Accept an invitation
Someone has invited you to connect on VERA. Here's what to expect when you click the link and accept the connection.
You've received an invitation email
When someone invites you to connect on VERA, you'll receive an email from VERA with the subject line containing their name and the invitation.
Open the invitation email
Find the email in your inbox. It will show the name of the person or business inviting you and a large Accept Invitation button.
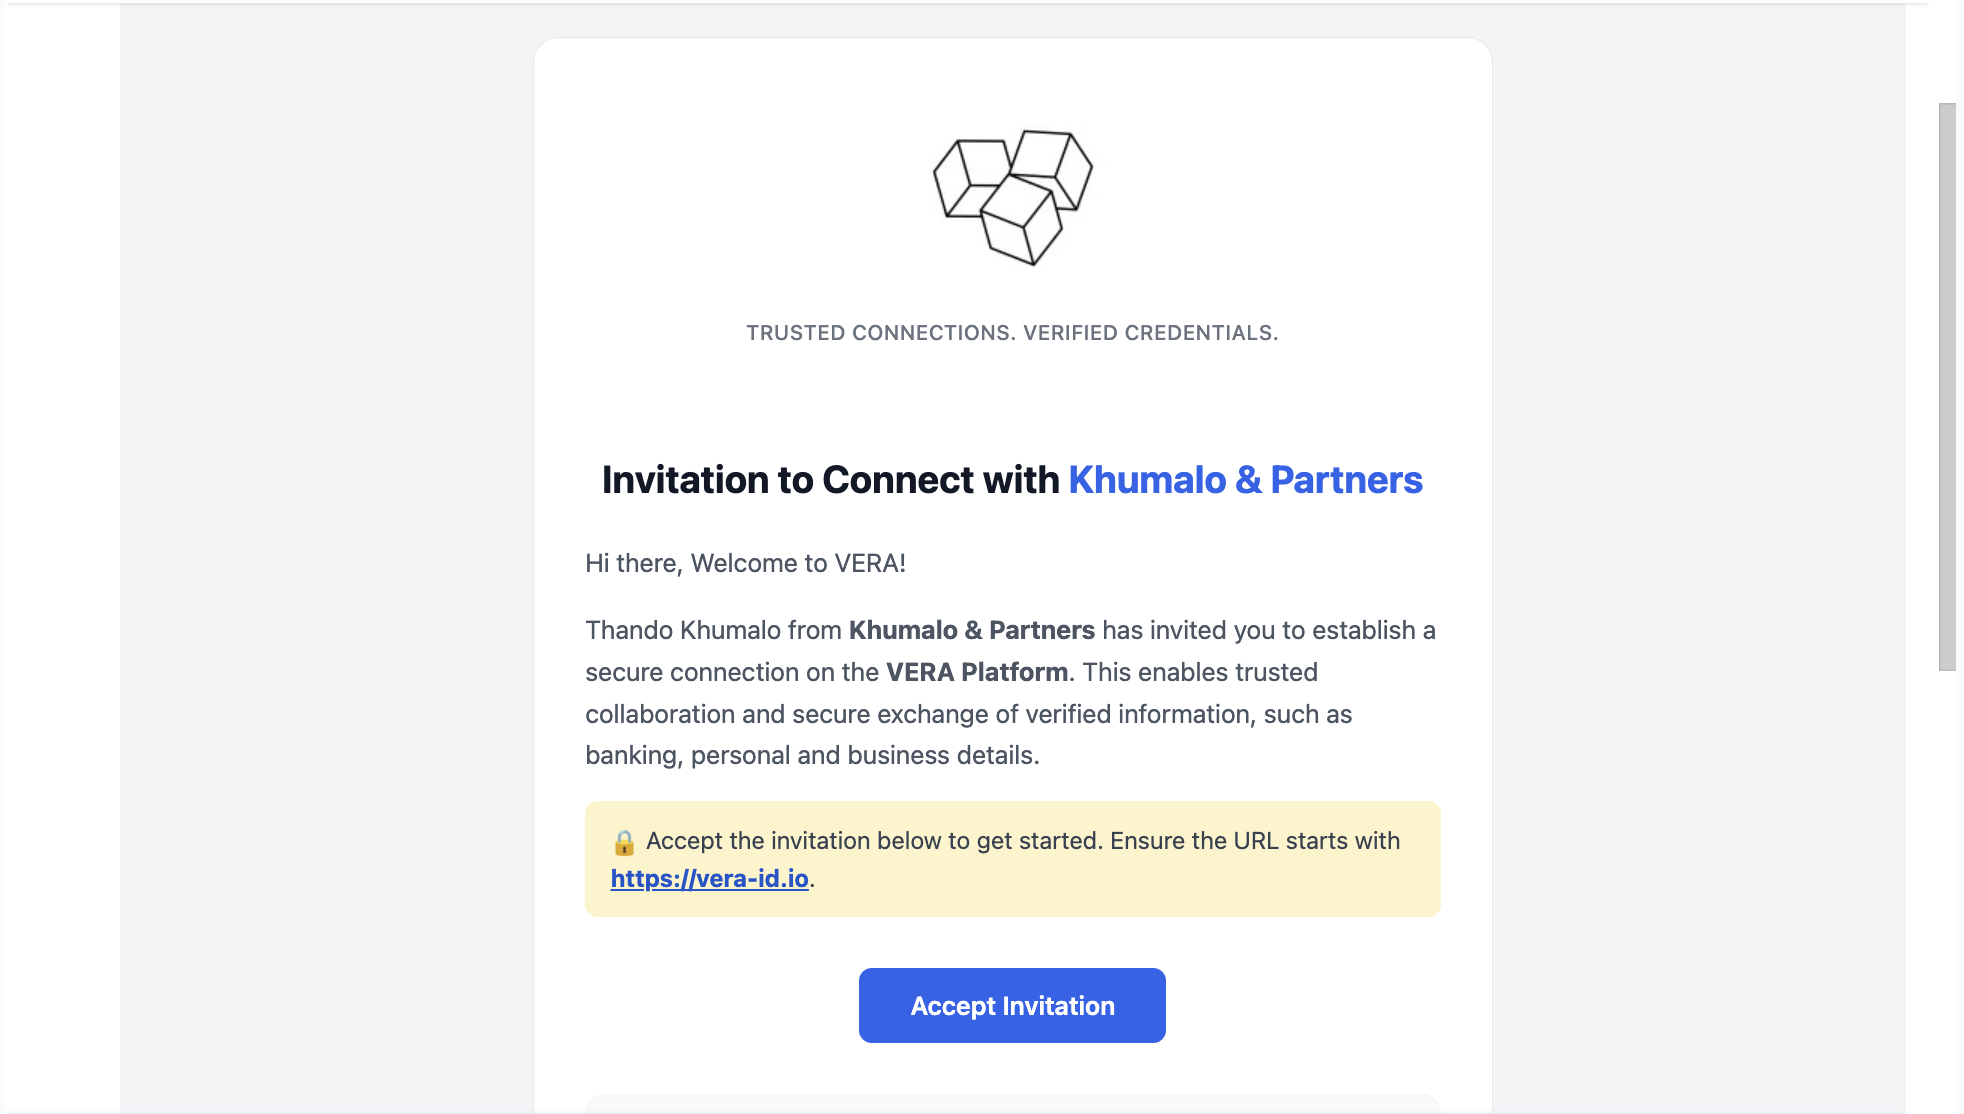
Always check that the invitation link starts with https://vera-id.io before clicking. VERA will never send invitations from any other domain.
Click through and sign in
Click Accept Invitation
Click the button in the email. You'll be taken to the VERA login page.
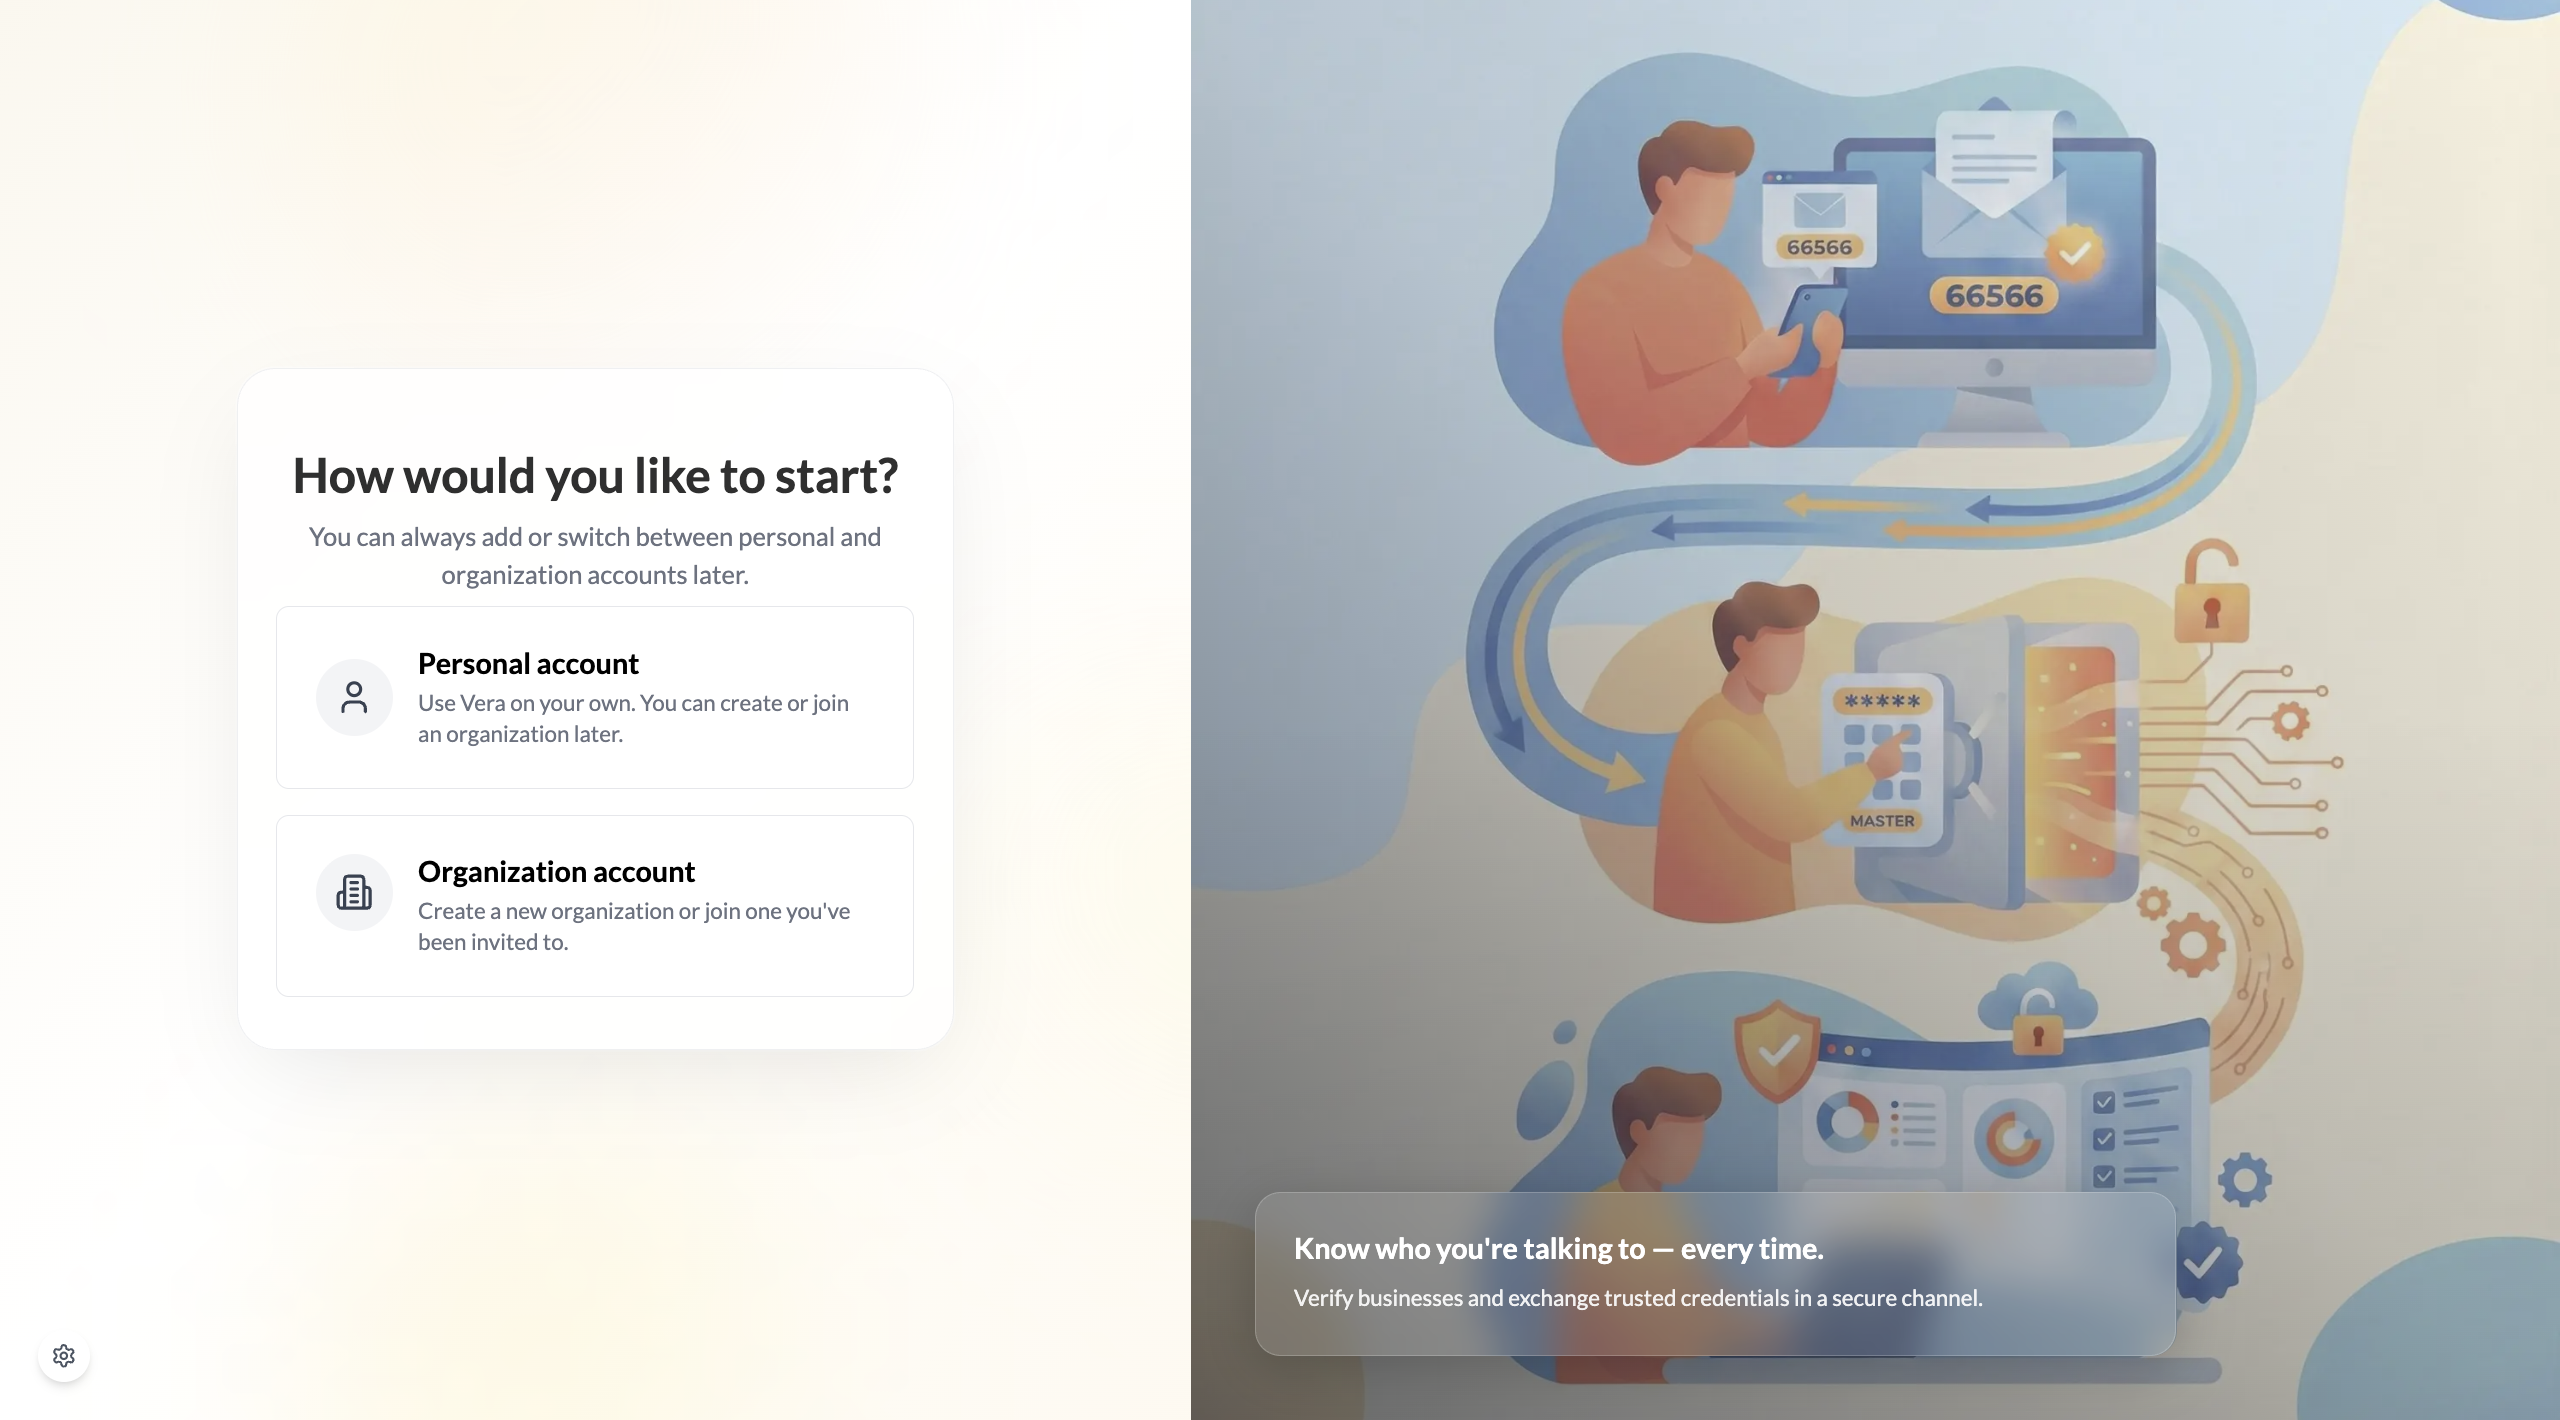
Sign in or create an account
If you already have a VERA account, sign in with your email and vault password. If you're new, you'll complete the signup flow first — see Create your account.
Choose which workspace to create (if you have both)
If you have both a personal account and an organisation, VERA asks which one you'd like to use to accept this connection. This determines whose identity the connection is under.
Review the connection invitation
You'll see a card showing who has invited you — their name, and their profile photo. VERA shows you who you're connecting with before you accept.
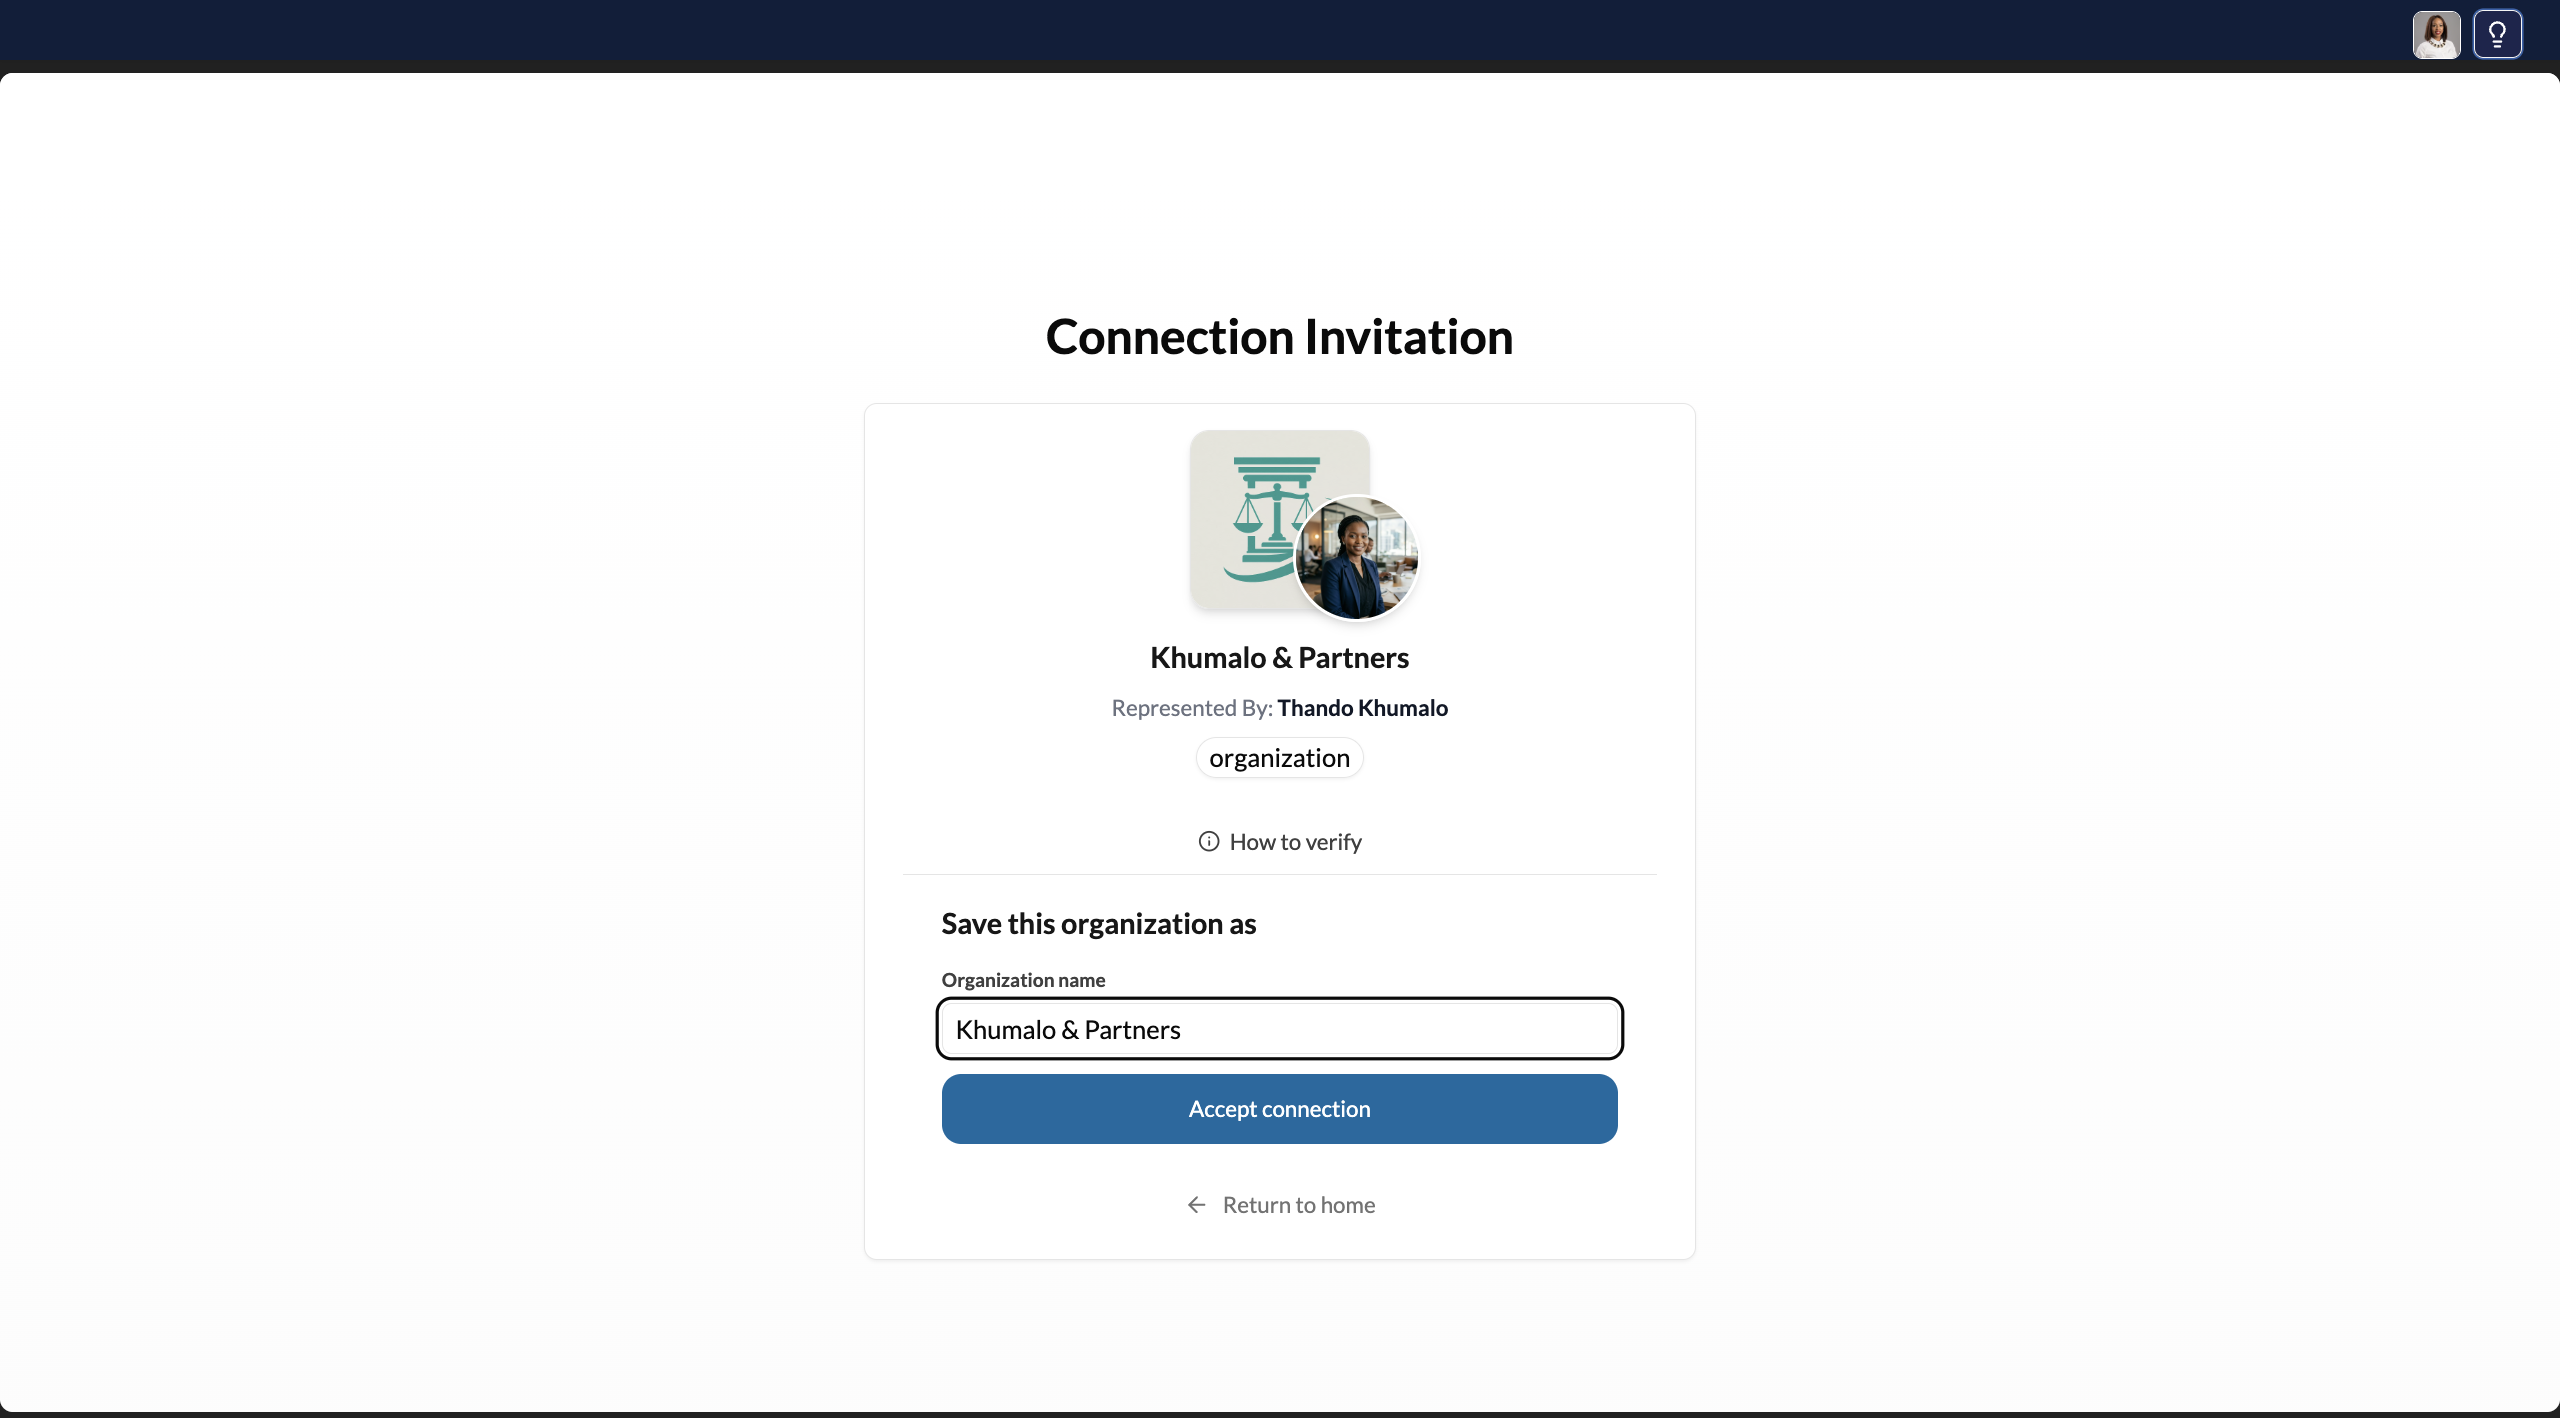
Name the contact and accept
Enter how you'd like this contact to appear in your directory — you can use their name as shown or customise it. Click Accept Connection.
After accepting
Once you accept:
- Both sides now appear in each other's contacts lists
- A secure, end-to-end encrypted channel is established between you
- You can send them a message, share a credential, or simply stay connected
Neither party can see the other's vault password or private keys. The connection is based on public key cryptography — your encrypted channel is established using keys that never leave your devices.