Completing an onboarding checklist
A contact can send you an onboarding workflow — a structured checklist of documents and information they need from you. Here's how to complete one.
What is an onboarding checklist?
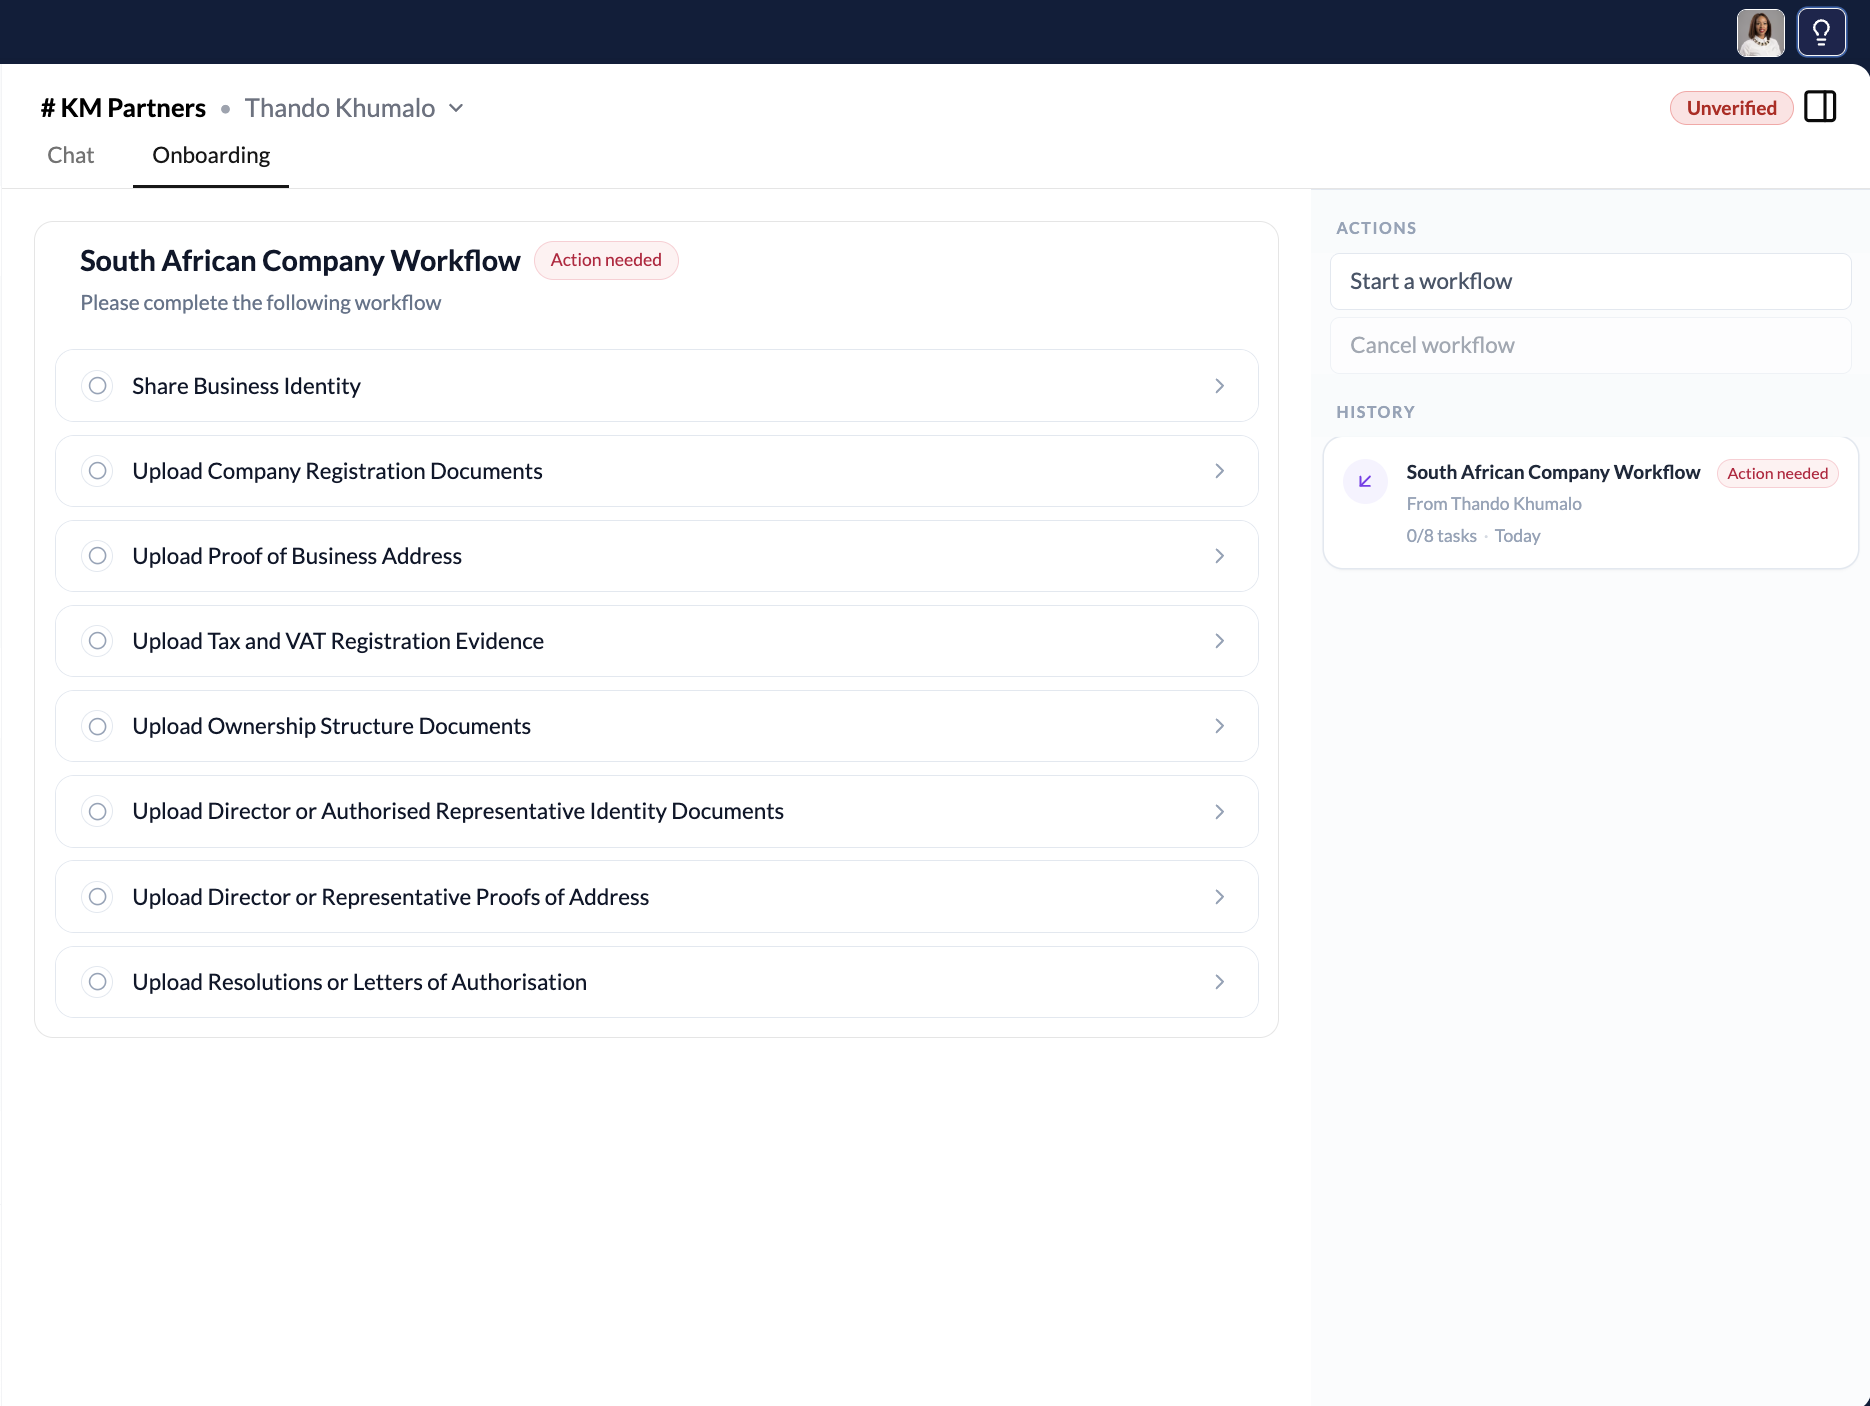
When a business on VERA wants to onboard you as a client, supplier, or partner, they can send you a structured onboarding workflow — a checklist of items they need from you before they can proceed.
Items in a checklist can include:
- Document uploads (e.g. signed agreements, proof of address, company registration documents)
- Credential sharing (e.g. share your Person ID or Business ID credential)
- Information fields (e.g. contact details, company information)
You receive the checklist inside your VERA account, complete it there, and submit — everything stays encrypted end-to-end.
Receiving a checklist
When a contact sends you an onboarding checklist, you'll receive a notification. You can also find it in the conversation with that contact, or via the Workflows section in the sidebar.
Complete the checklist
Open the checklist
Click the checklist notification or navigate to the contact's conversation and click the workflow card. You'll see all required items listed with their current status.
Upload documents and fill in information
Work through each item in the checklist. For document uploads, click the upload area for that item and select your file. Supported formats are shown per item (PDF, JPG, PNG).
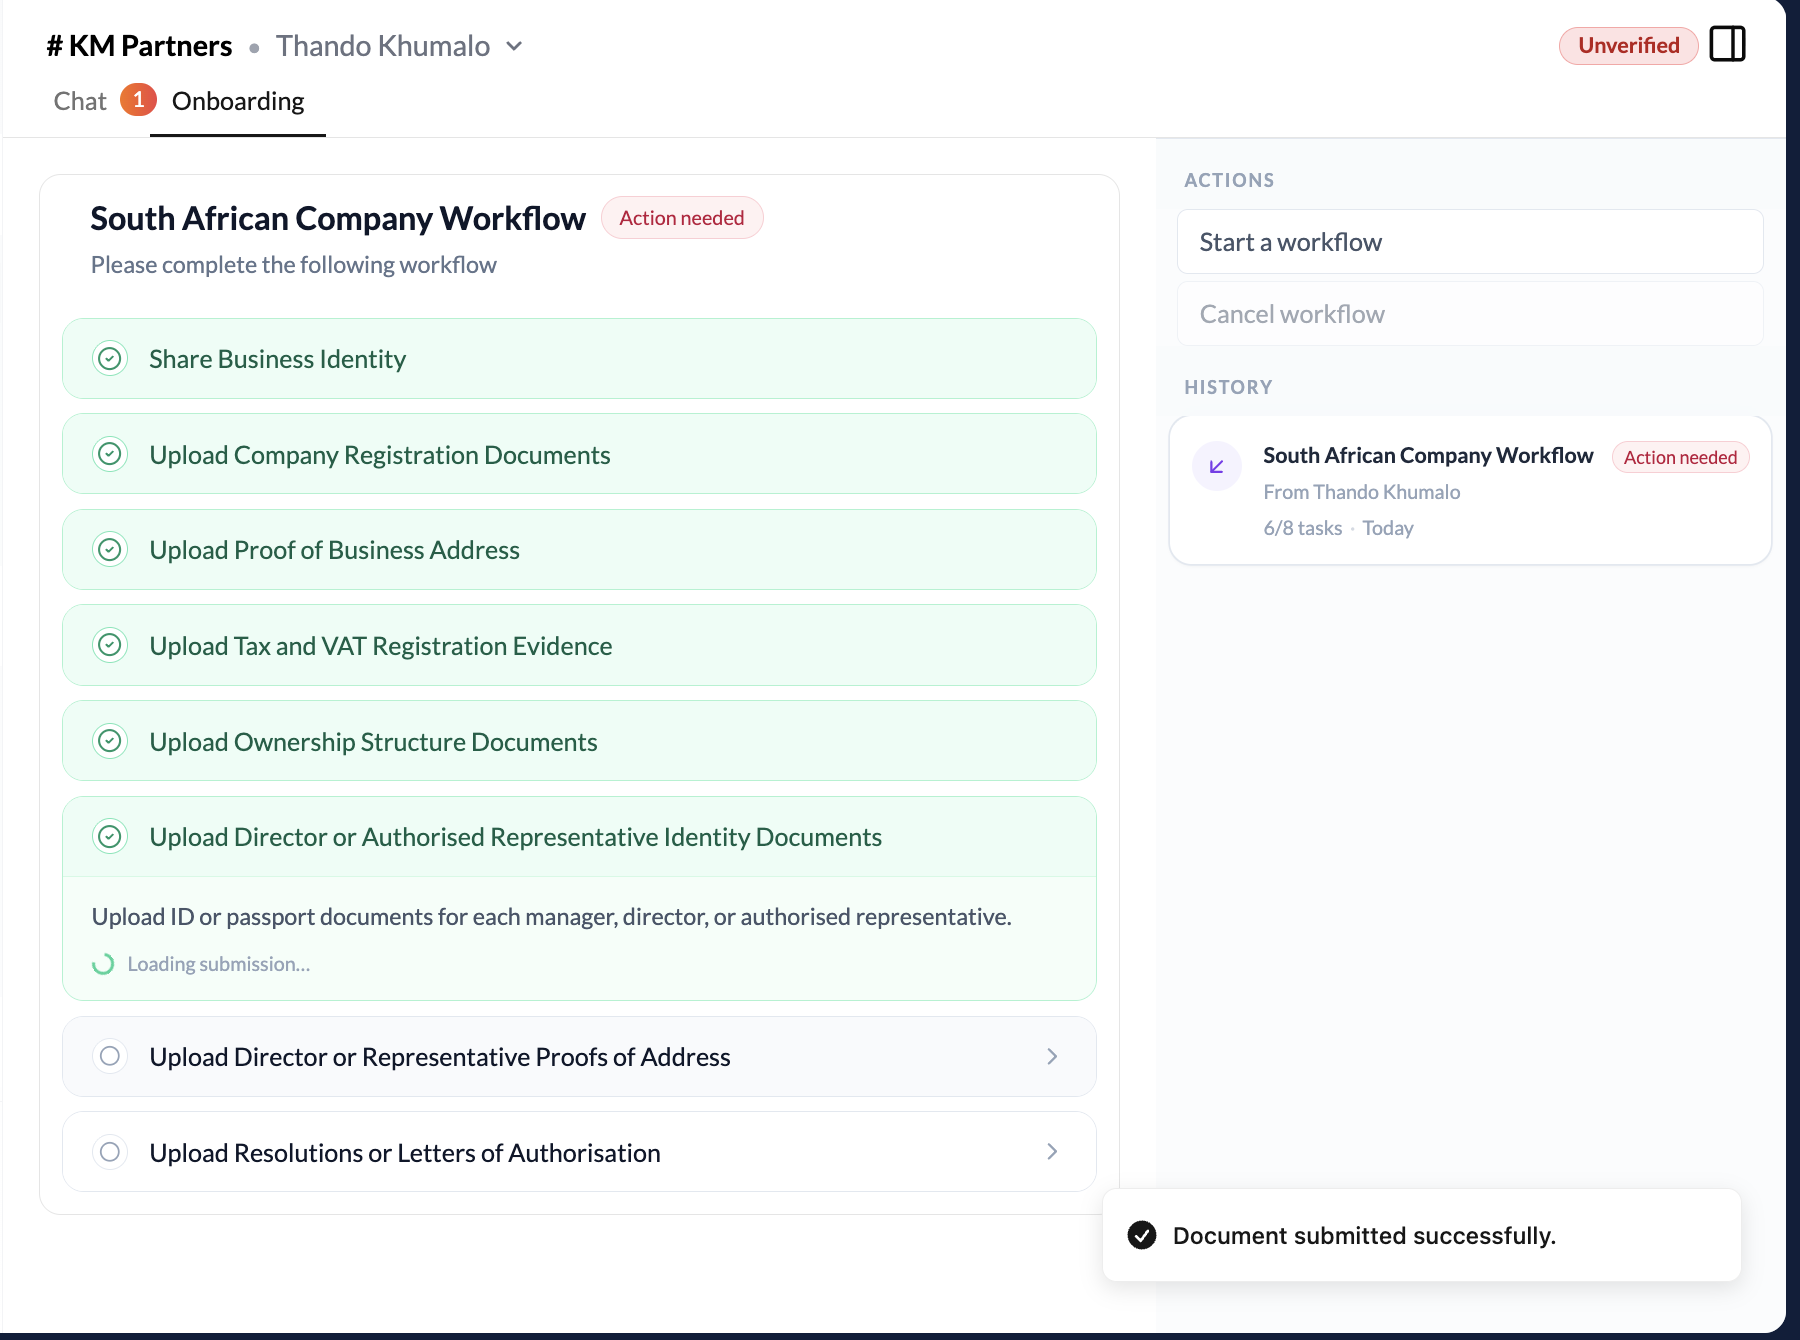
Files you upload are encrypted and transmitted securely — only the requesting contact can access them.
Share credentials where required
Some items may ask you to share a specific credential (e.g. your Person ID Credential or Bank Account Credential). Click Share credential on those items and select the credential from your wallet.
Review and submit
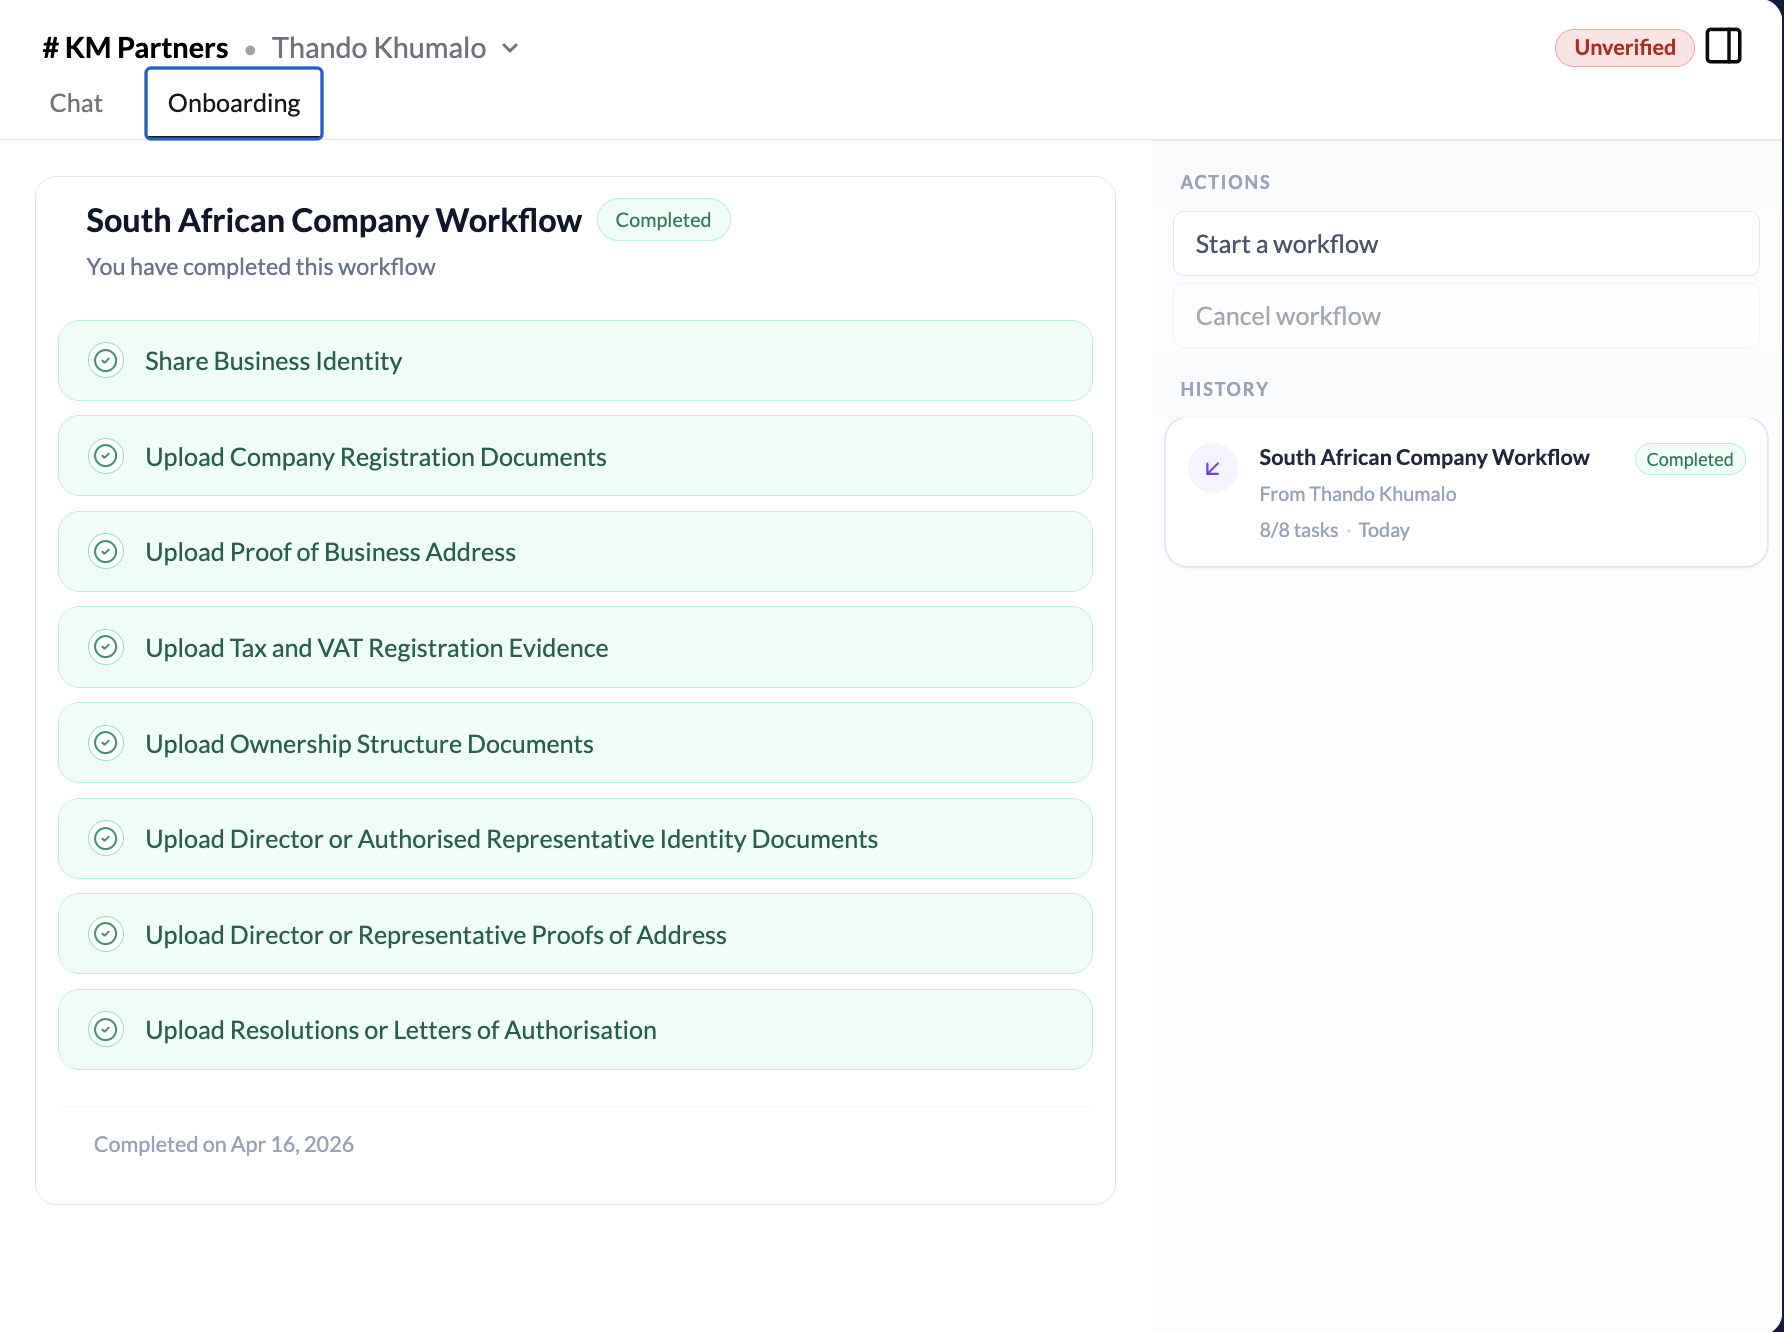
Once all items are marked complete, the Submit button becomes active. Review everything, then click Submit to send the completed checklist back to the contact.
You can save your progress at any point and return to a checklist later. The contact is only notified when you click Submit — partial completions are not visible to them.
After submitting
Once submitted:
- The contact receives a notification that your onboarding checklist is complete
- They can review your documents and credentials in their secure inbox
- The checklist shows as Submitted in your Workflows list
If the contact needs changes or has questions, they can message you directly through the conversation.