Invite a contact
Connecting with someone on VERA starts with an invitation. Here's how to send one — whether you're connecting with a business or an individual.
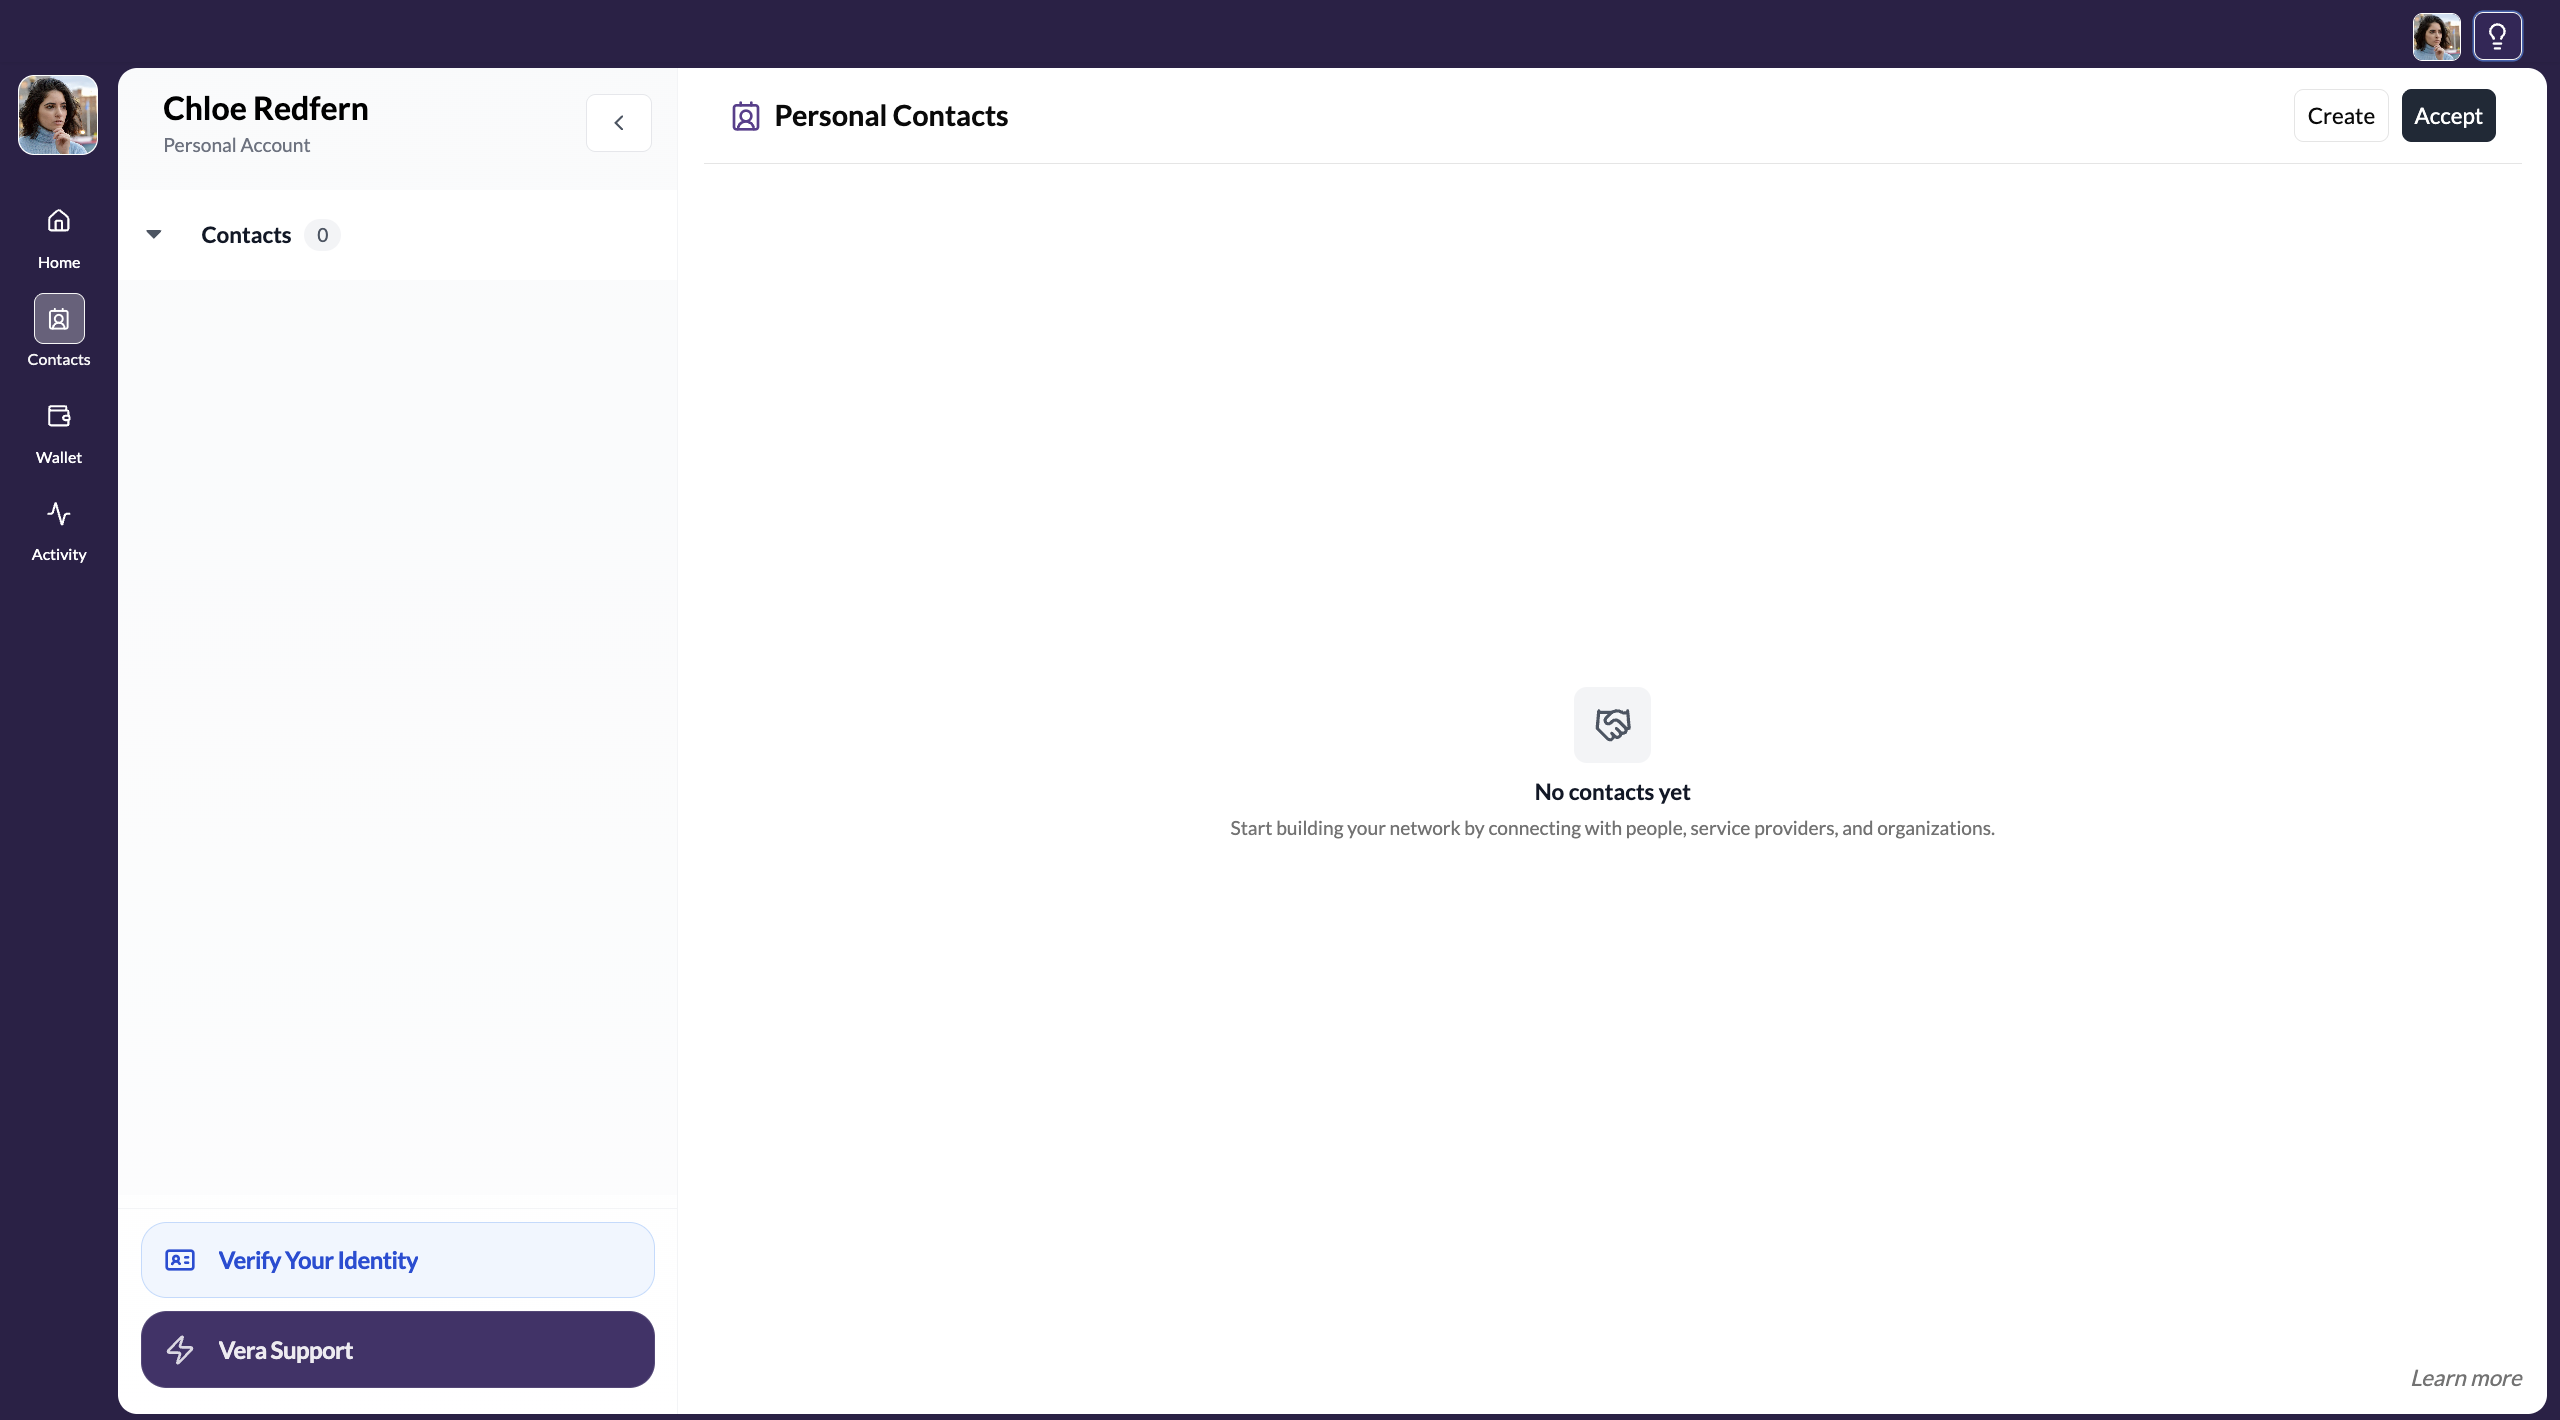
Go to Contacts
Open Contacts from the sidebar
Click Contacts in the left sidebar. If you haven't added anyone yet, you'll see an empty state with a prompt to create your first connection.
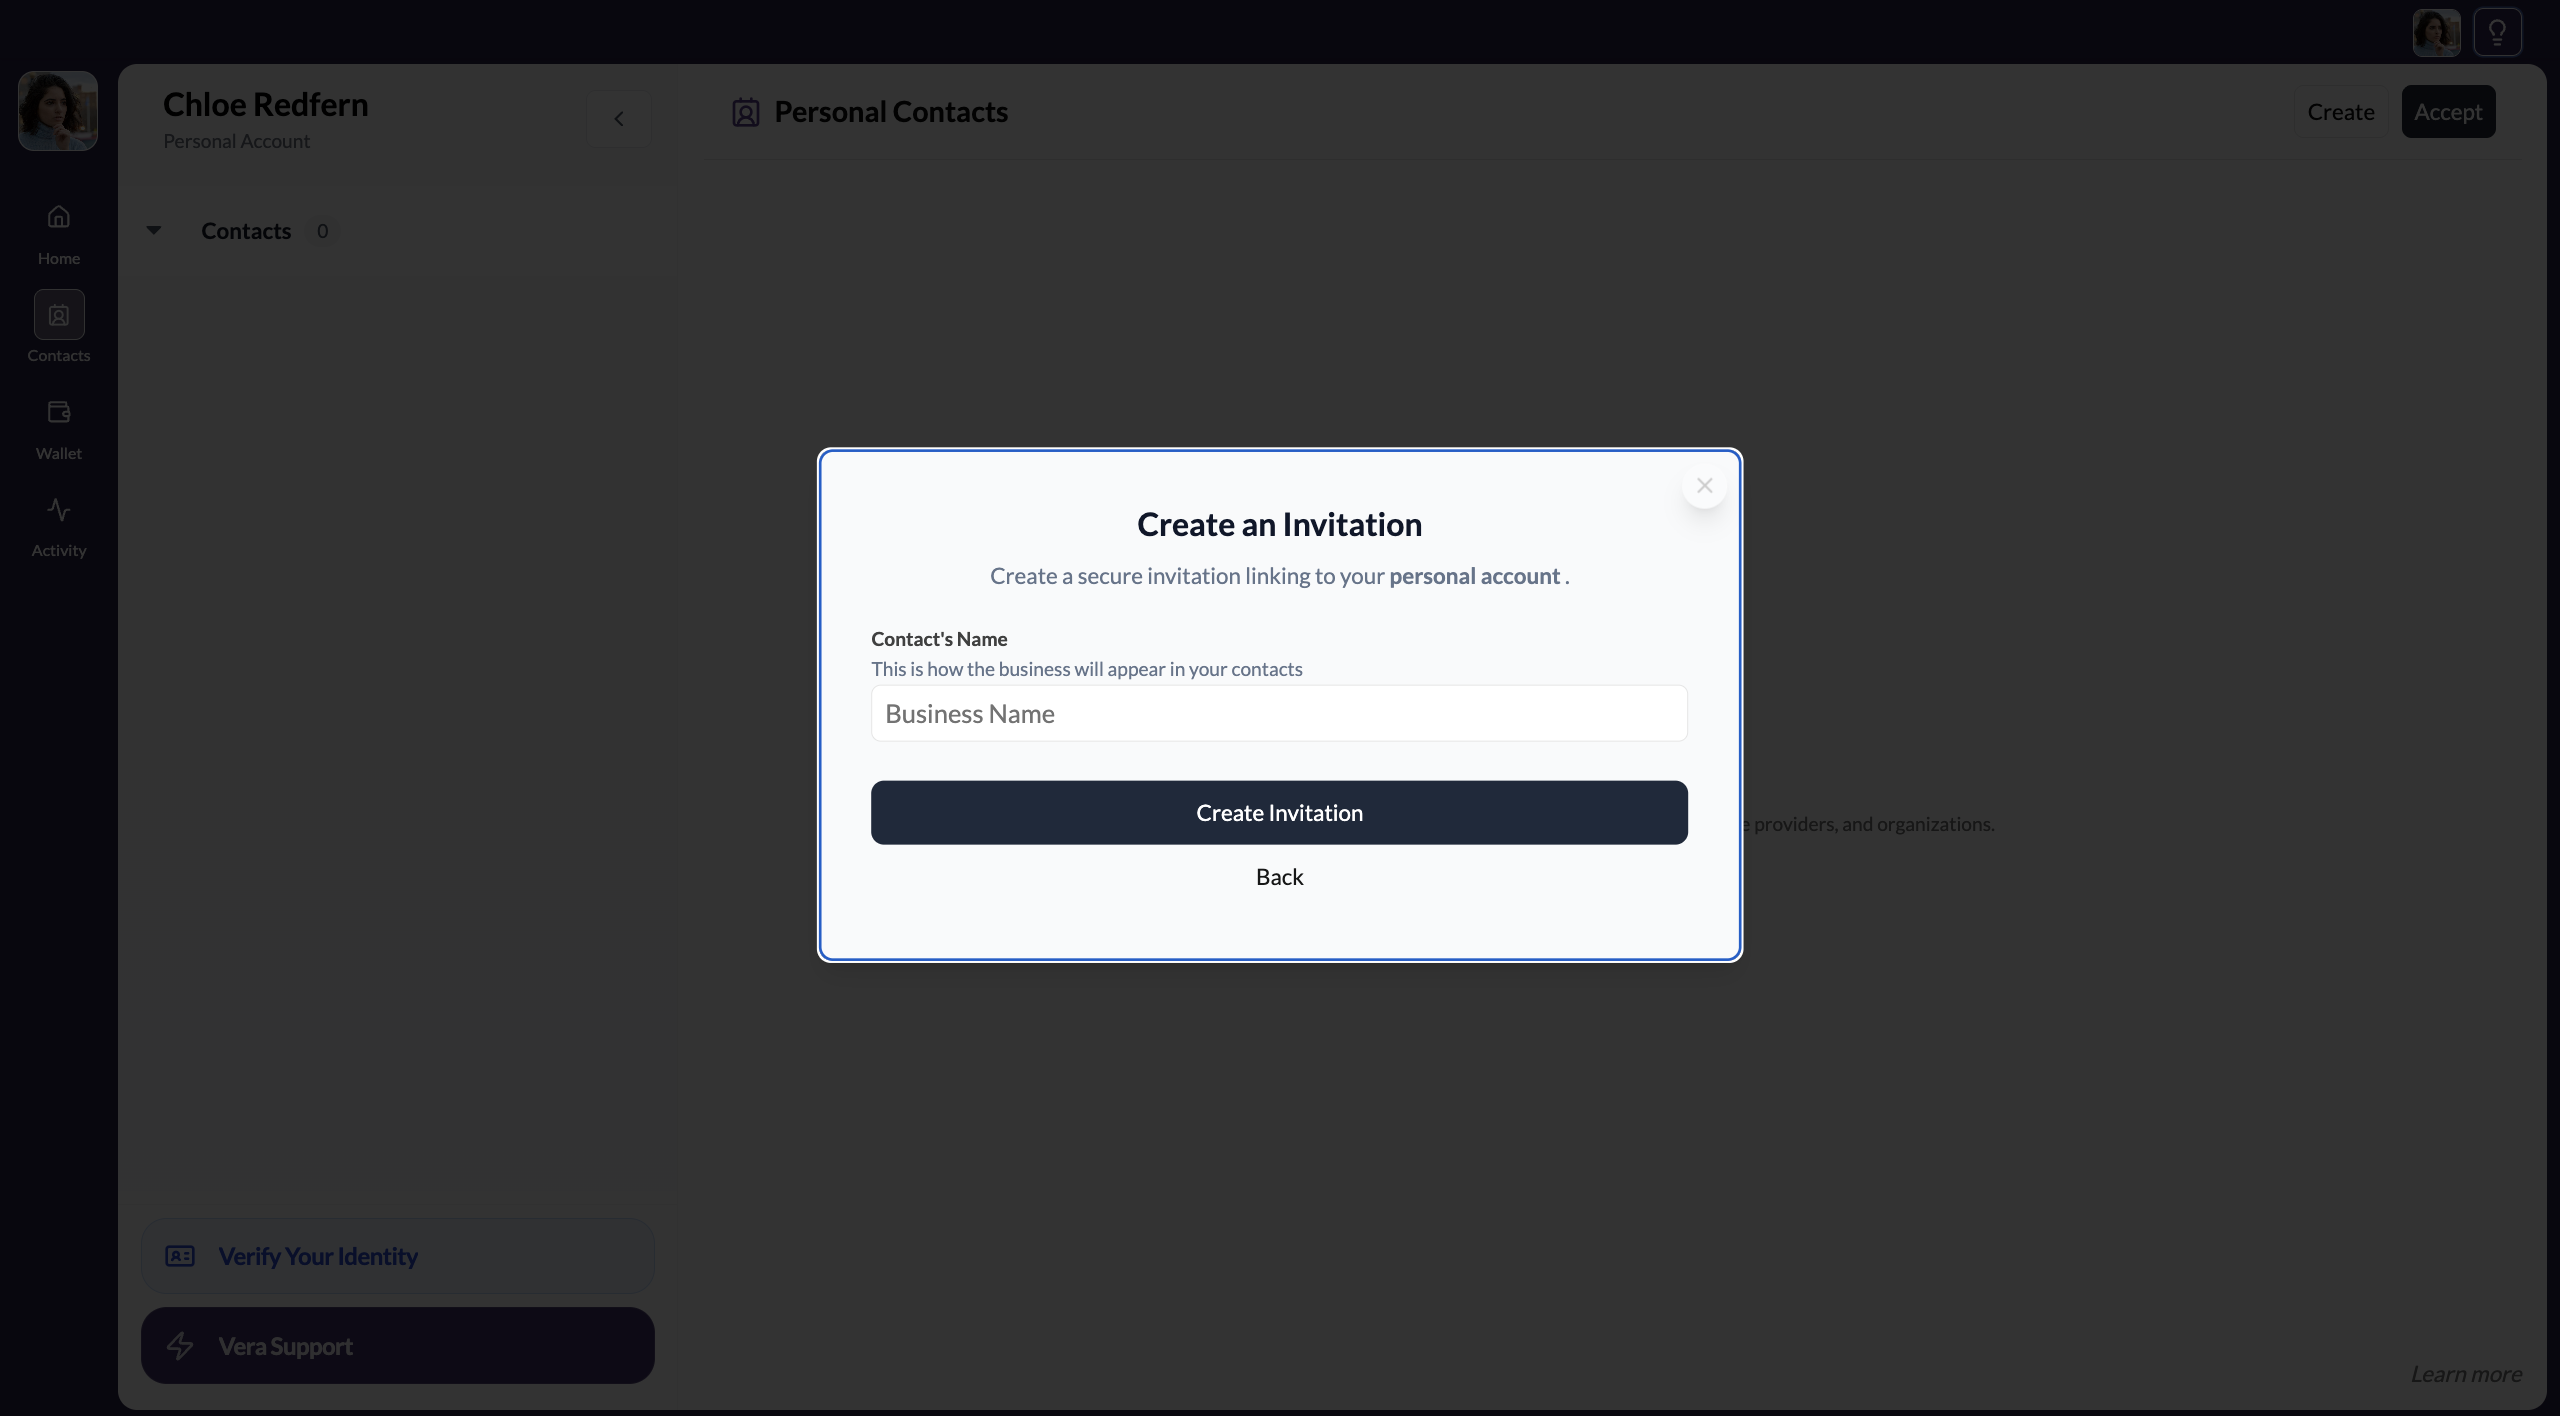
Click Create to start an invitation
Click the Create button in the top-right of the Contacts page.

Choose Business or Individual
Select whether you're inviting a Business or an Individual.

Business — use this when you're connecting with a company. The invitation links to their organisation account on VERA, and their business credentials will be visible in the Trust Vault.
Individual — use this when you're connecting with a person directly. The invitation links to their personal account.
Send the invitation
Enter the contact's name
Type the name of the business or individual you're inviting. This is just for your own records — it's how they'll appear in your contacts list.
You can also attach an onboarding checklist to the invitation — toggle it on before clicking Create Invitation and select the template you need. The checklist is sent automatically when your contact accepts. See Send an onboarding checklist for details.
Choose how to share the invitation link
VERA generates a unique invitation link. You can share it in two ways:
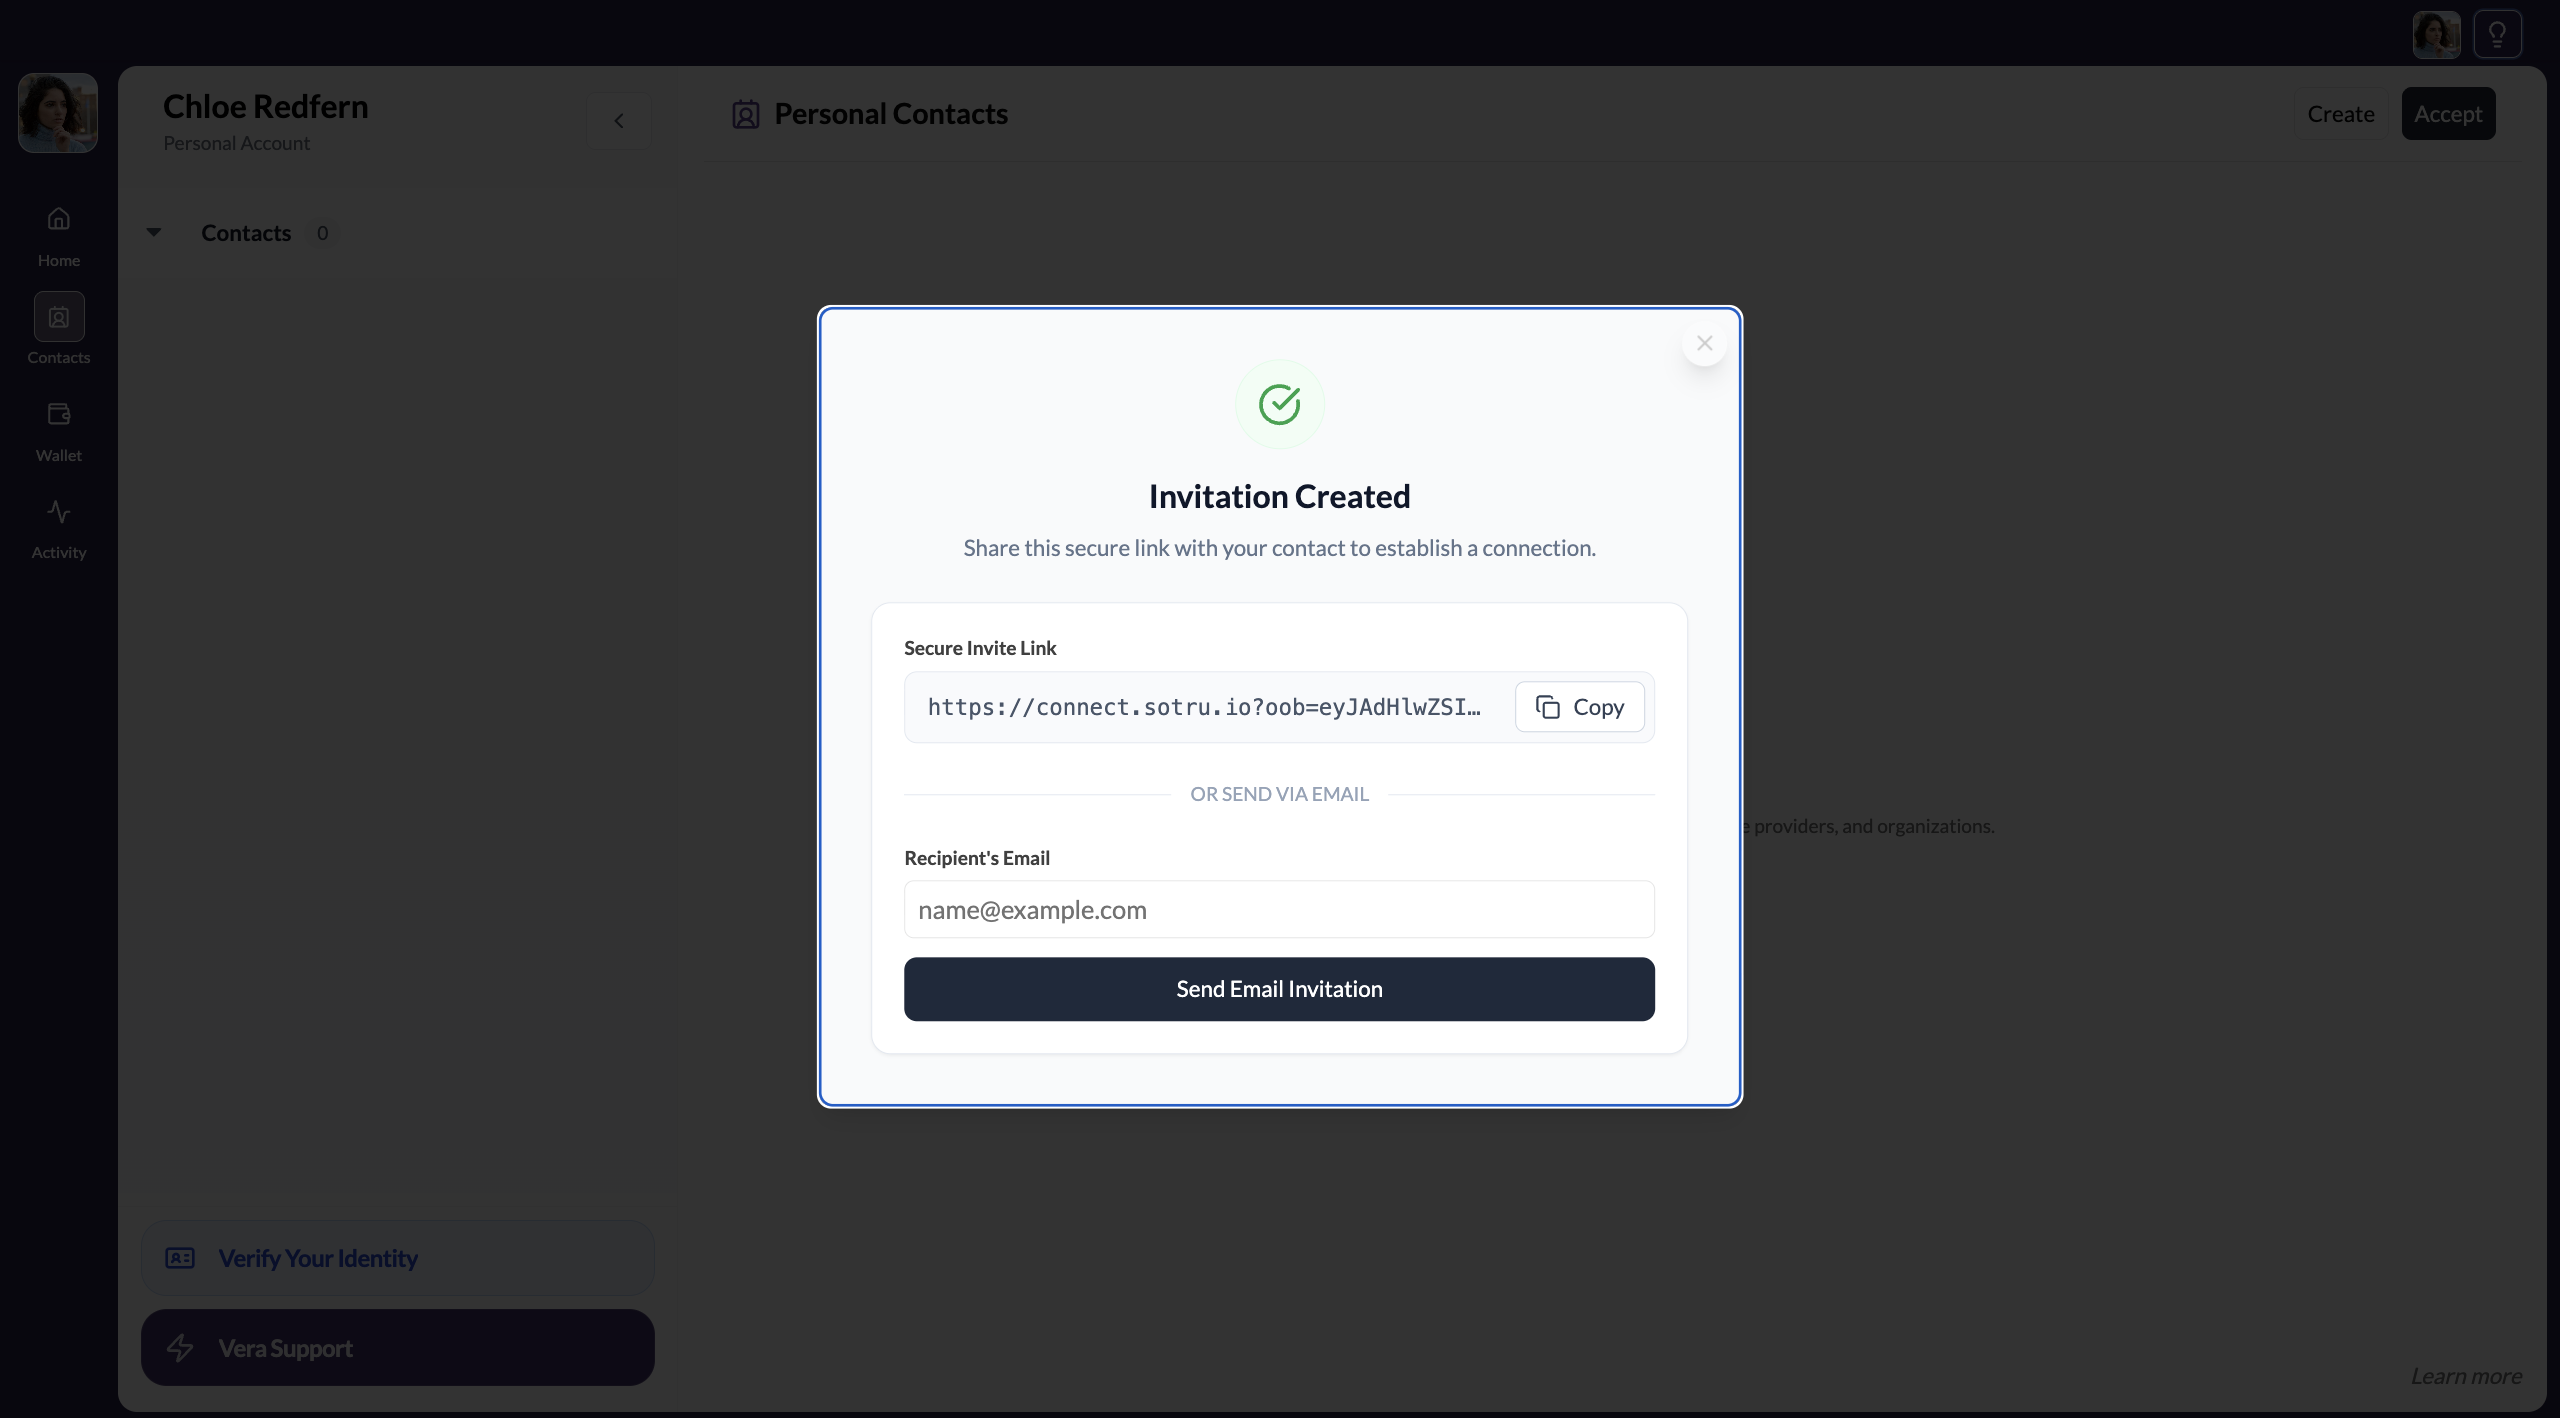
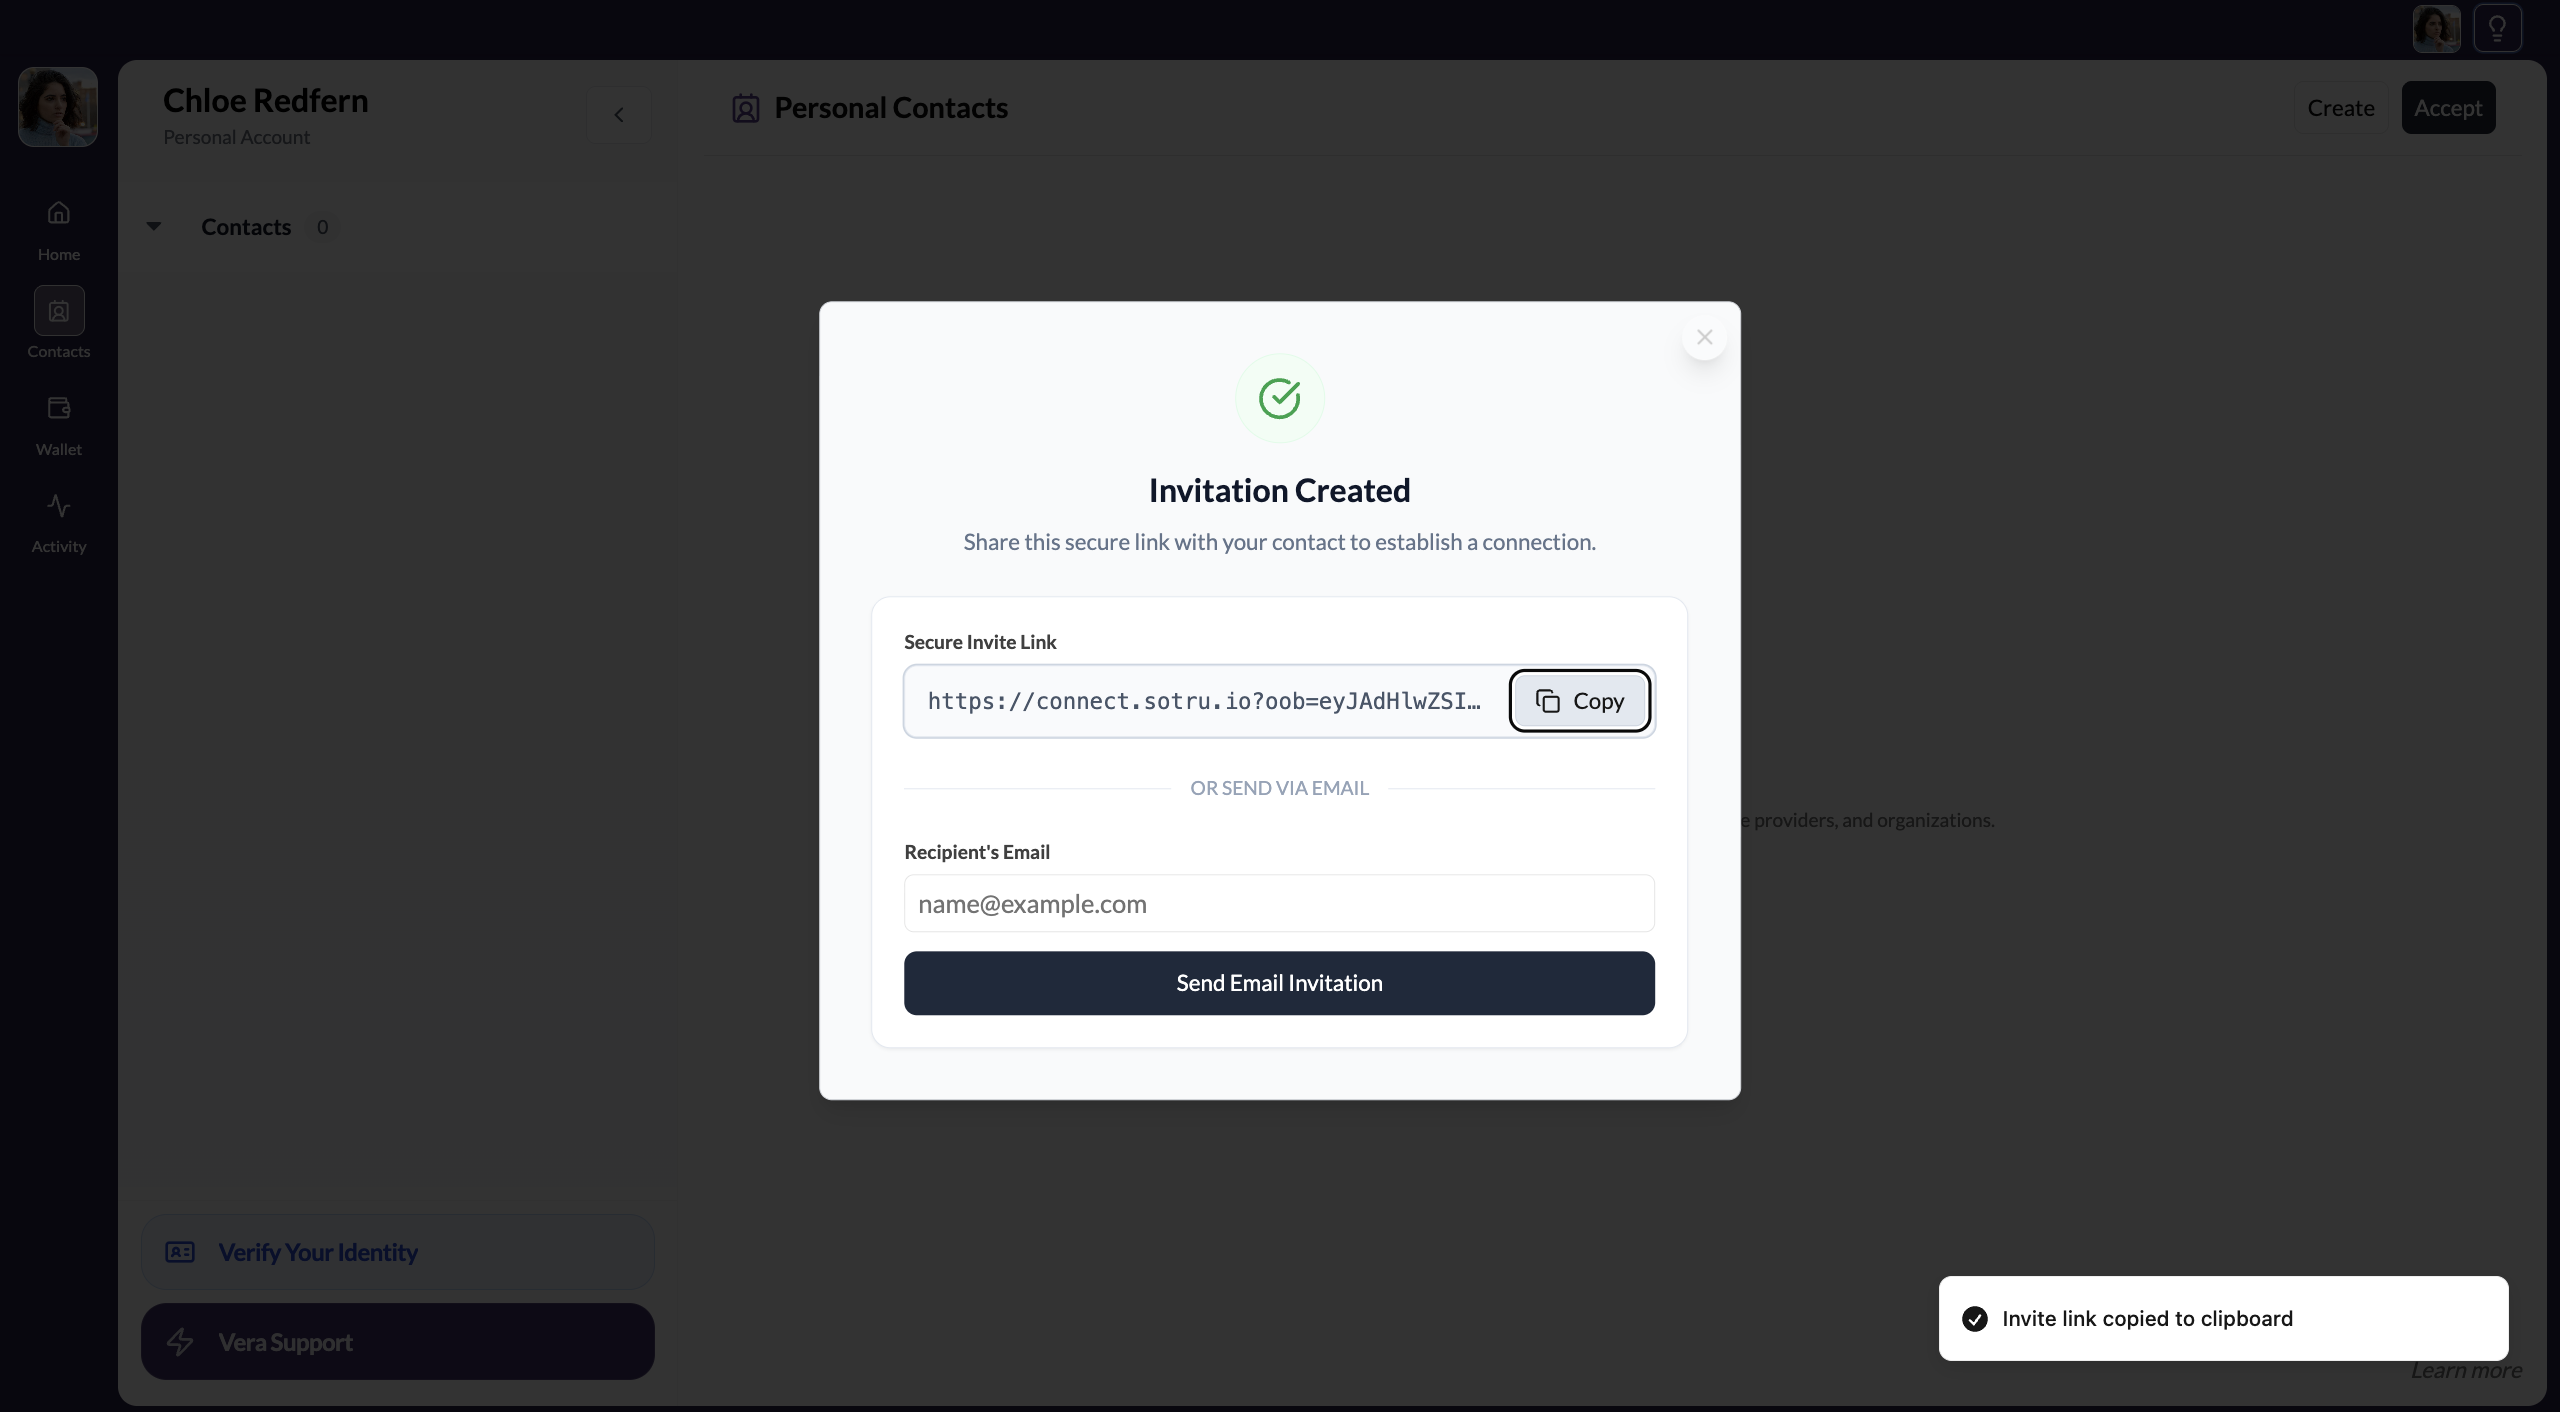
Option A: Copy the link
Copy the invitation link
Click Copy link. Paste it into an email, WhatsApp, Slack — wherever you communicate with your contact. The link is unique to this invitation and does not expire.
Option B: Send via email
Enter the email address and send
Type your contact's email address in the field and click Send Email Invitation. VERA will send them an email with the invitation link.
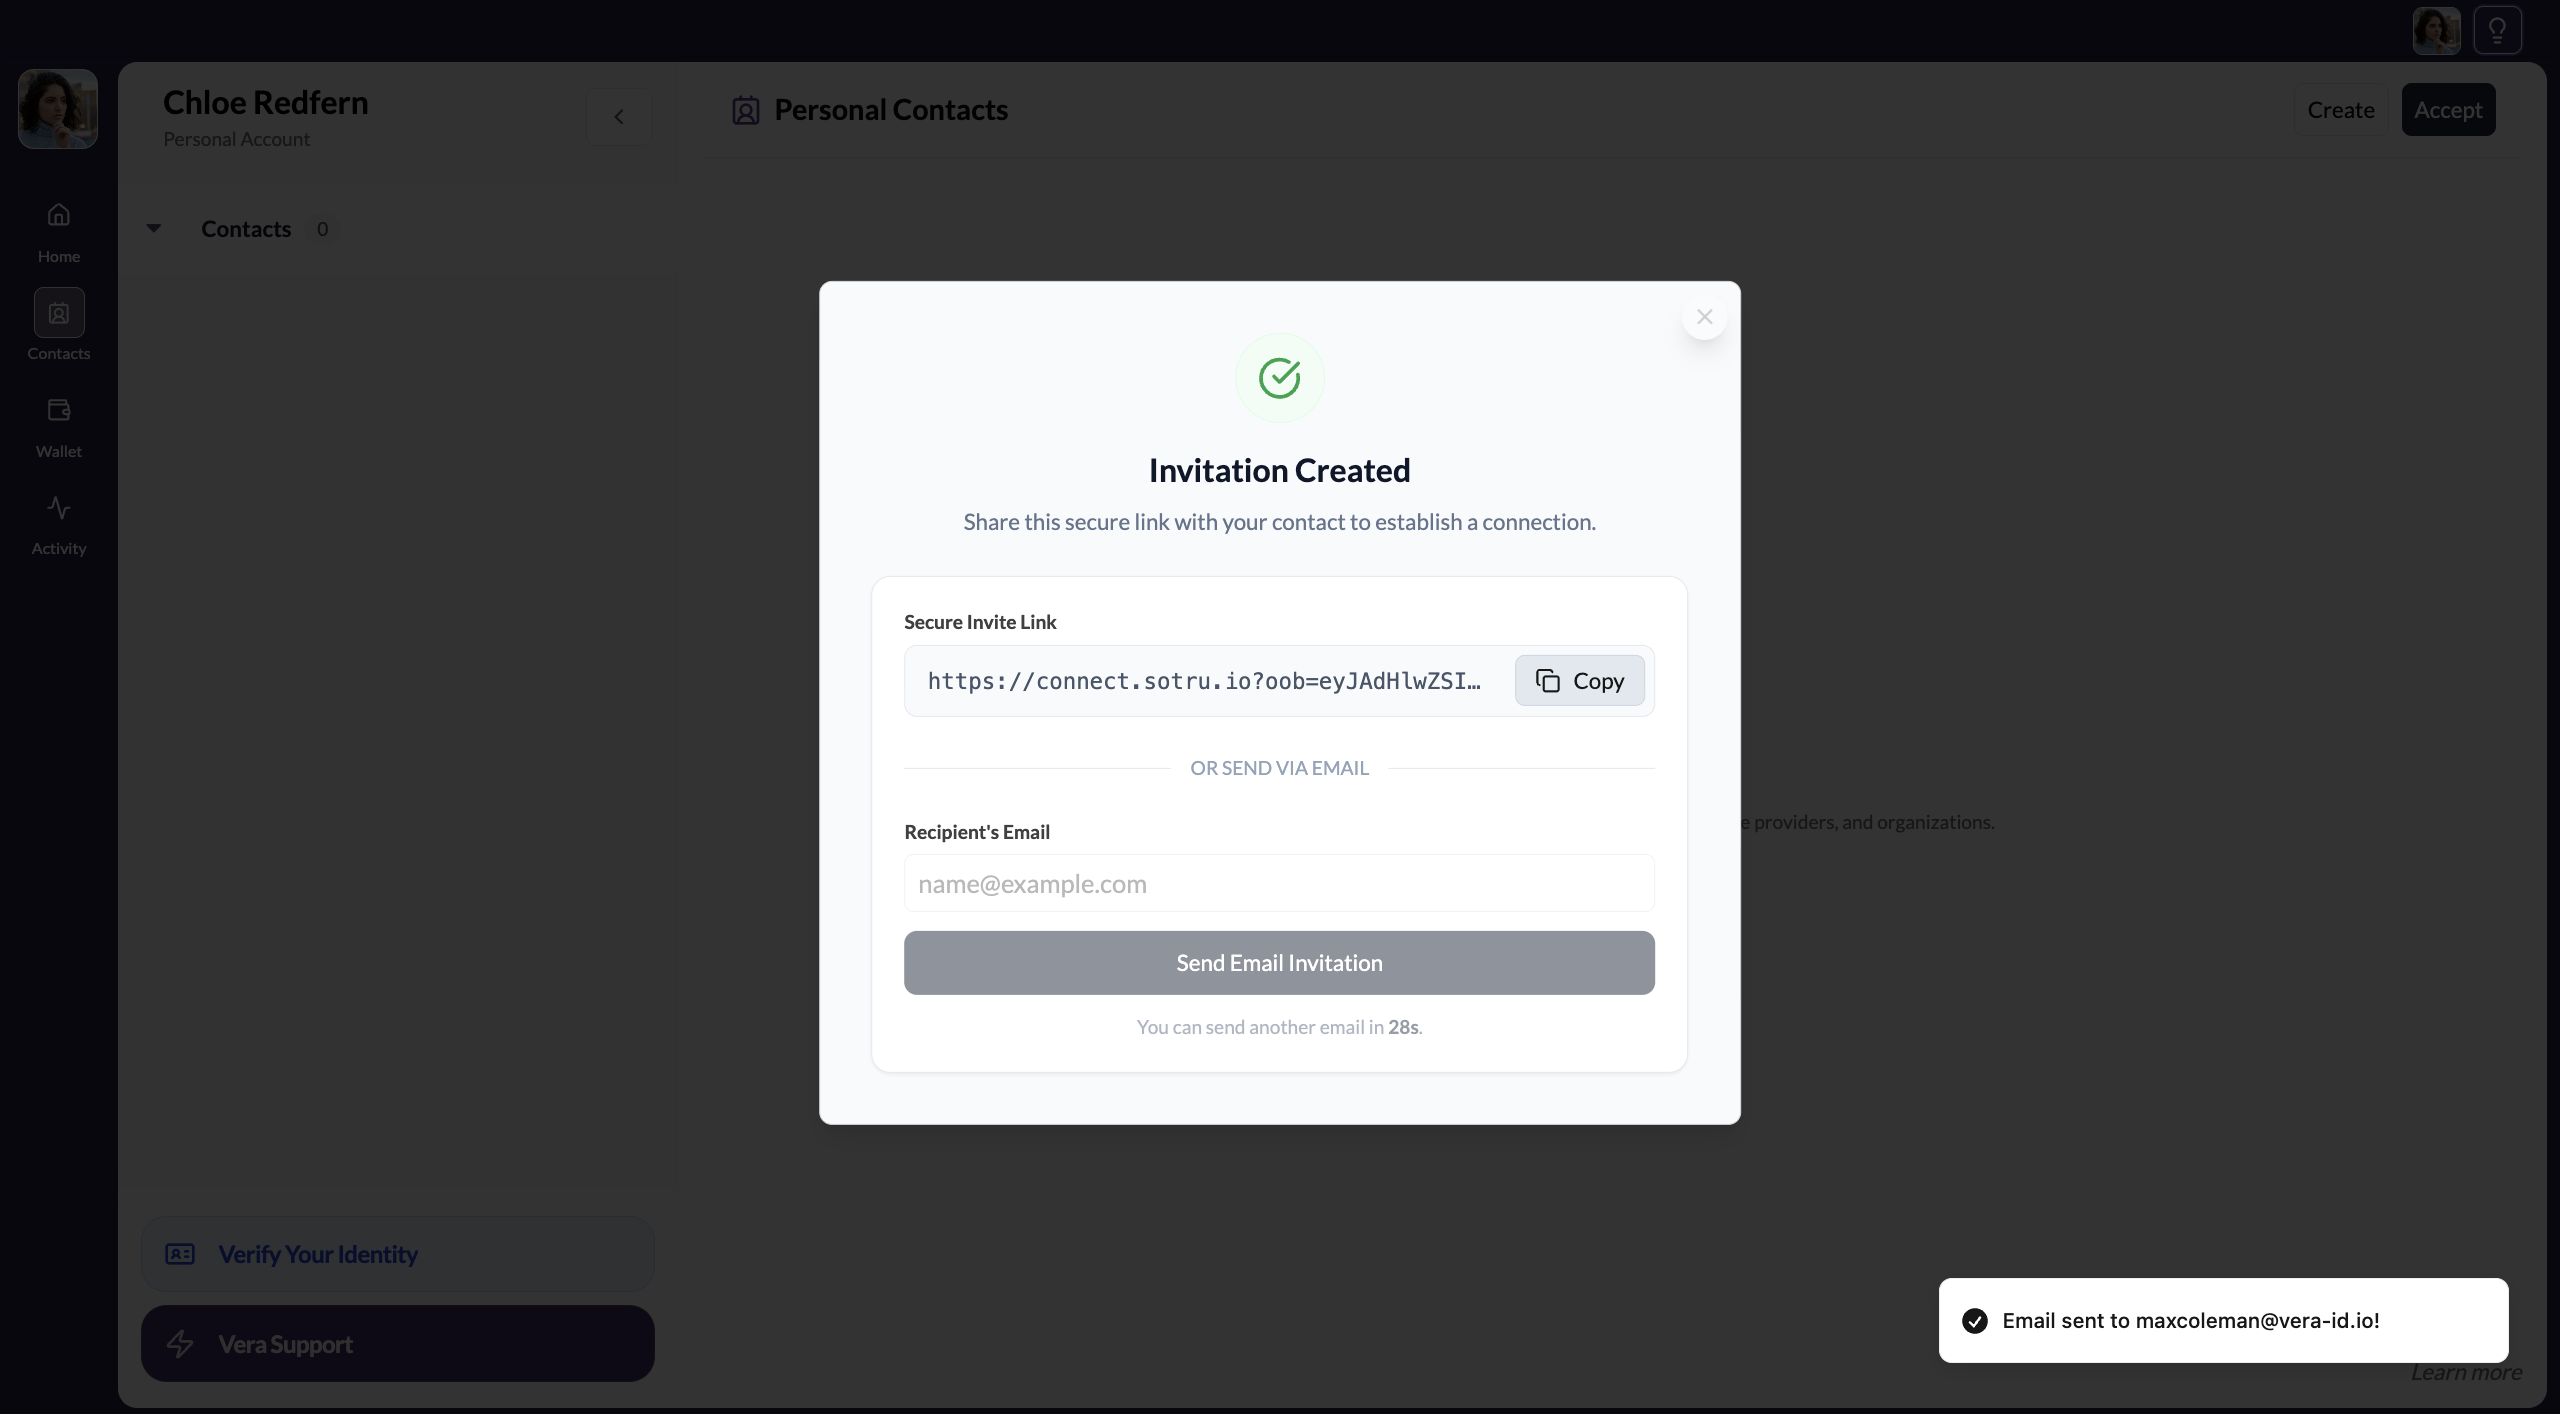
If your contact doesn't receive the email within a few minutes, check their spam folder before resending.
What happens next
Once your contact clicks the invitation link, they'll:
- Sign in to VERA (or create an account if they're new)
- See the connection invitation from you
- Accept and name you in their contacts
You'll receive a notification when they've accepted. The contact will then appear in your Contacts list.