Verify your connections
Every new connection on VERA starts as unverified. Here's how to request and share verified credentials so both sides know exactly who they're dealing with.
Why connections start unverified
When you first connect with someone on VERA, the connection establishes a secure encrypted channel — but neither side has proven their identity to the other yet. The connection is marked "Unverified" with a red badge in the top-right corner of the chat.
This is by design. VERA separates connecting (establishing a secure channel) from verifying (proving who you are). You can message, share files, and communicate freely — but you haven't yet exchanged verified credentials.
Think of it like meeting someone at a conference. You can talk, exchange cards, and have a productive conversation. But until you've independently confirmed they are who their card says they are, there's a degree of trust you haven't yet established. VERA makes that confirmation step simple and cryptographically verifiable.
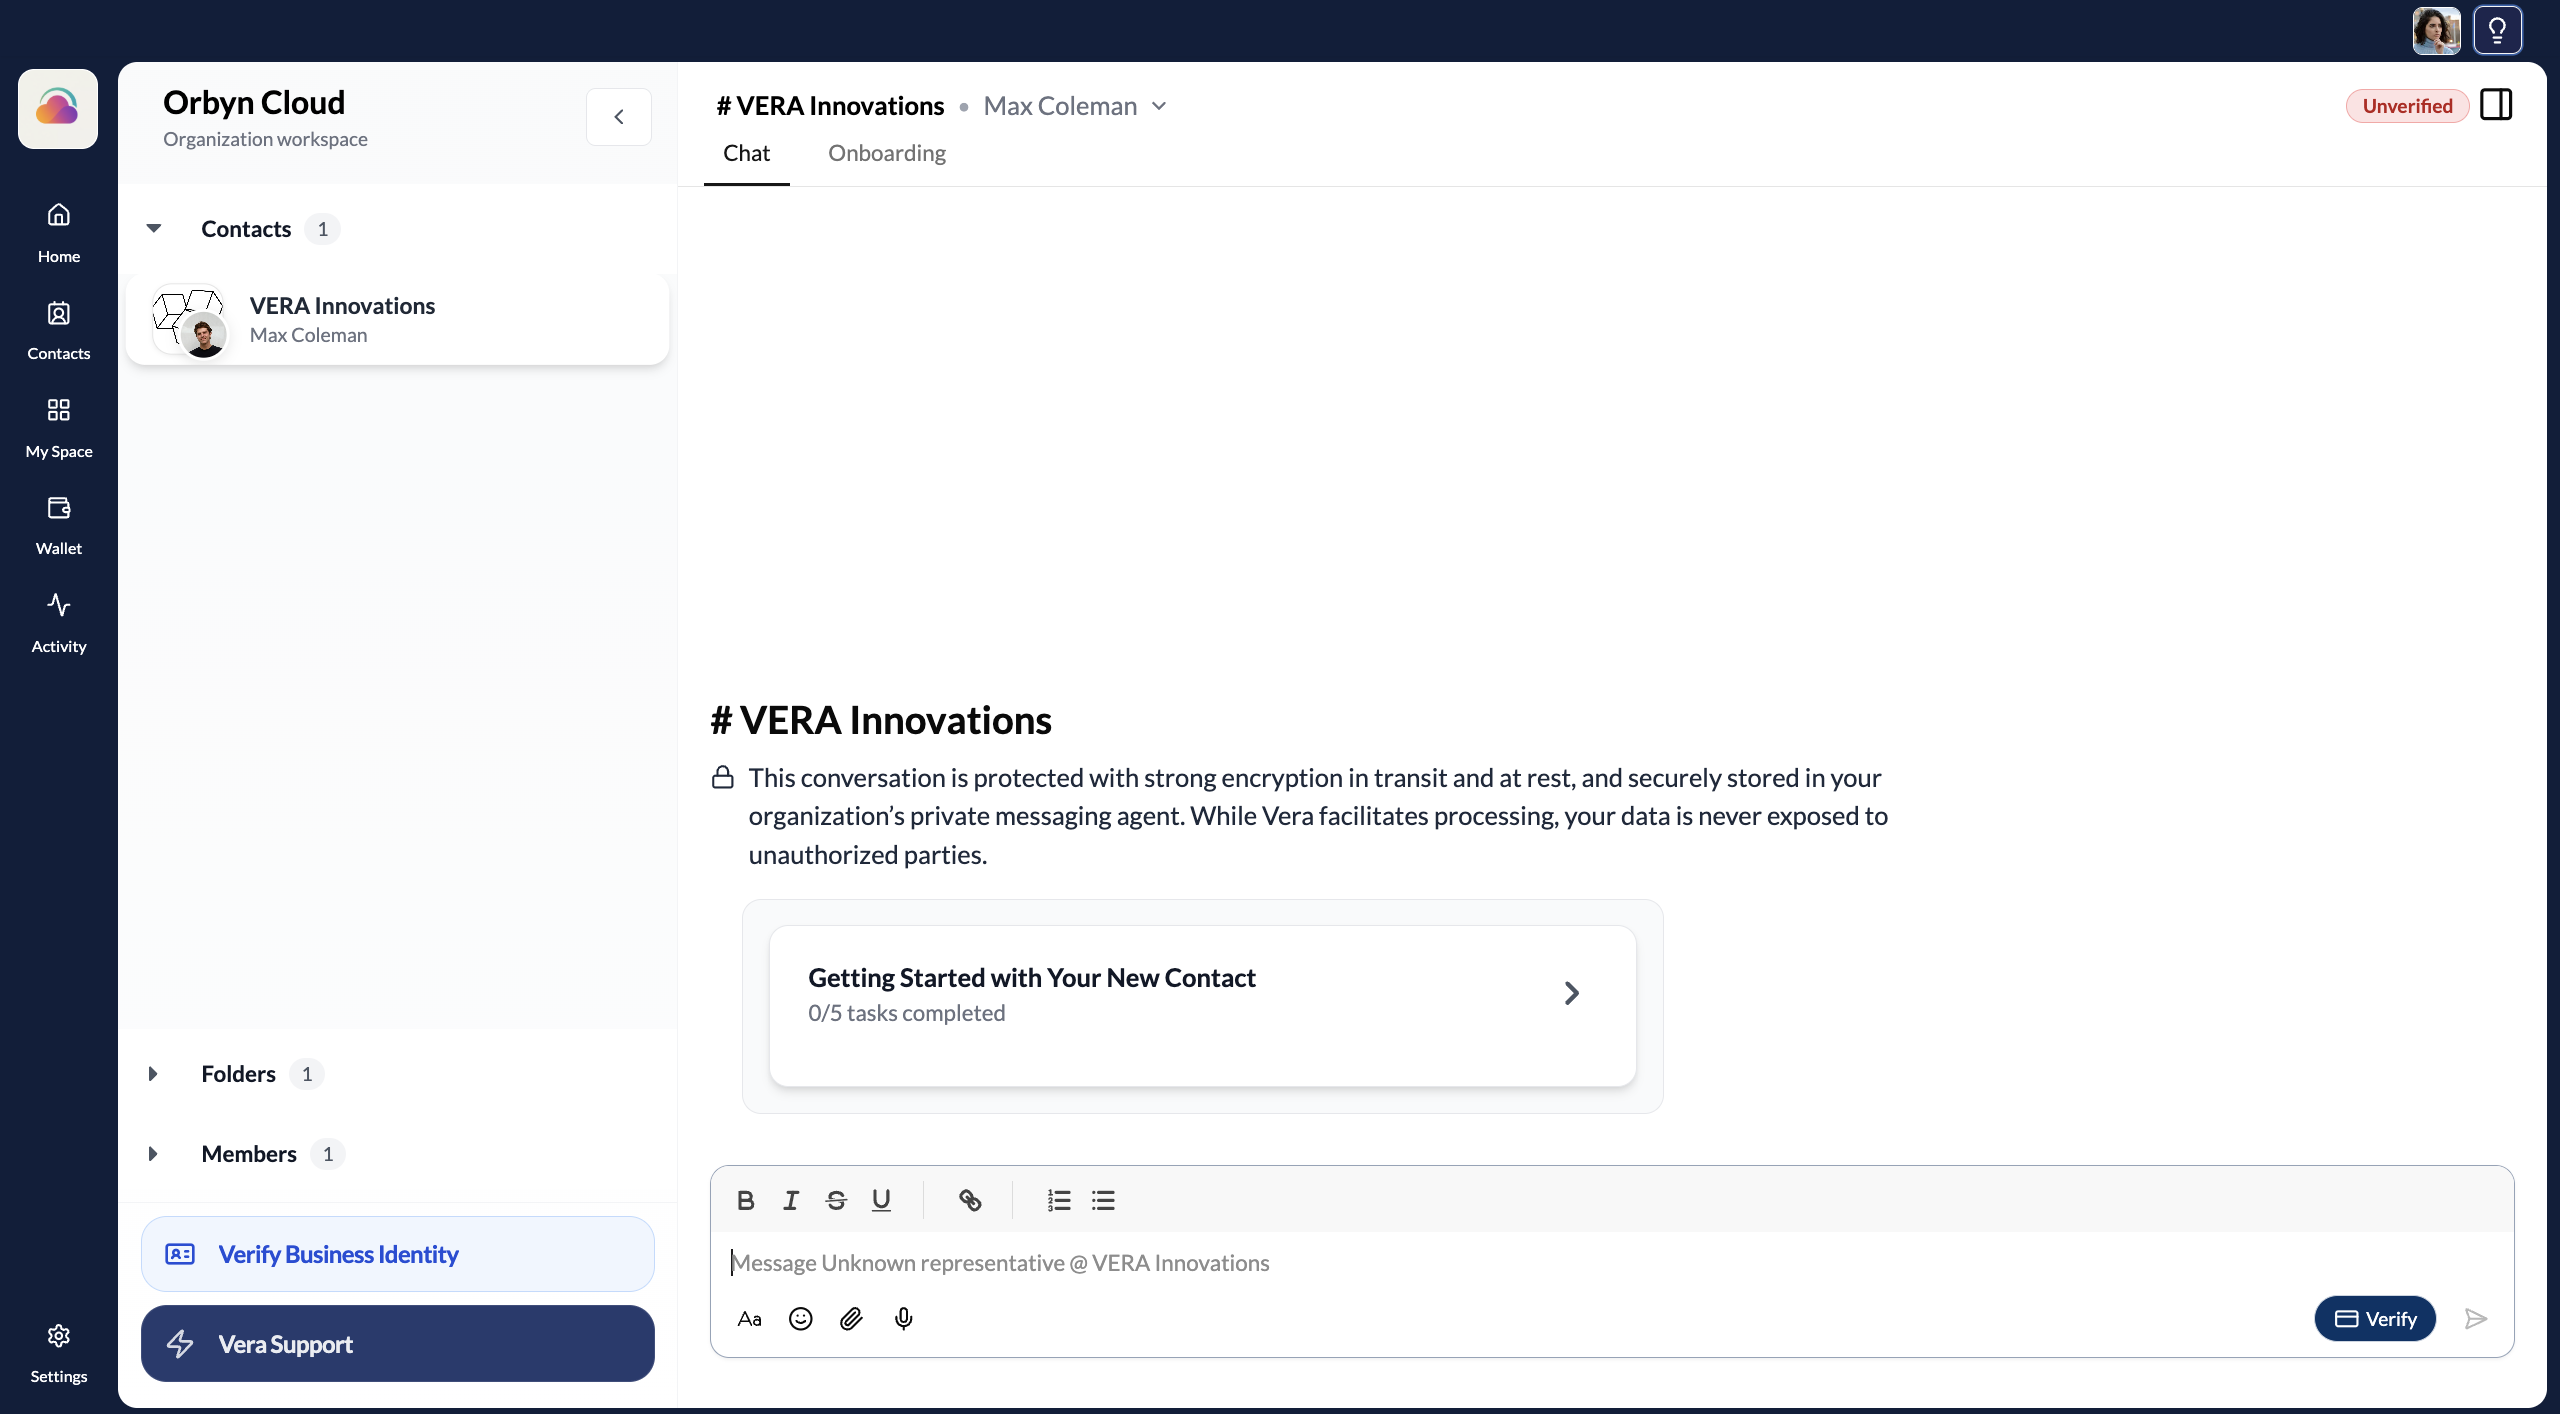
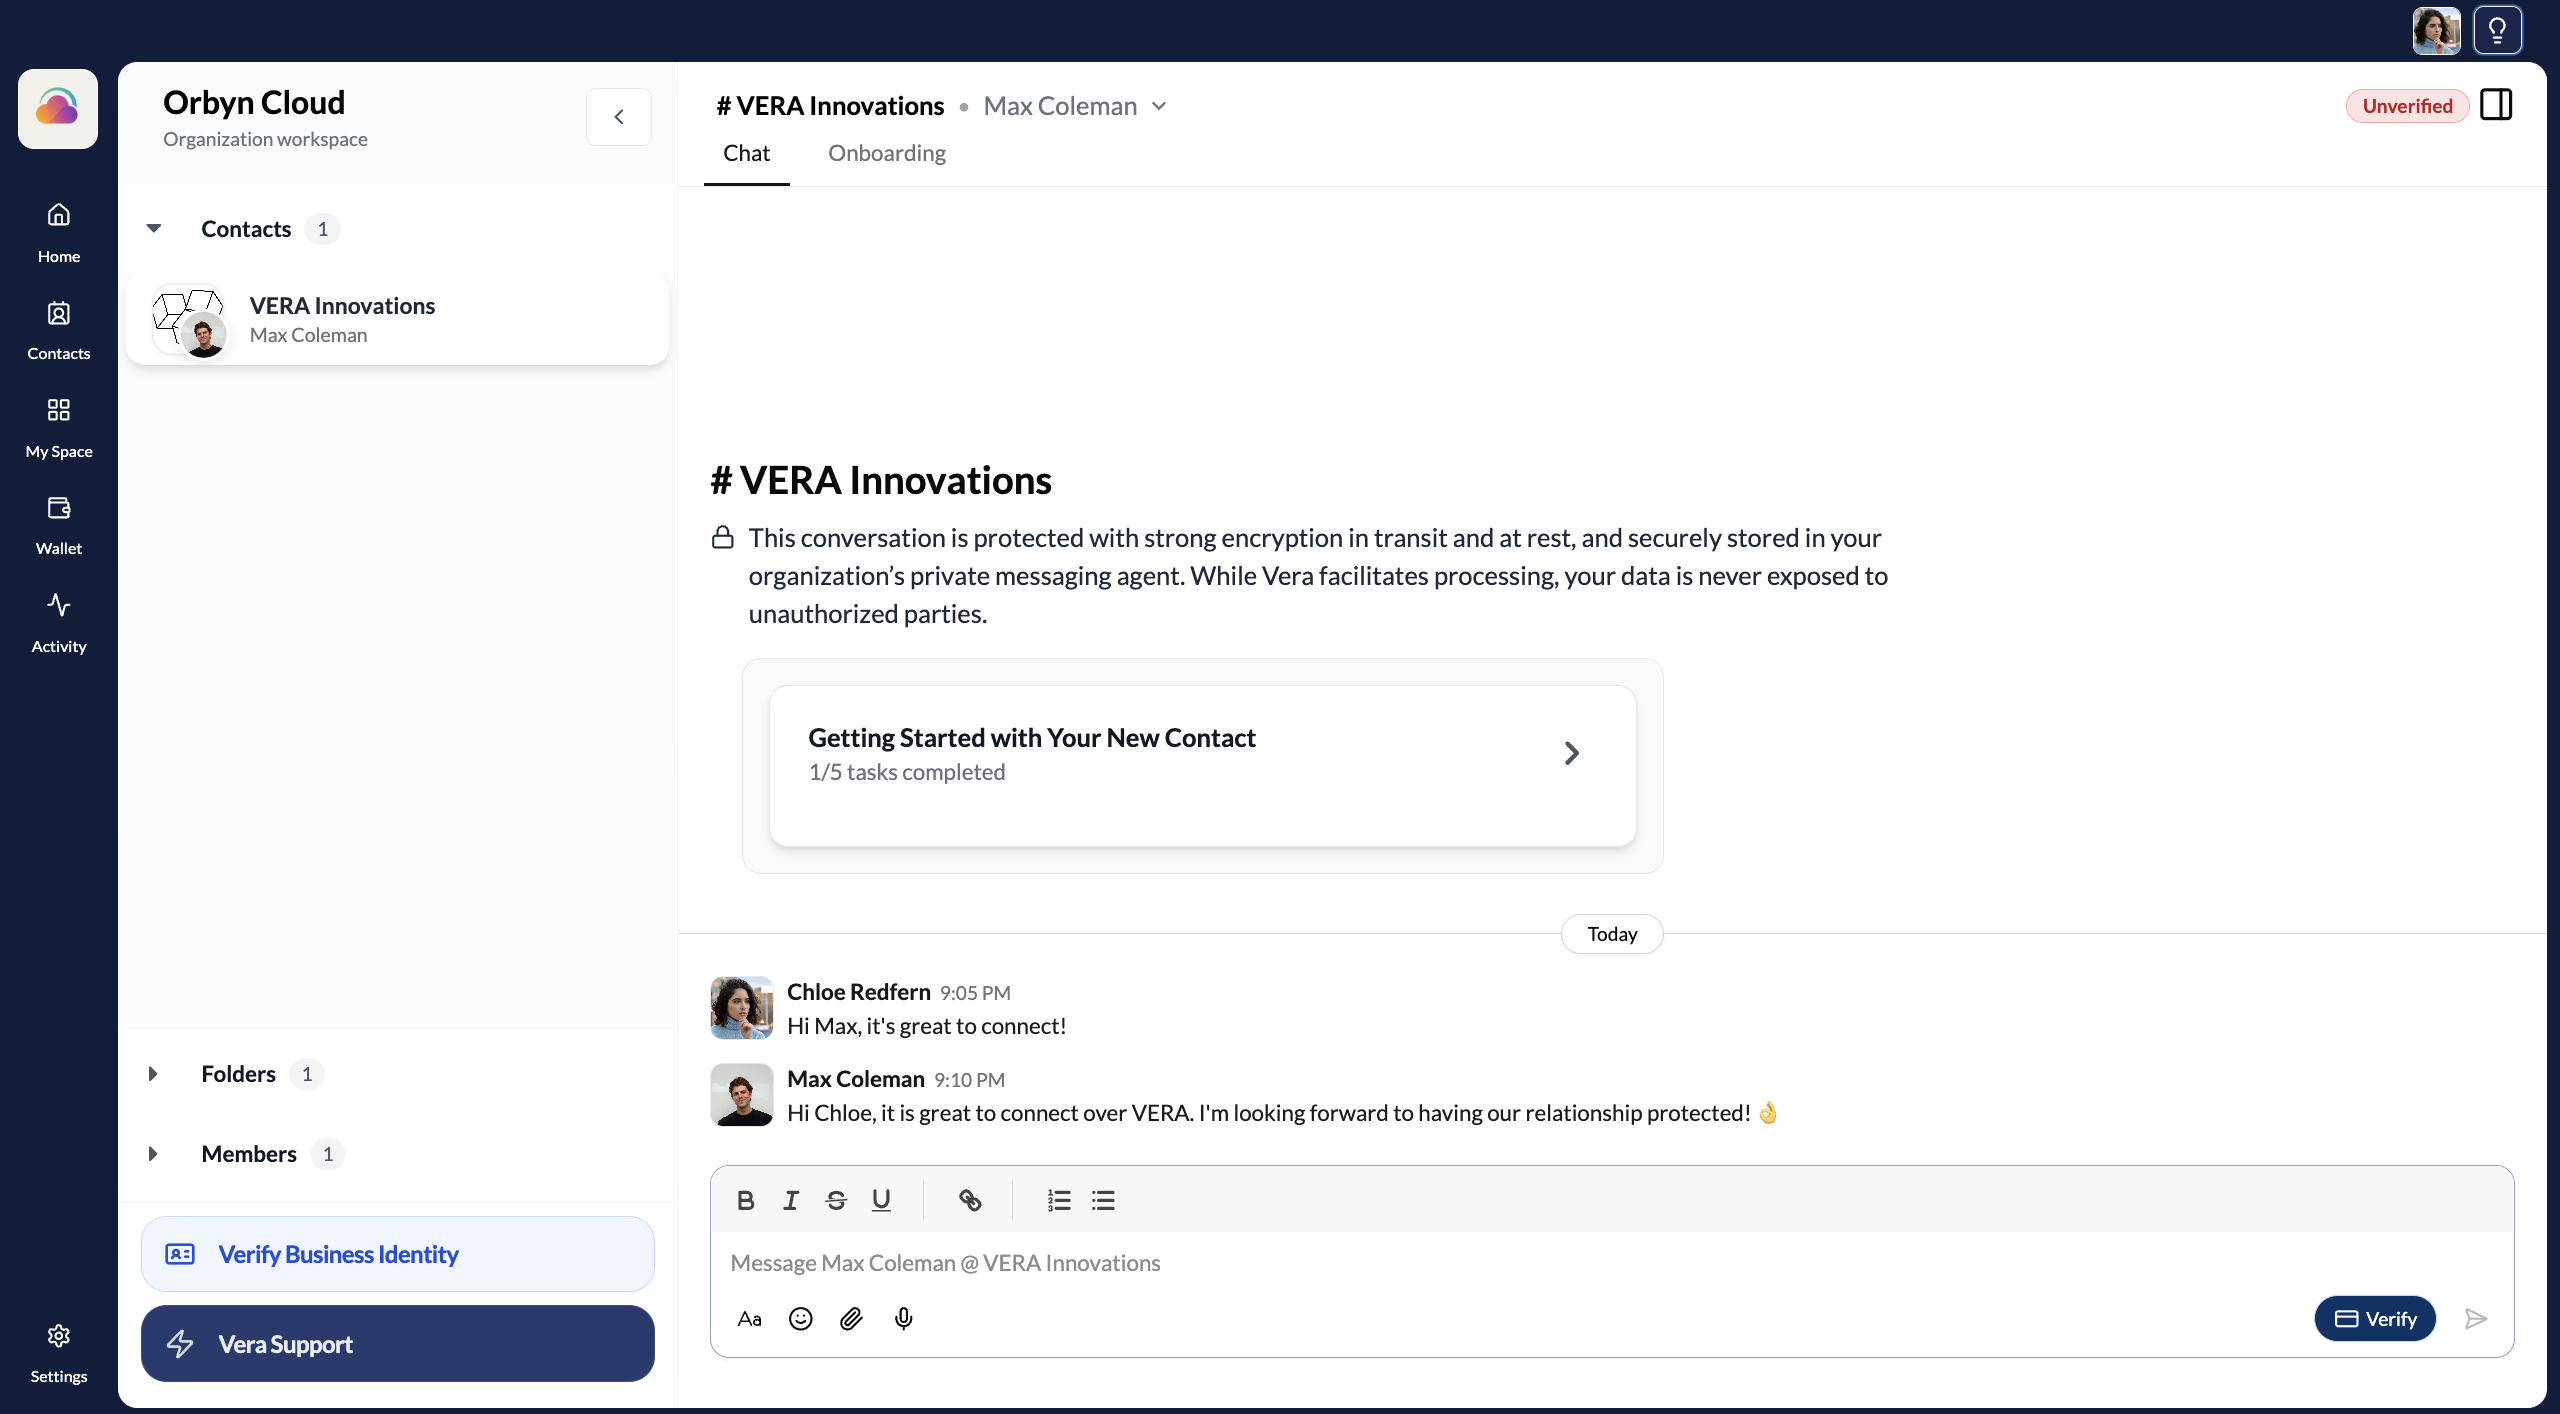
An unverified connection doesn't block you from doing anything. You can send messages, share documents, voice messages, and files through the encrypted channel. Verification adds a layer of trust — it doesn't gate access to the channel.
What you can do in a secure channel
Each connection has a full-featured encrypted channel from the moment you connect. Before or after verification, you can send and receive text messages with rich formatting (bold, italic, strikethrough, underline, links, lists), share documents, contracts, spreadsheets, and images via the attachment button, send voice messages via the microphone button, and exchange verified credentials using the Verify button in the bottom-right corner.
All communication is encrypted in transit and at rest — VERA's servers never hold your messages in readable form.
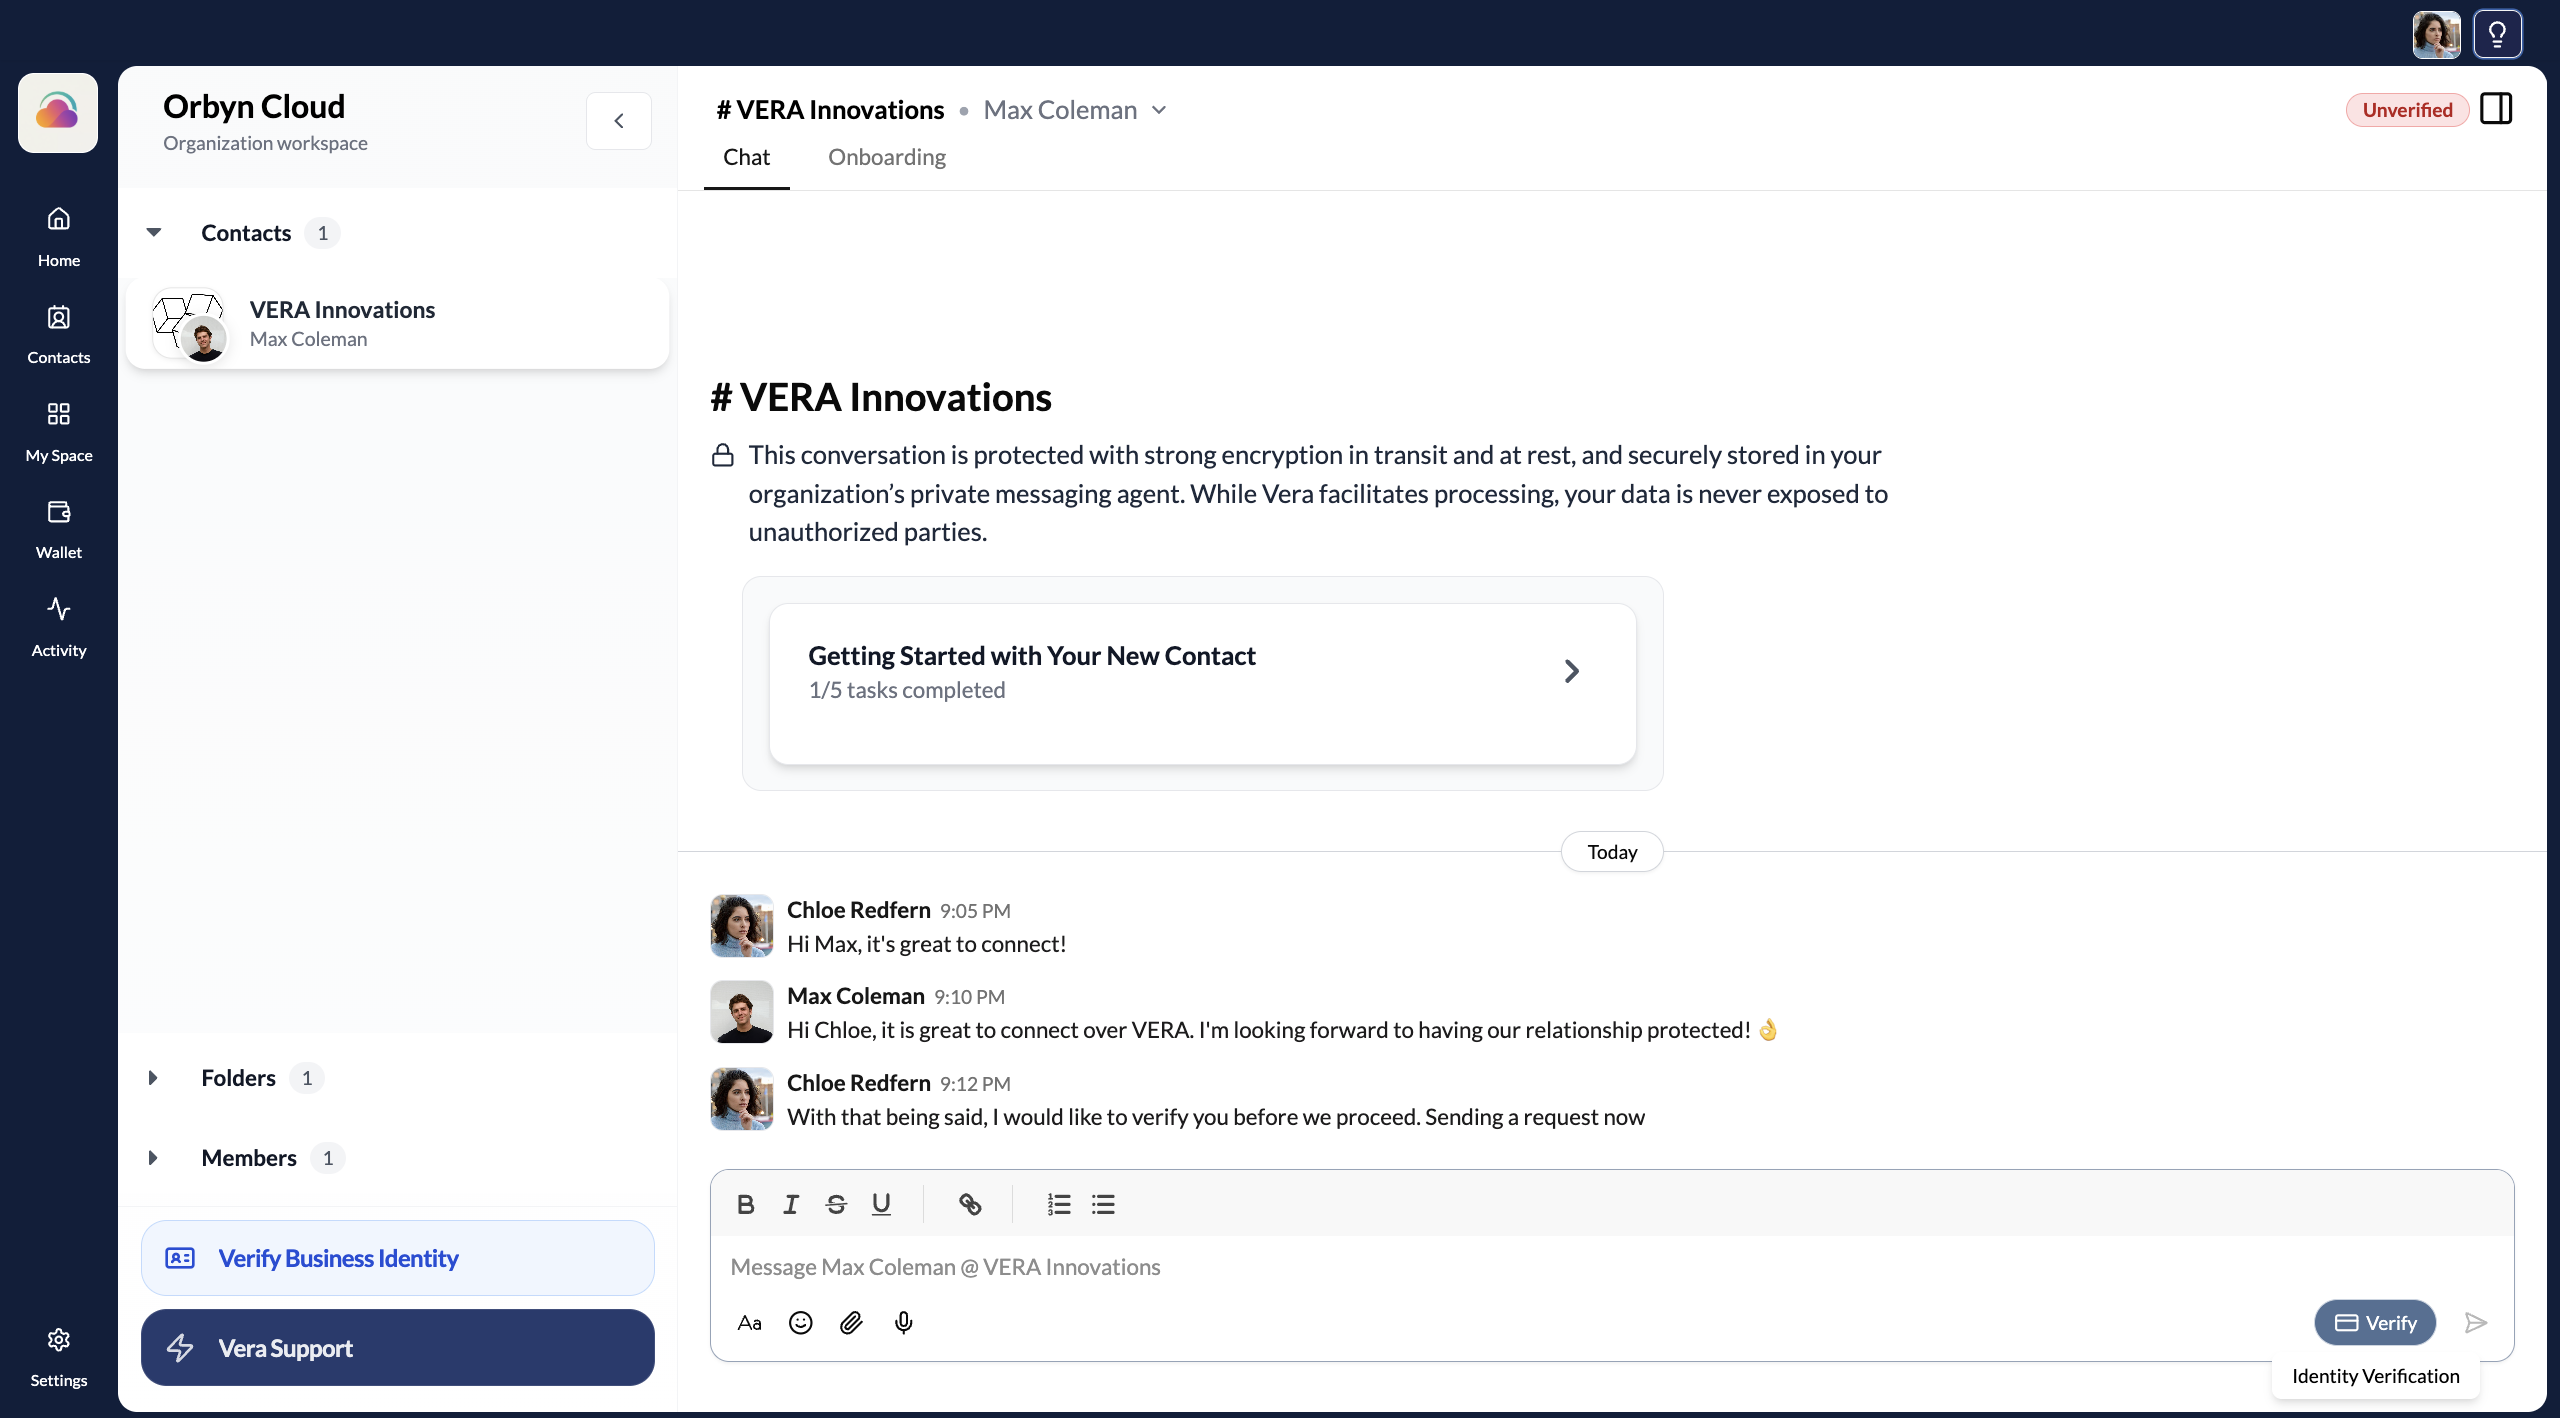
To move a connection from unverified to verified, use the Verify button.
How to request a credential from your contact
Click the Verify button
The Verify button sits in the bottom-right corner of every chat channel. Click it to open the verification menu.
Choose Send or Request
You'll see two options:
- Send Credential Verification — proactively share one of your own verified credentials with this contact
- Request Credential Verification — ask your contact to share a specific credential with you
Click Request Credential Verification to ask your contact to verify.
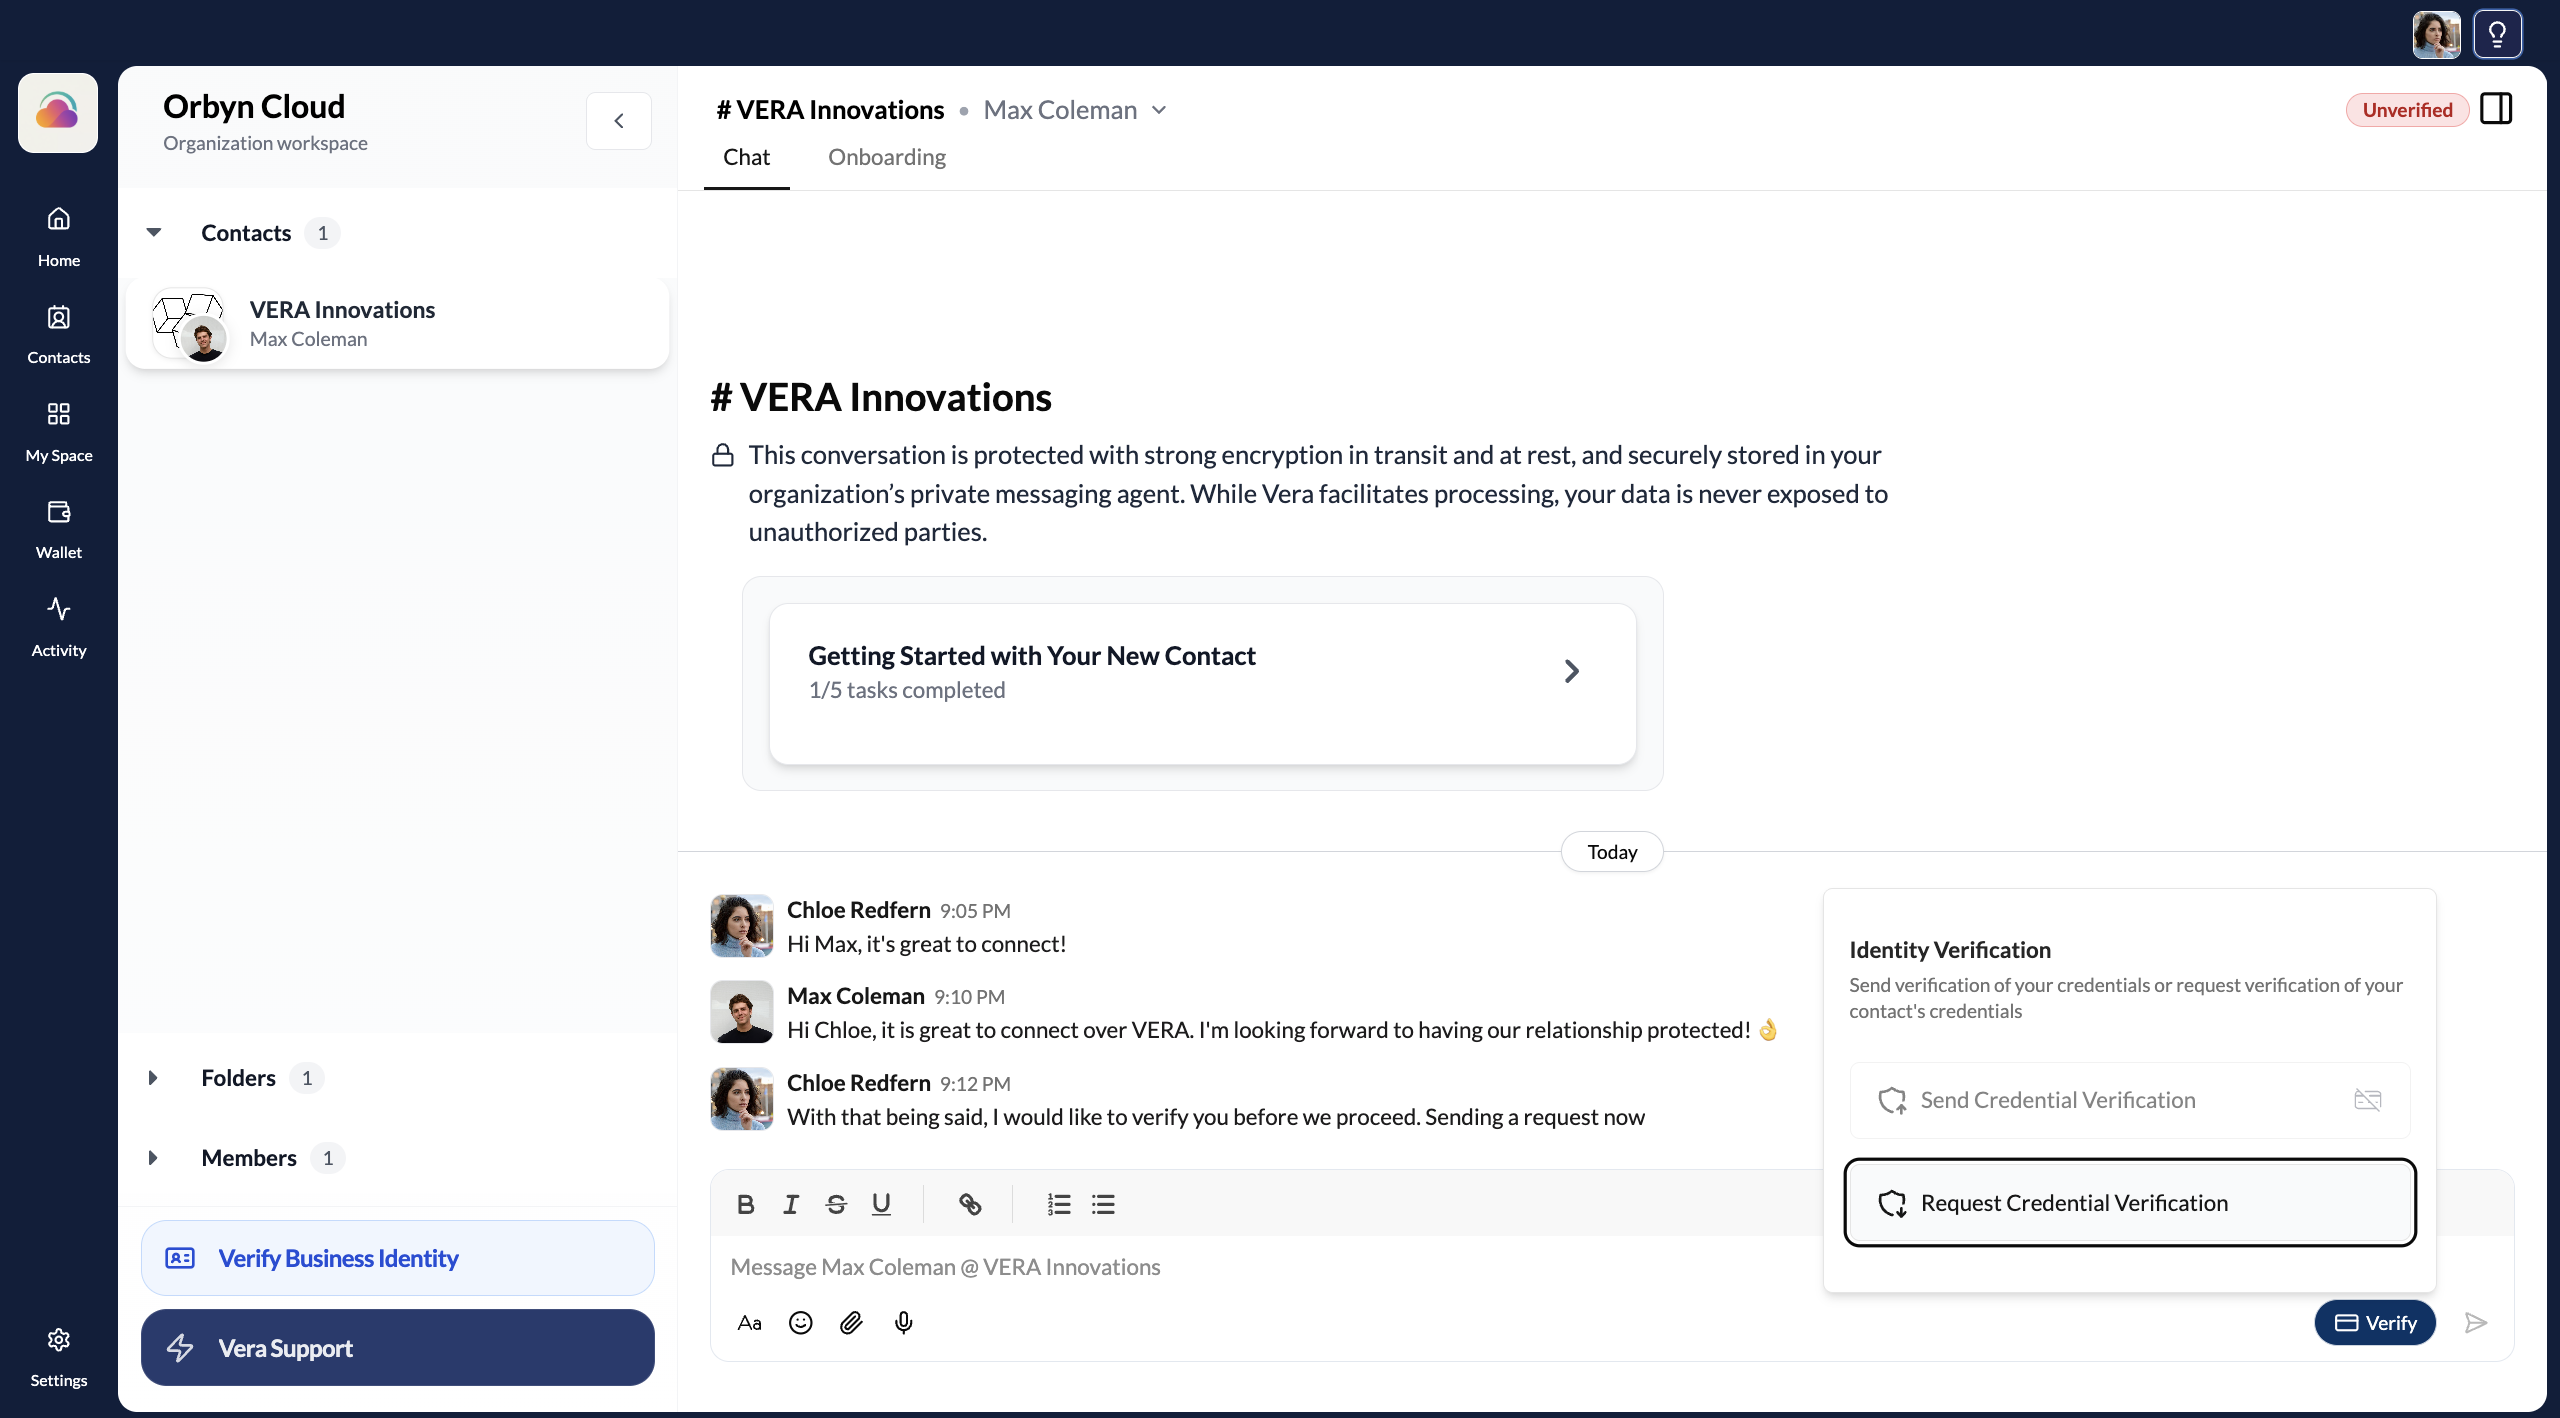
Send is when you proactively share your verified details — useful when a client or partner needs to confirm your legitimacy. Request is when you need to verify the other party. Both result in a credential exchange through the secure channel.
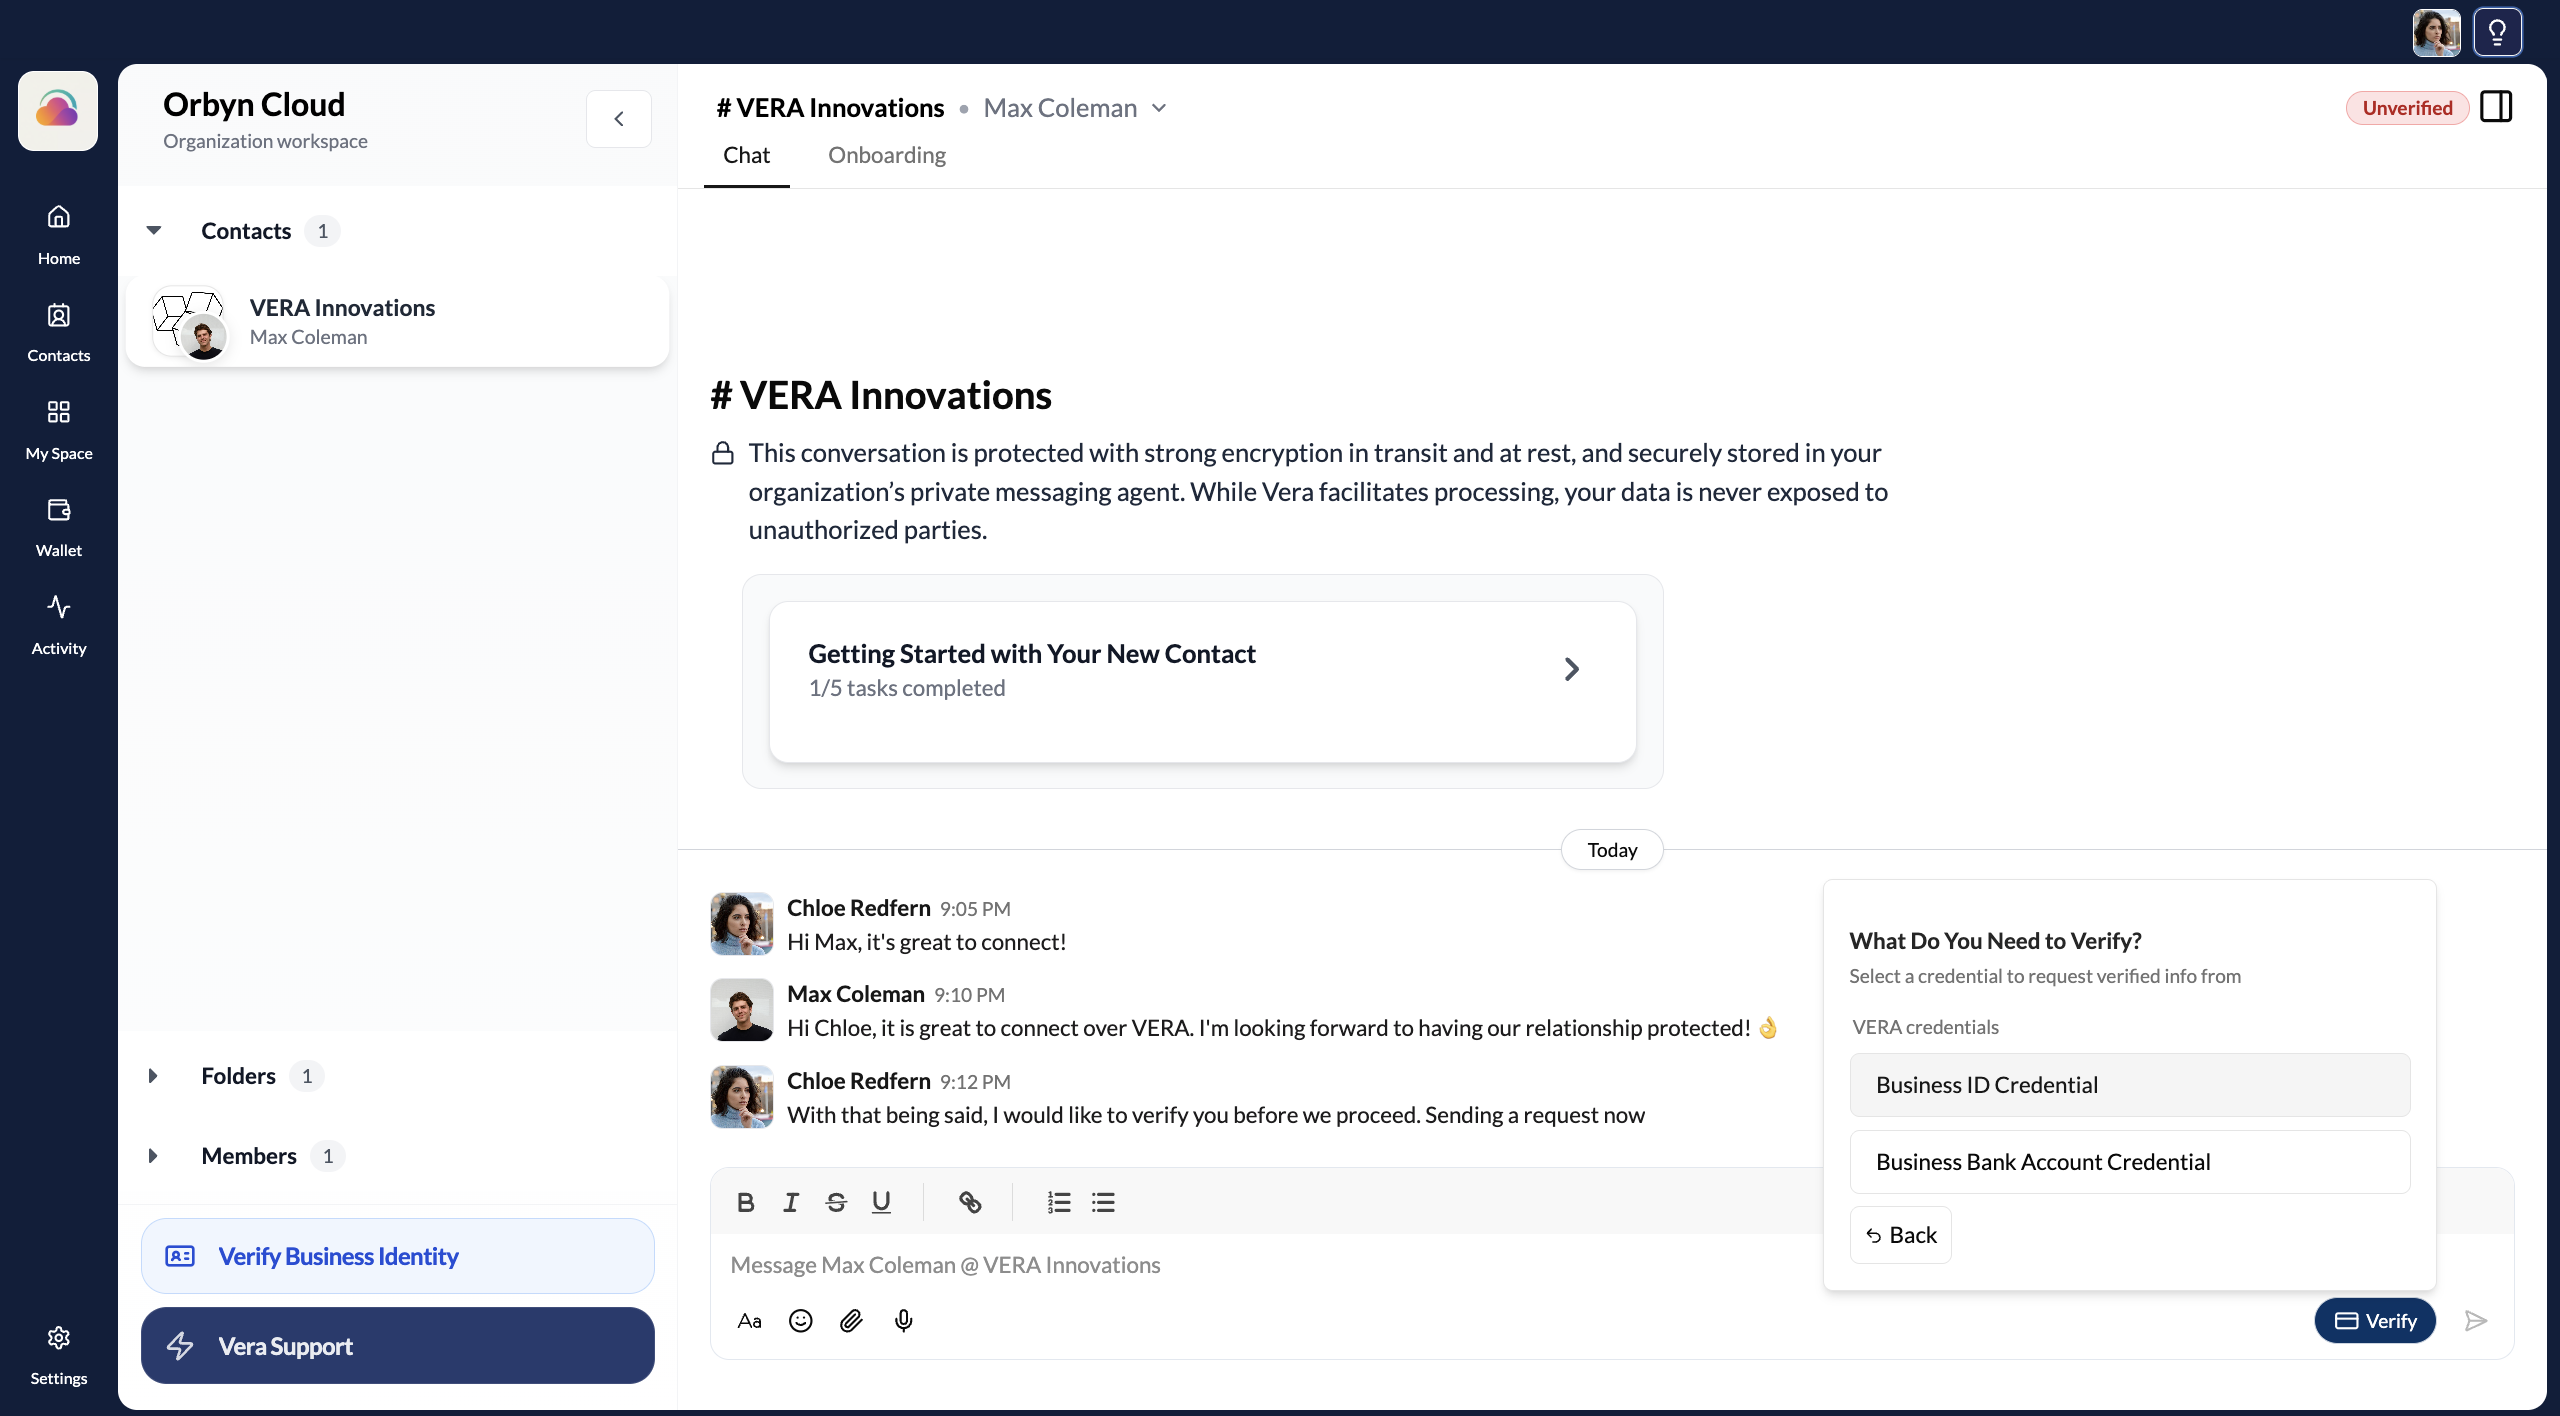
Select the credential type
Choose what kind of verification you need. The two main types are:
- Business ID Credential — company registration details (commercial name, registration number, company type, status, tax number)
- Business Bank Account Credential — verified banking details
Select the credential type you want to request.
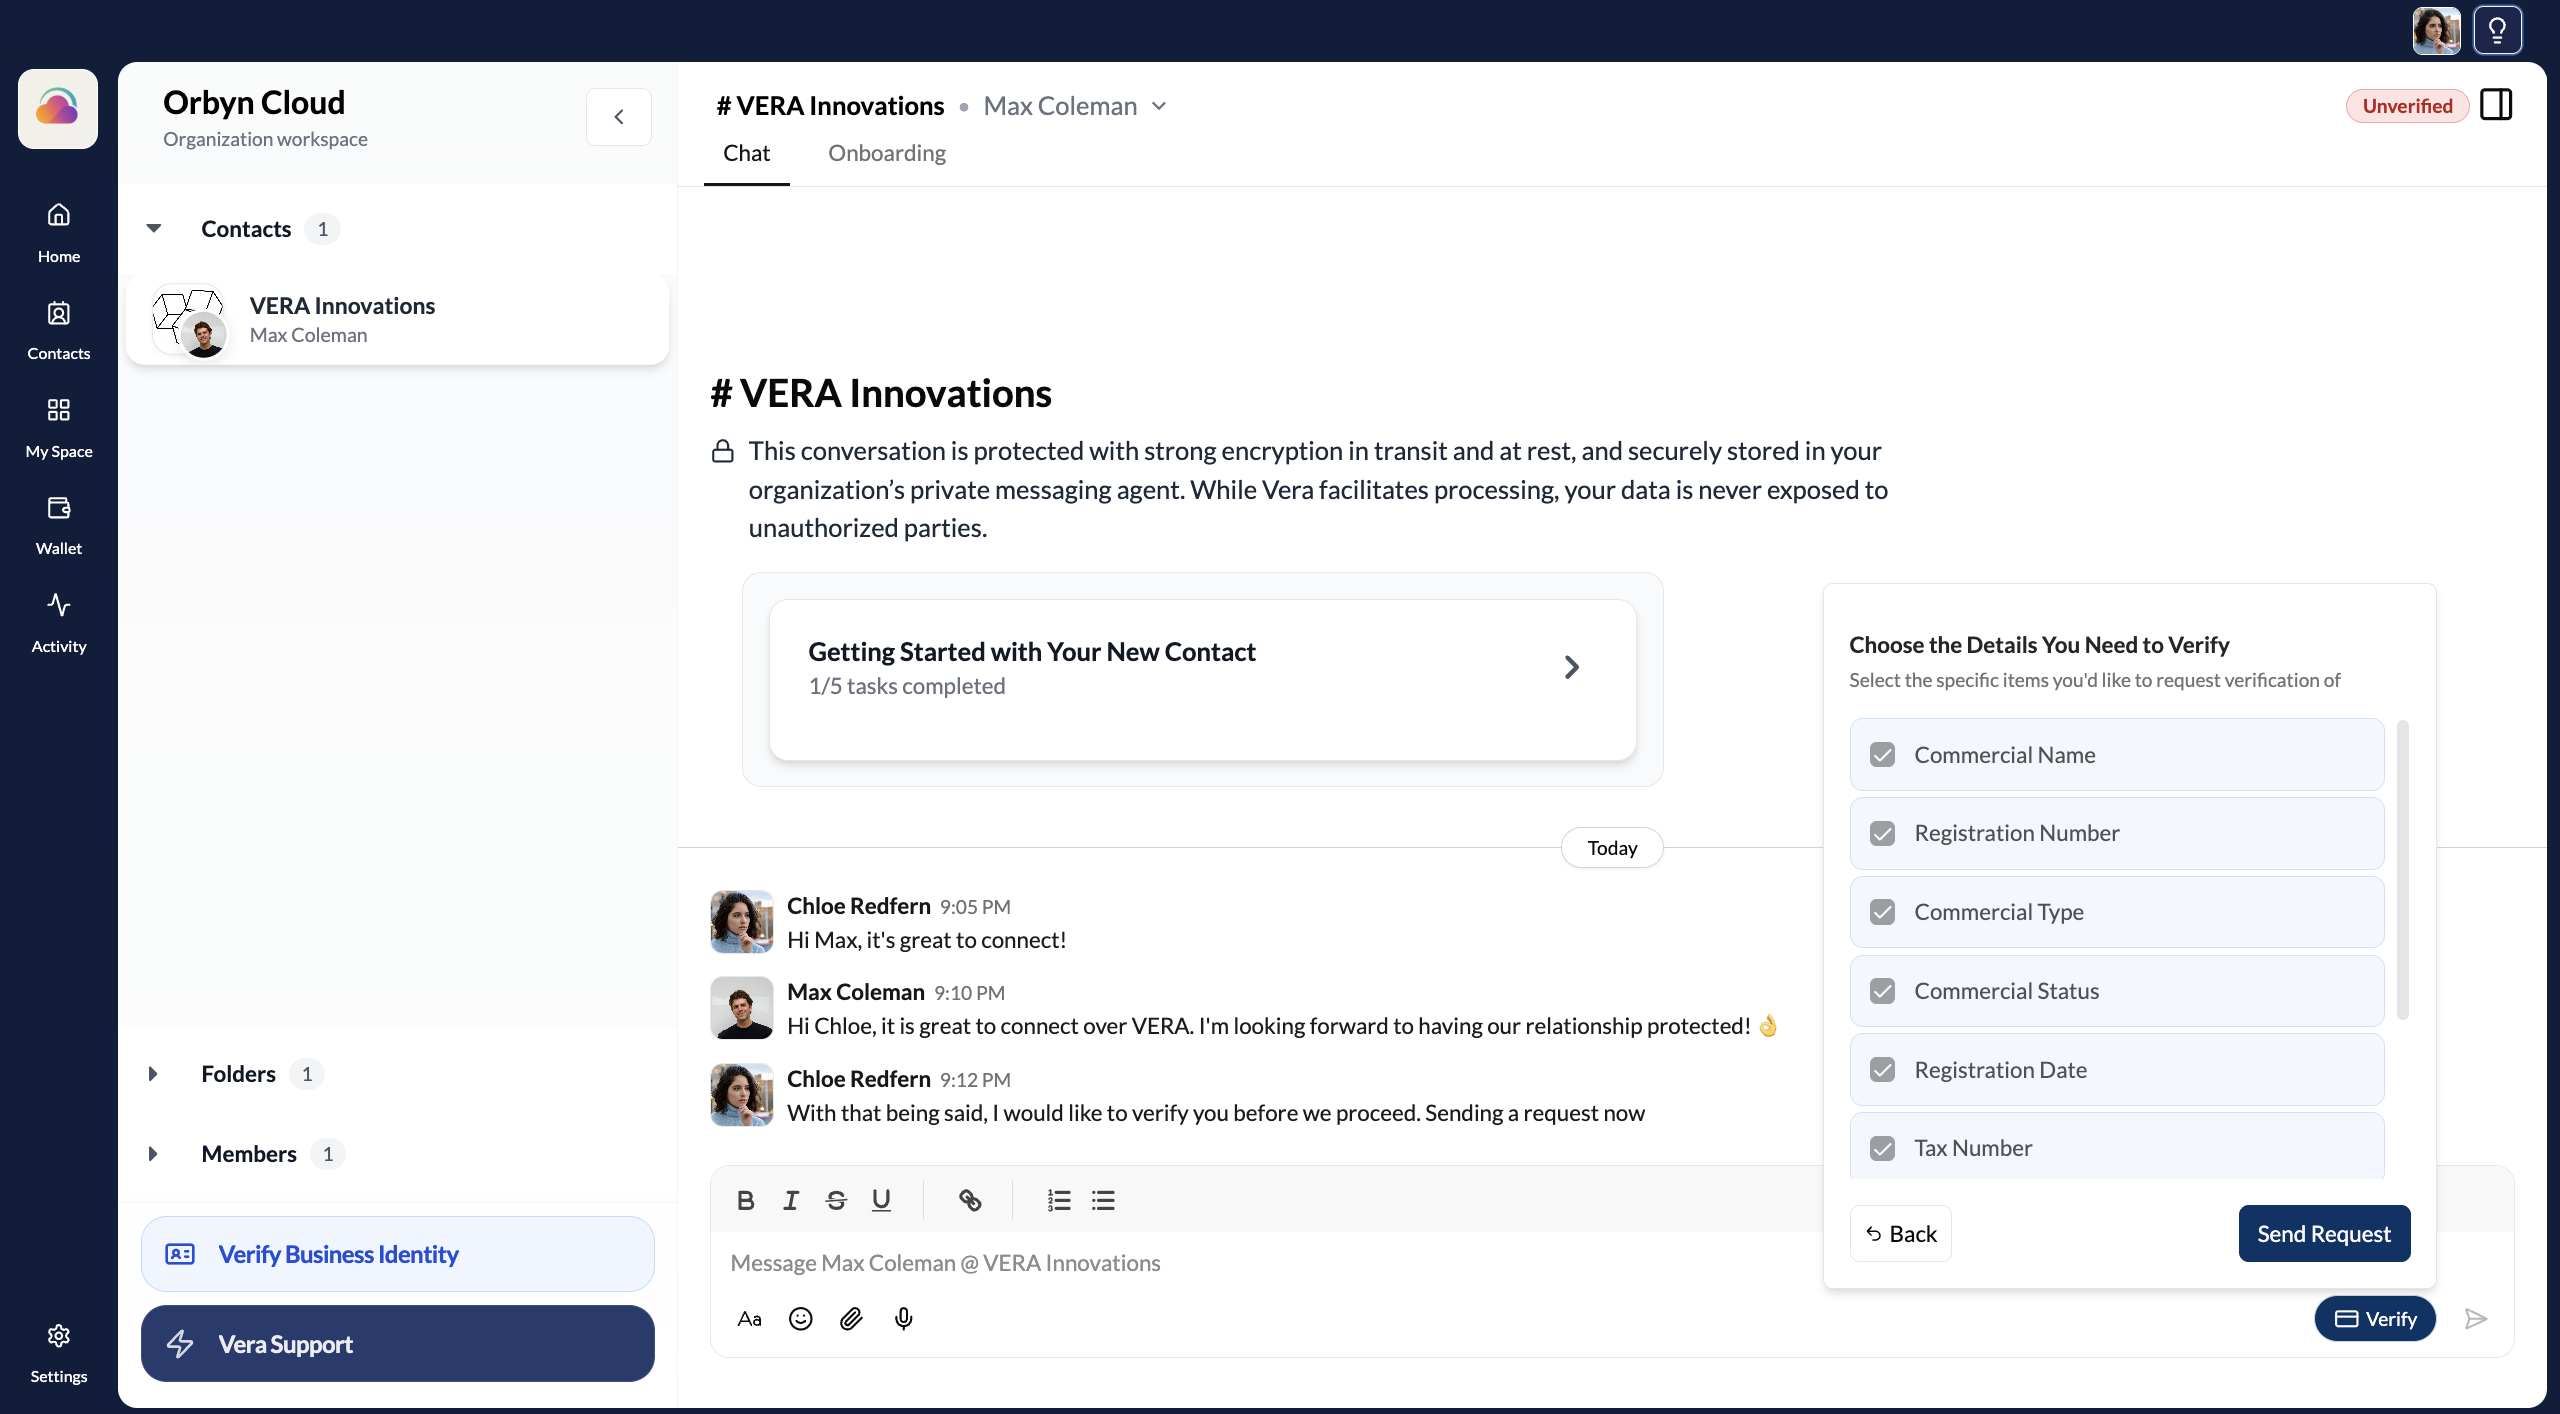
Choose the specific fields
After selecting a credential type, choose exactly which fields you need verified. For a Business ID Credential, the available fields include: Commercial Name, Registration Number, Commercial Type, Commercial Status, Registration Date, and Tax Number.
Select the fields relevant to your needs and click Send Request.
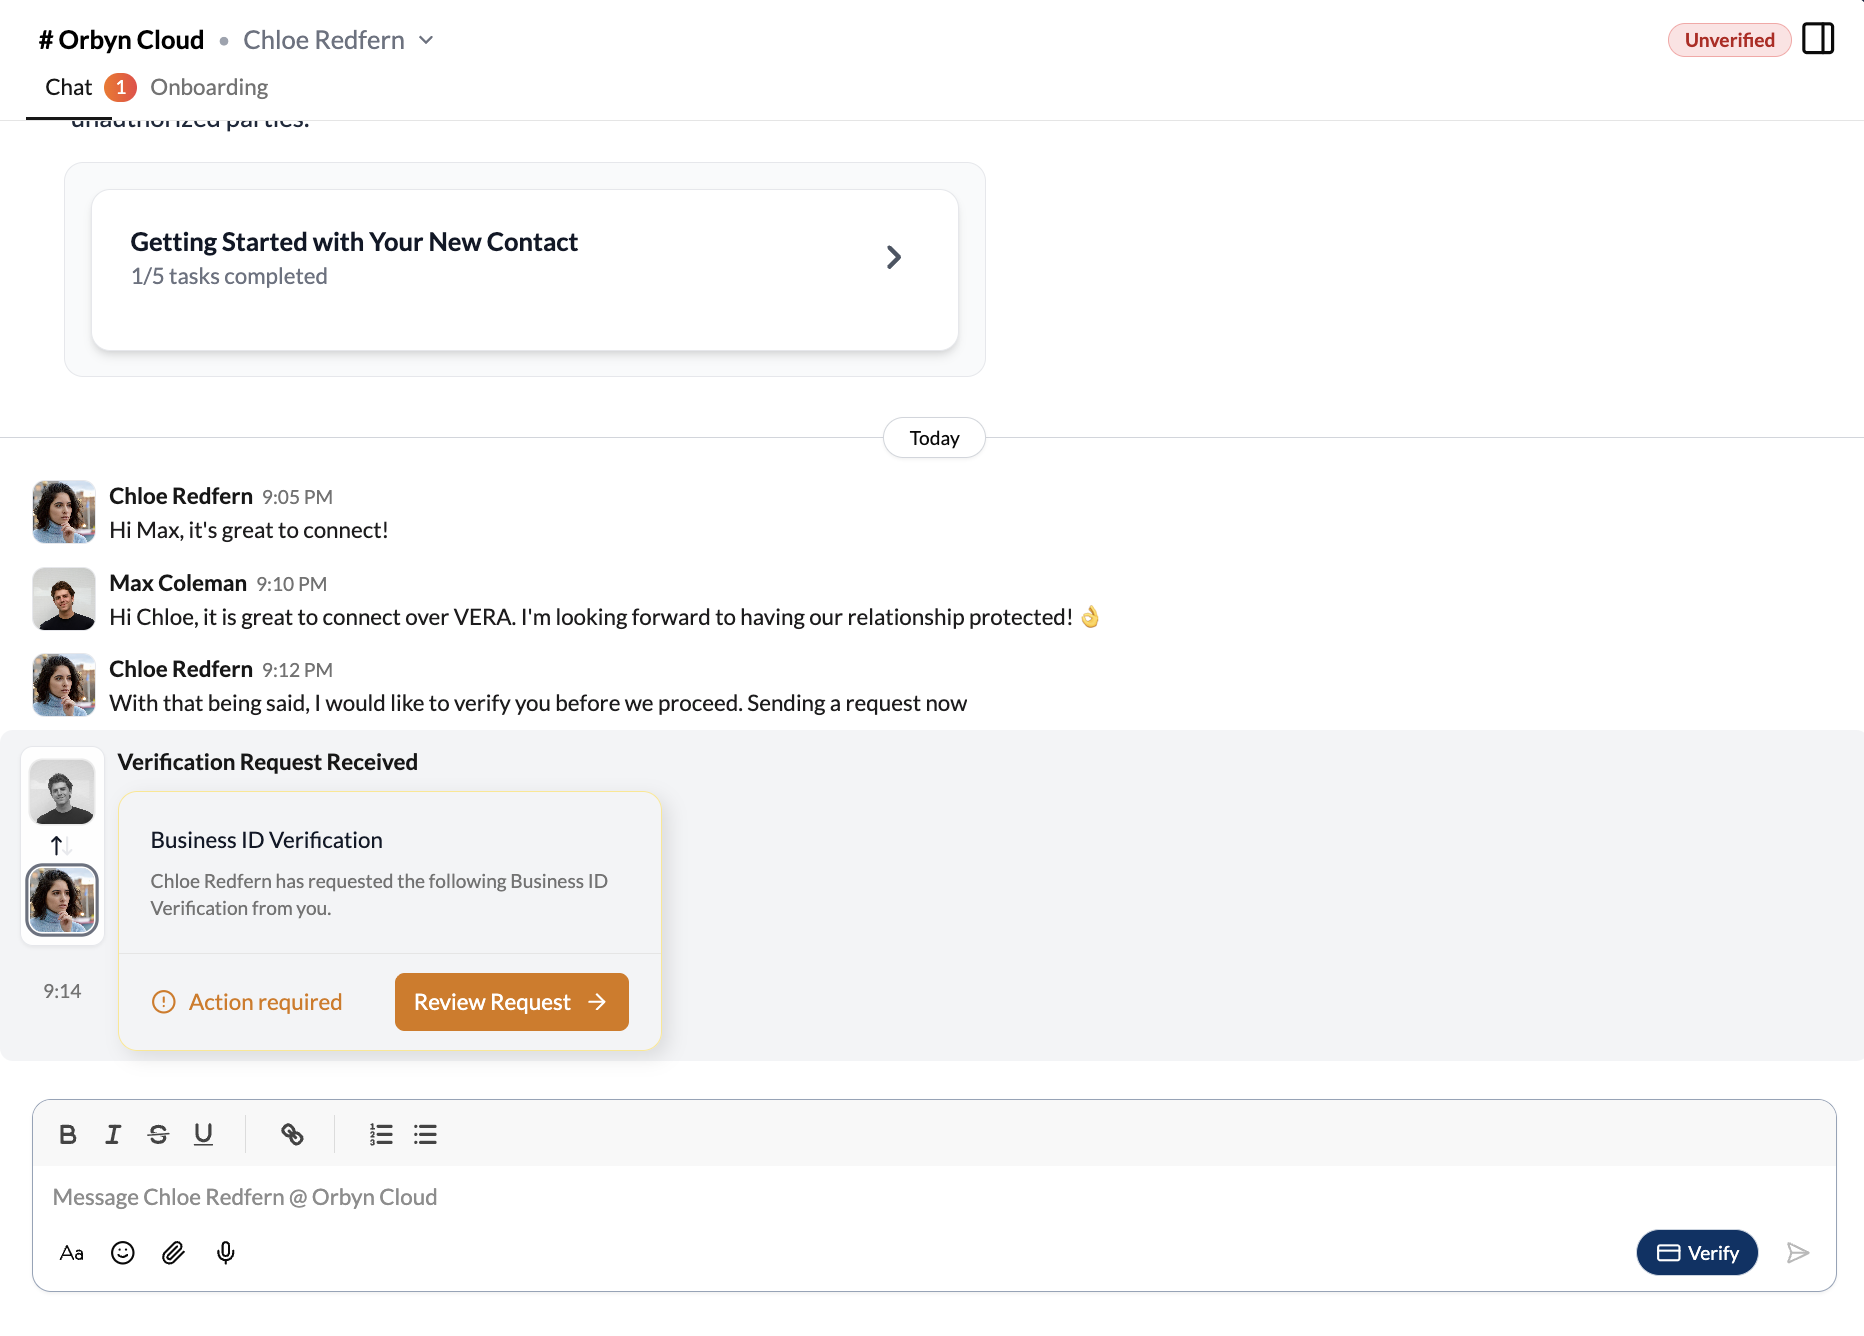
Request sent
The verification request appears in the chat as a structured card showing what was requested and from whom. Your contact will see it as an actionable request in their own chat.

What your contact sees
When your contact opens their chat, they see the verification request with an "Action required" indicator. They can review exactly what information will be shared before accepting or declining.
Receive the request
The request appears as an orange-highlighted card with an Action required label and a Review Request button.
Review and accept
Clicking Review Request opens a detailed modal showing exactly what information will be shared — the credential type, every field that will be disclosed (Commercial Name, Registration Number, Commercial Type, Commercial Status, Registration Date, Tax Number, Country of Registration, and Verification Source details), and which credential from their wallet fulfils the request.
Your contact reviews everything, then clicks Accept to share or Decline to refuse.
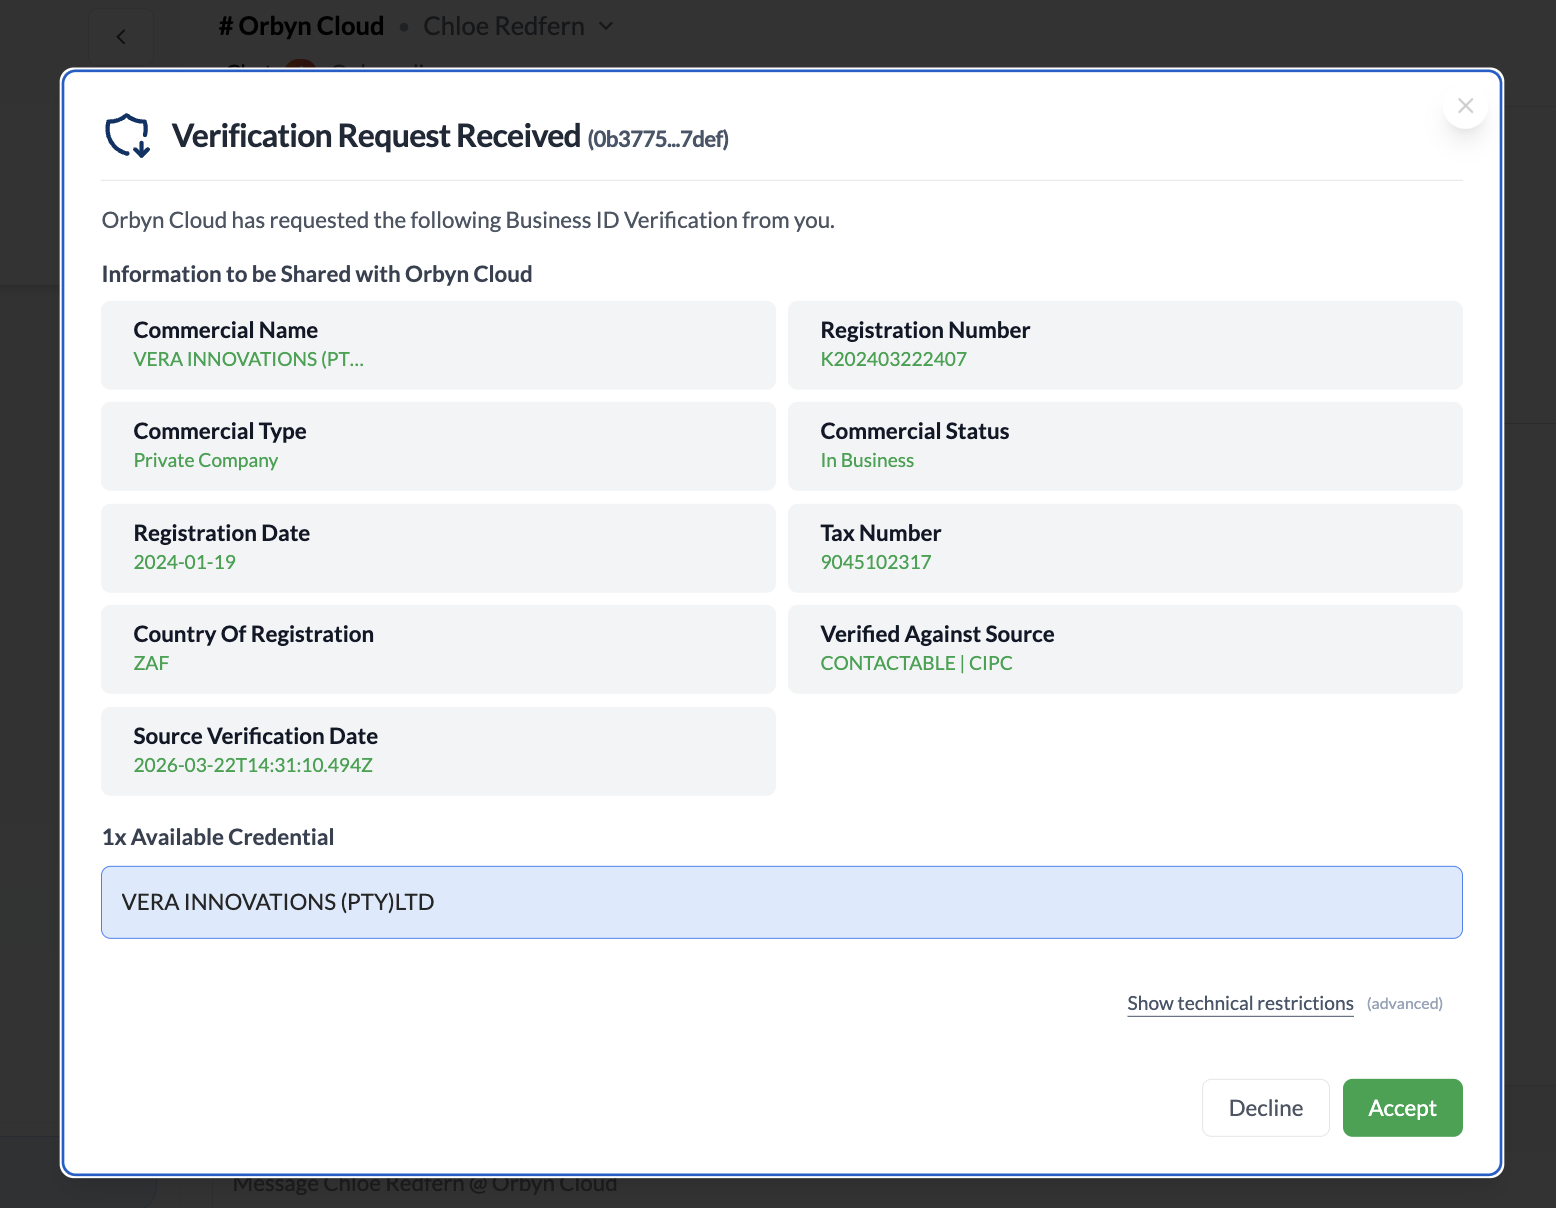
Your contact always sees exactly what they're sharing before they accept. Nothing is shared without explicit consent. They can also decline if they don't want to share the requested information.
Once verified
Once your contact accepts, their verified credential is shared through the secure channel. The chat immediately updates: a "Verification Received" card appears in the conversation, and the connection's status badge changes from red Unverified to green Verified in the top-right corner.
This isn't just a label change. The credential your contact shared is cryptographically verifiable — it was issued by a trusted authority, verified against official records (CIPC for business credentials), signed, and timestamped. You can inspect every detail at any time.
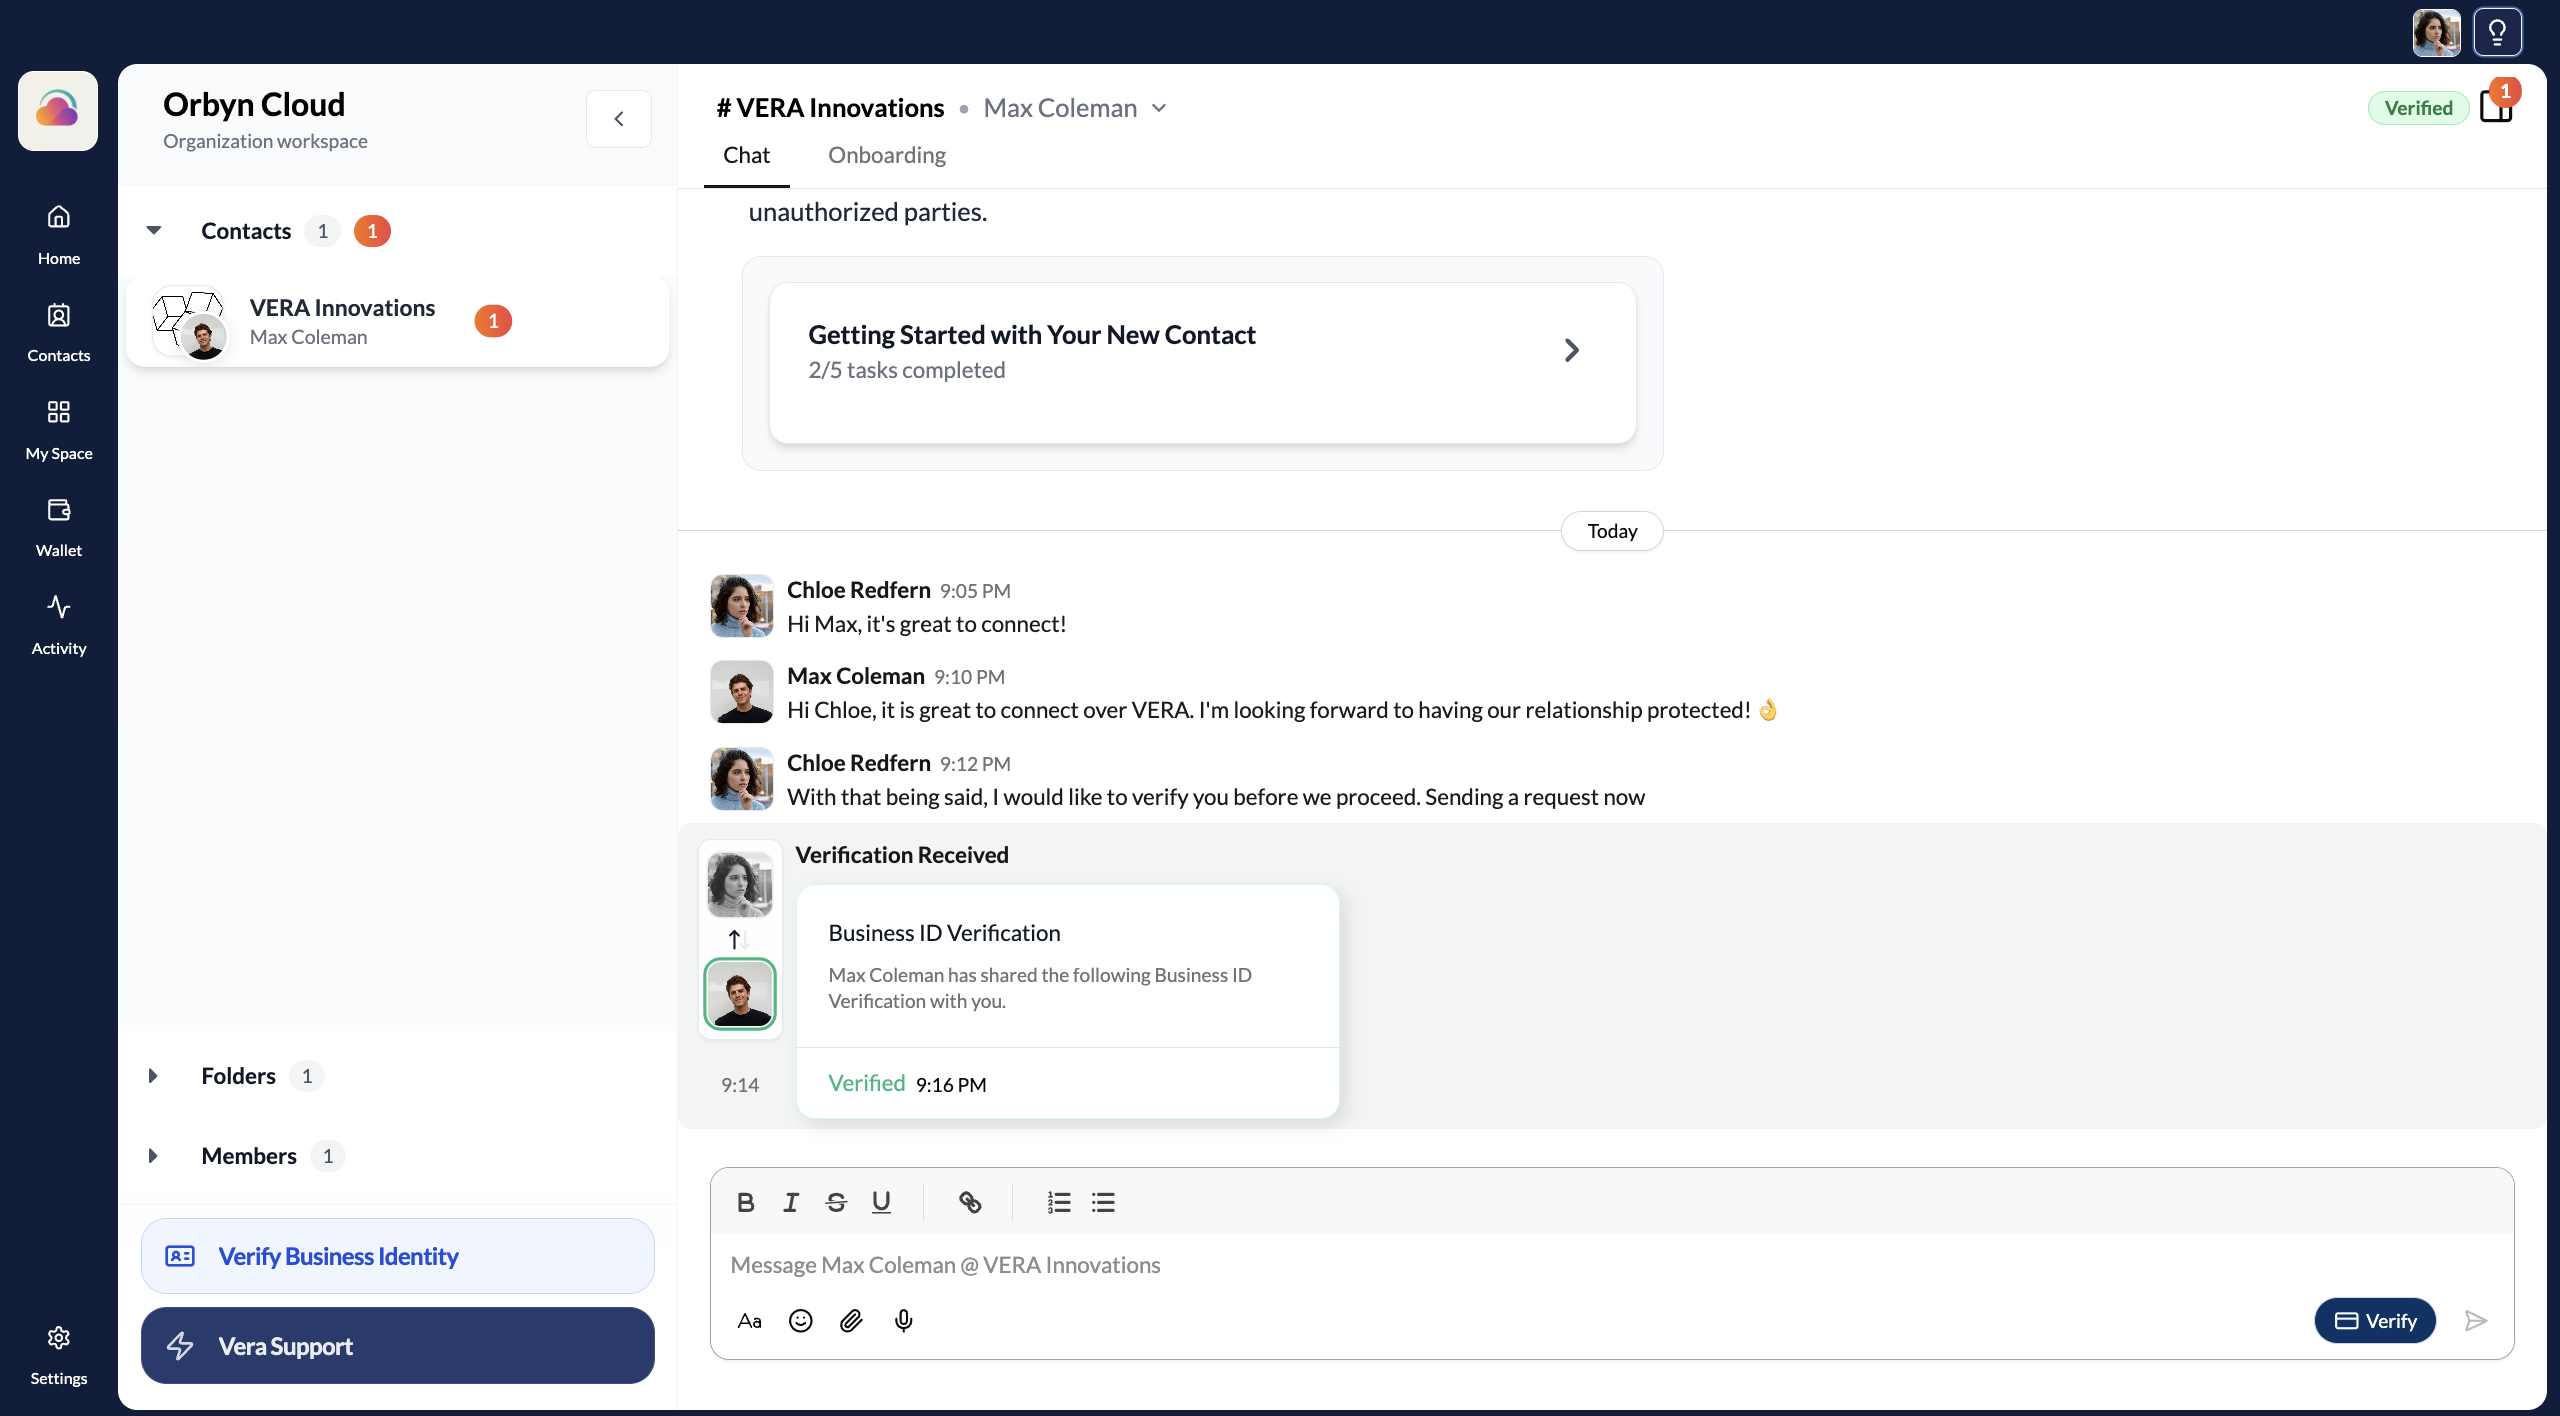
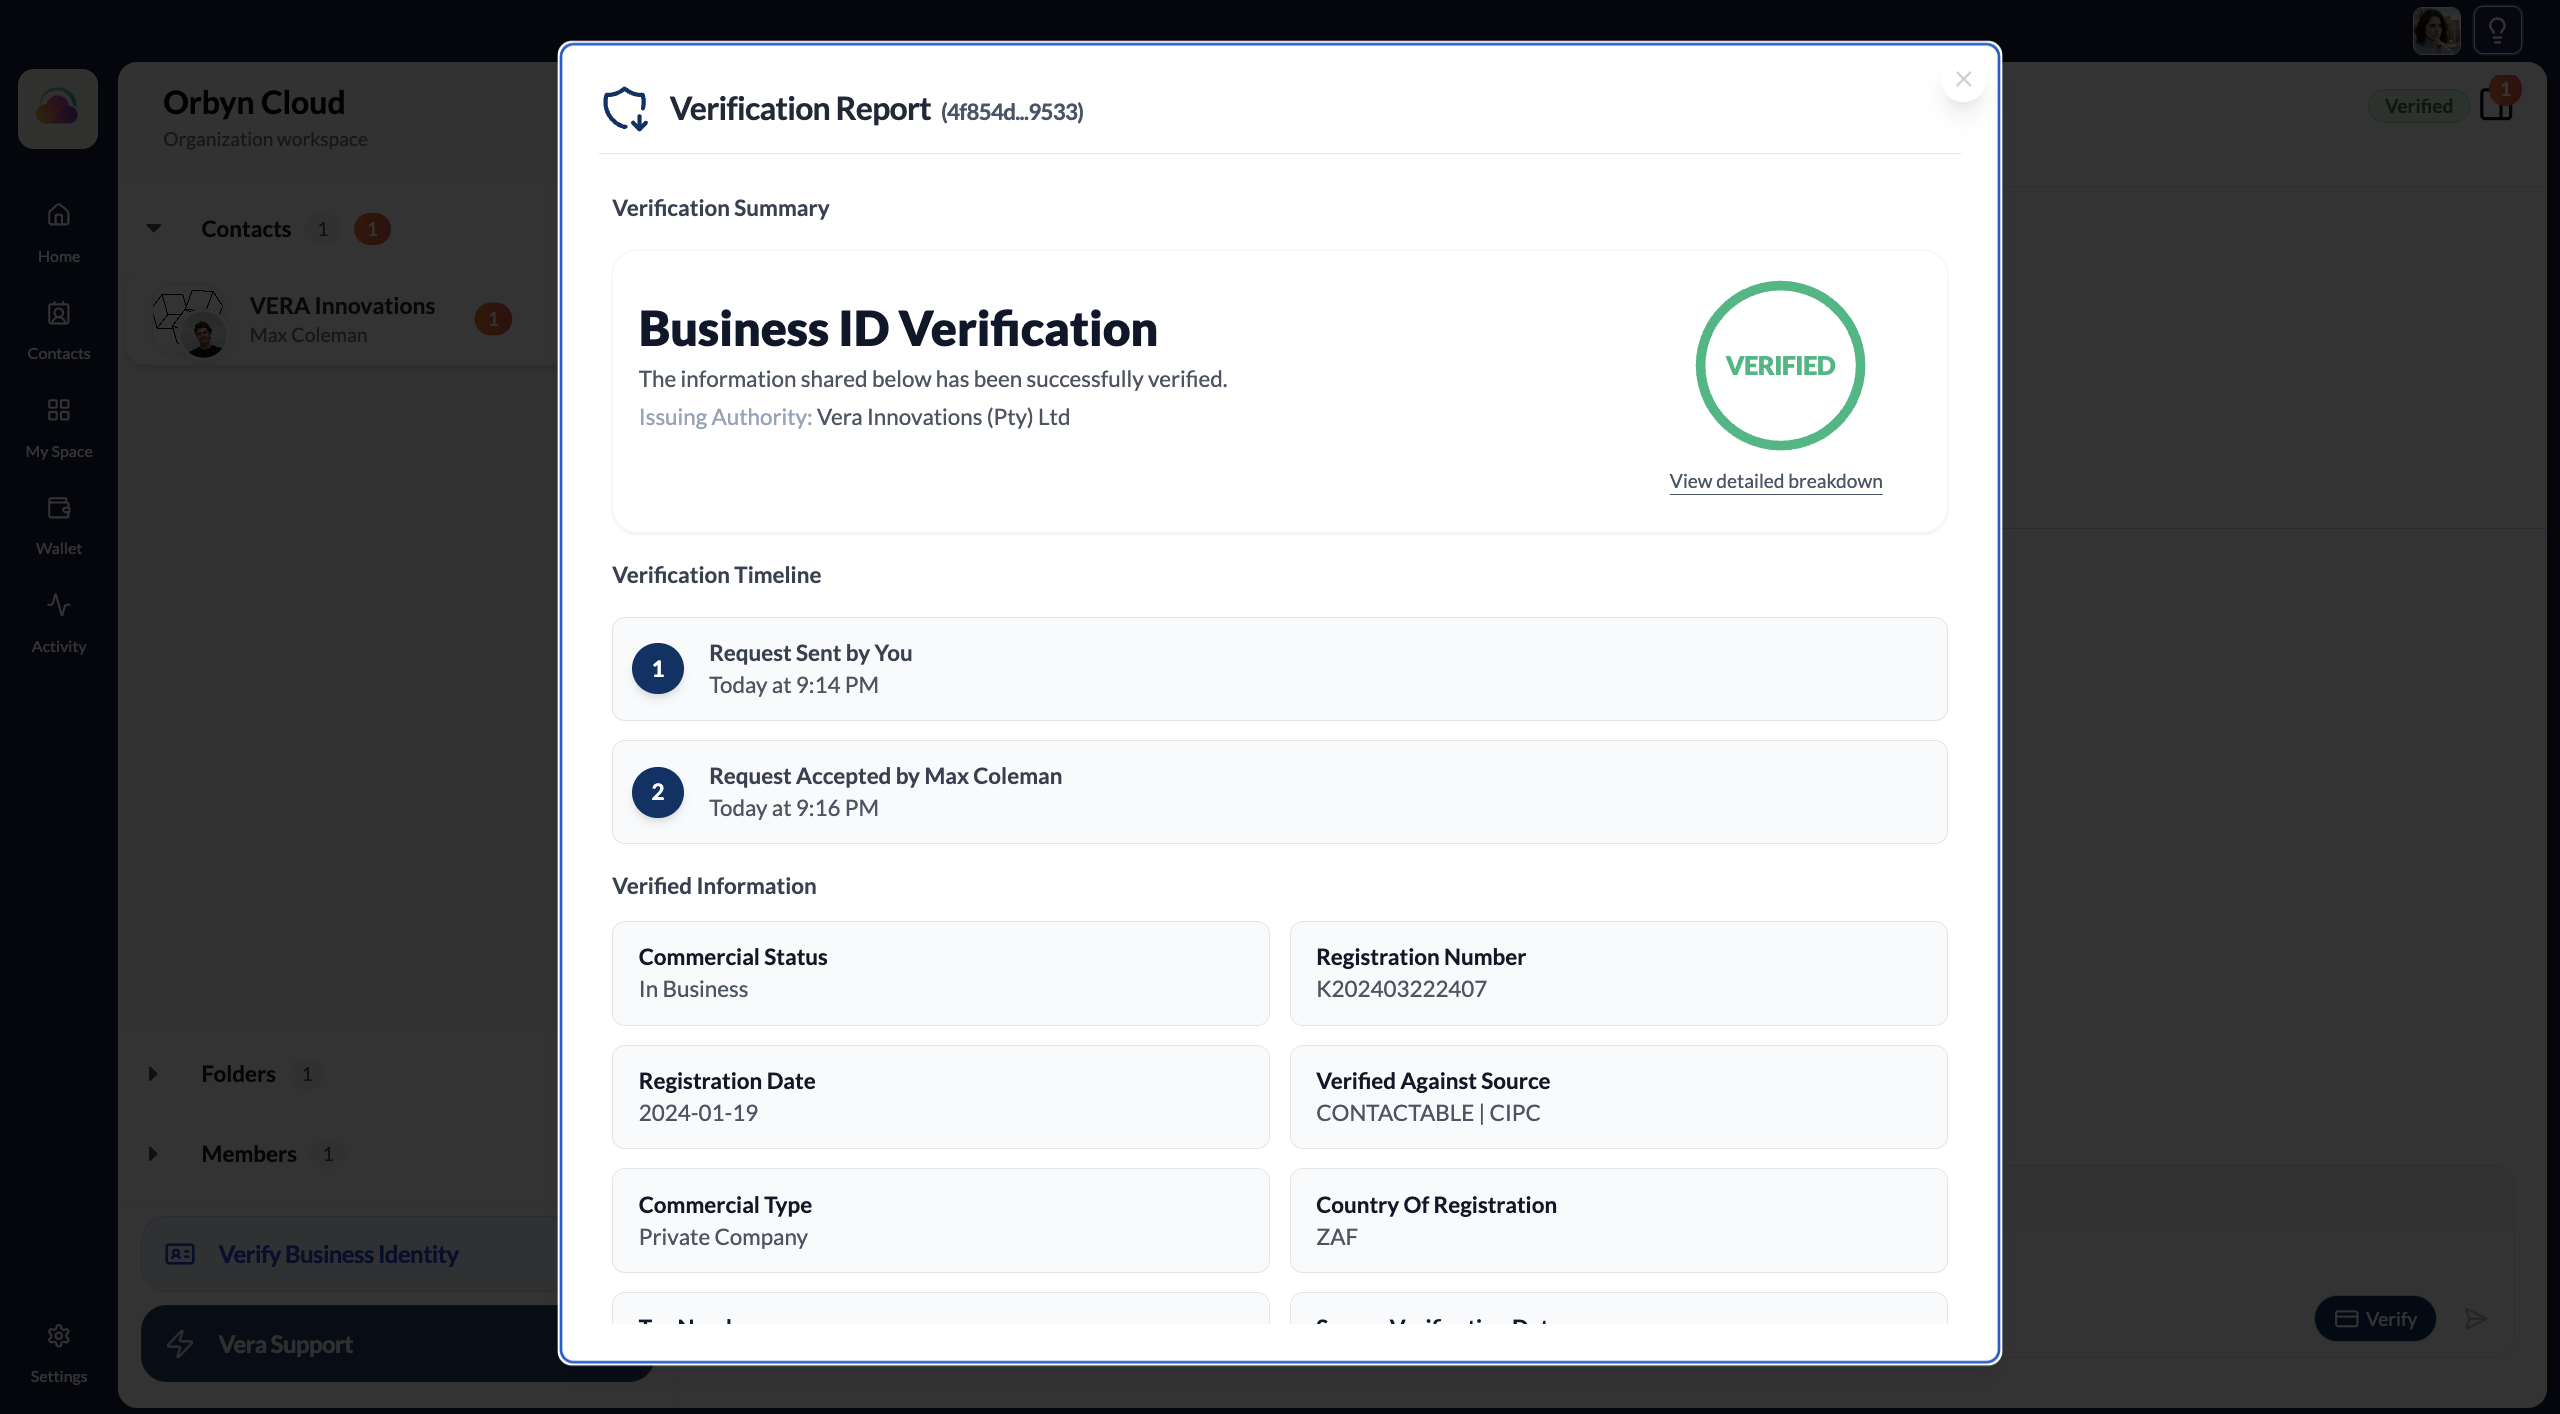
View the Verification Report
Click on the verification card in the chat to open the full Verification Report. This shows: a summary with a large VERIFIED badge, a timeline of when the request was sent and when it was accepted, and a complete breakdown of every verified field — Commercial Status, Registration Number, Registration Date, Verified Against Source, Commercial Type, Country of Registration, Tax Number, and more.
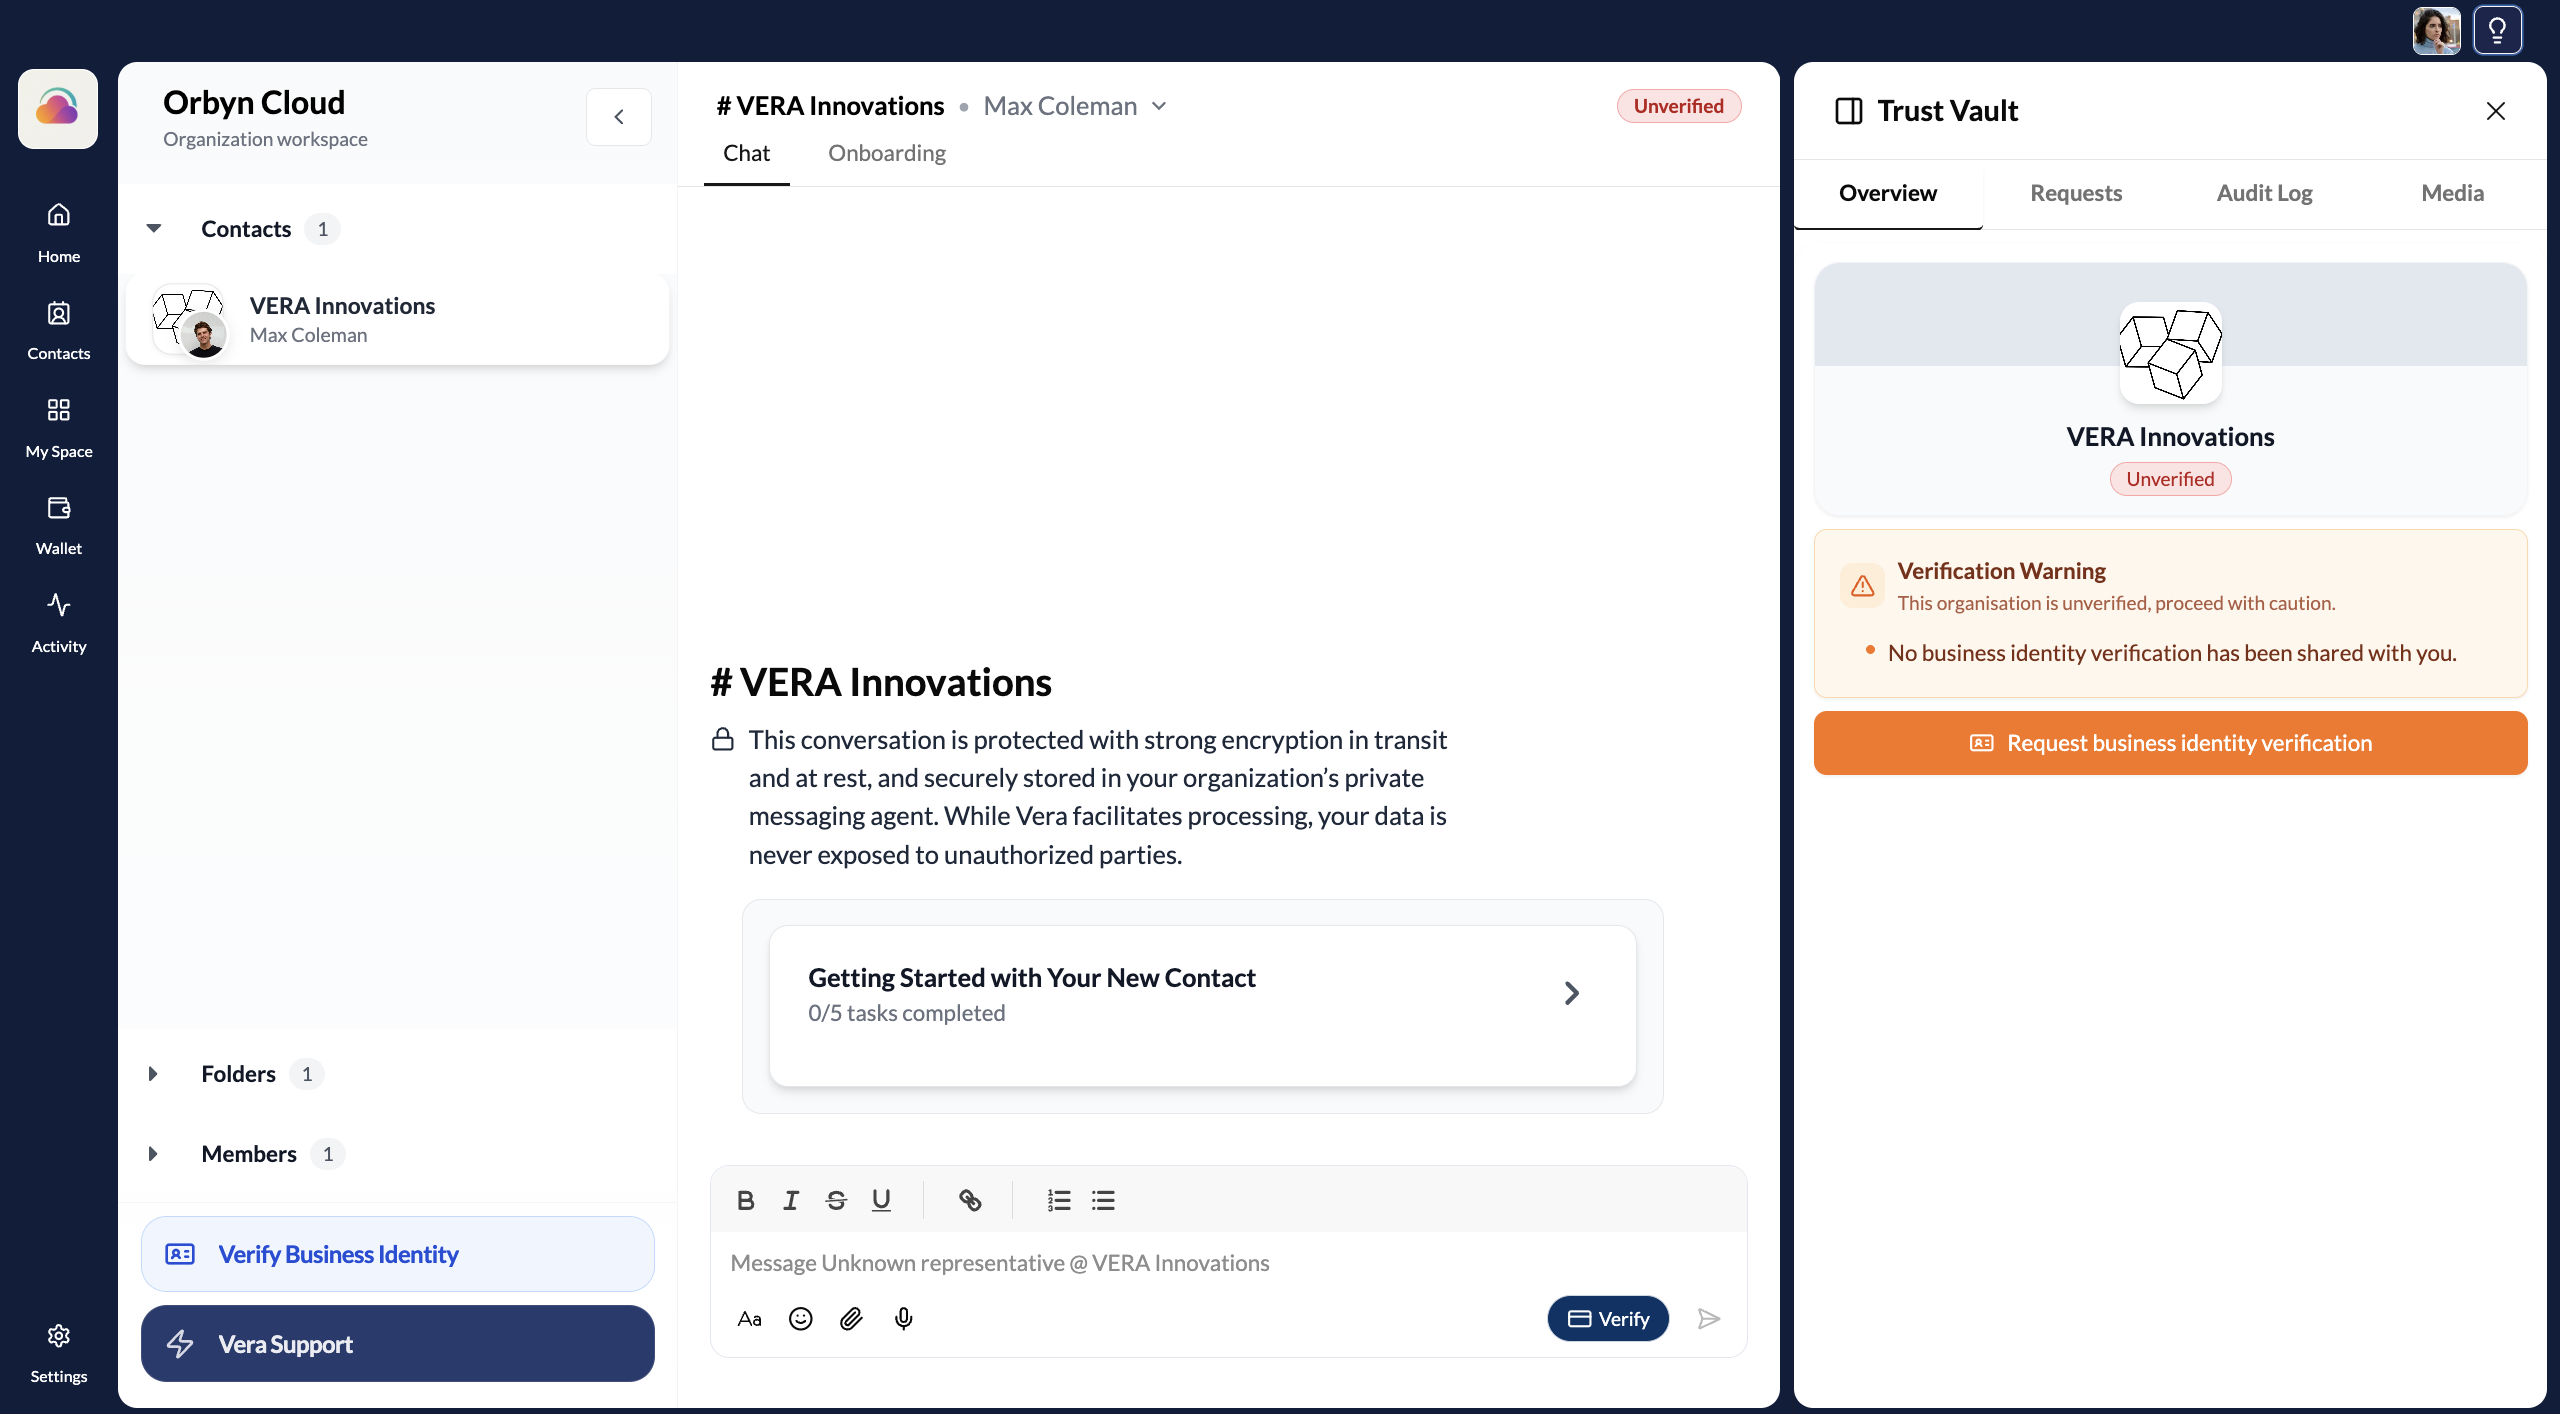
The Trust Vault
Every verification exchange is recorded in the Trust Vault — accessible by clicking the Trust Vault icon in the top-right corner of any chat. The Trust Vault is your at-a-glance trust dashboard for each connection.
After a successful verification, the Trust Vault shows: the connection's verified name and status, each verified attribute with its source verification date and proof hash, and a link to view the full summary.
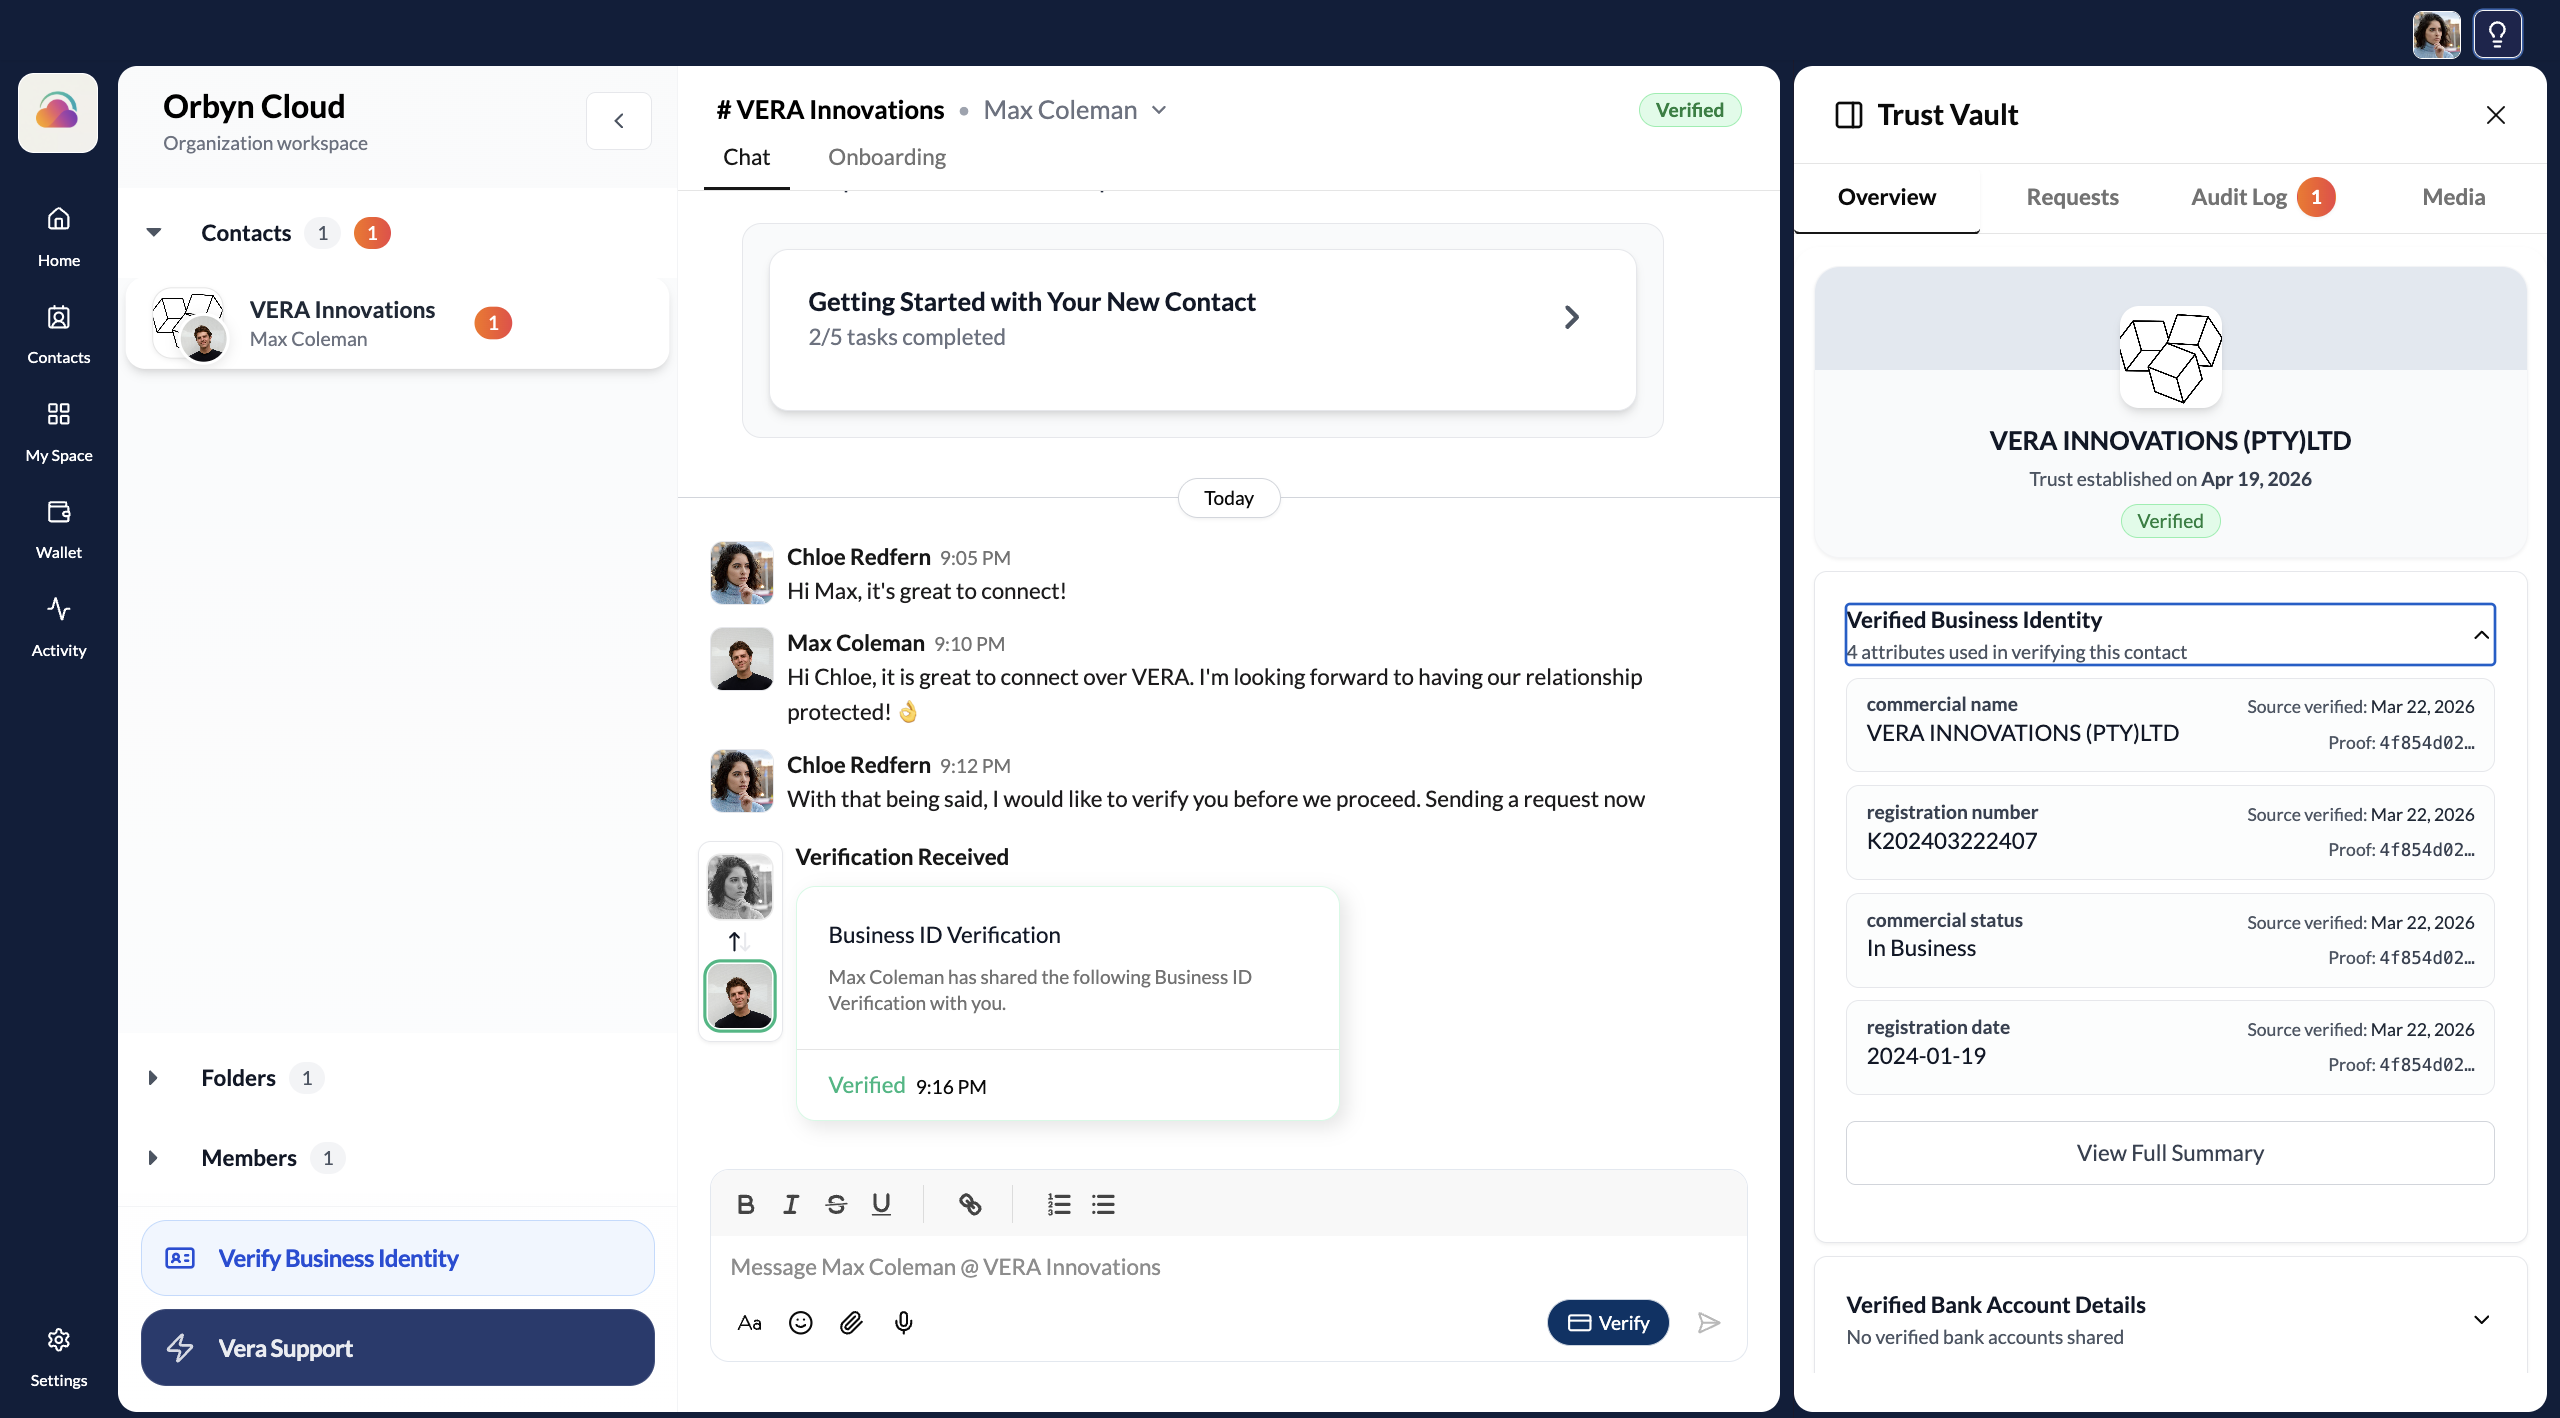
Check the Audit Log
Switch to the Audit Log tab in the Trust Vault to see a chronological record of every verification event for this connection. Each entry shows the credential type, who it was received from, and exact timestamps for initiation and completion.
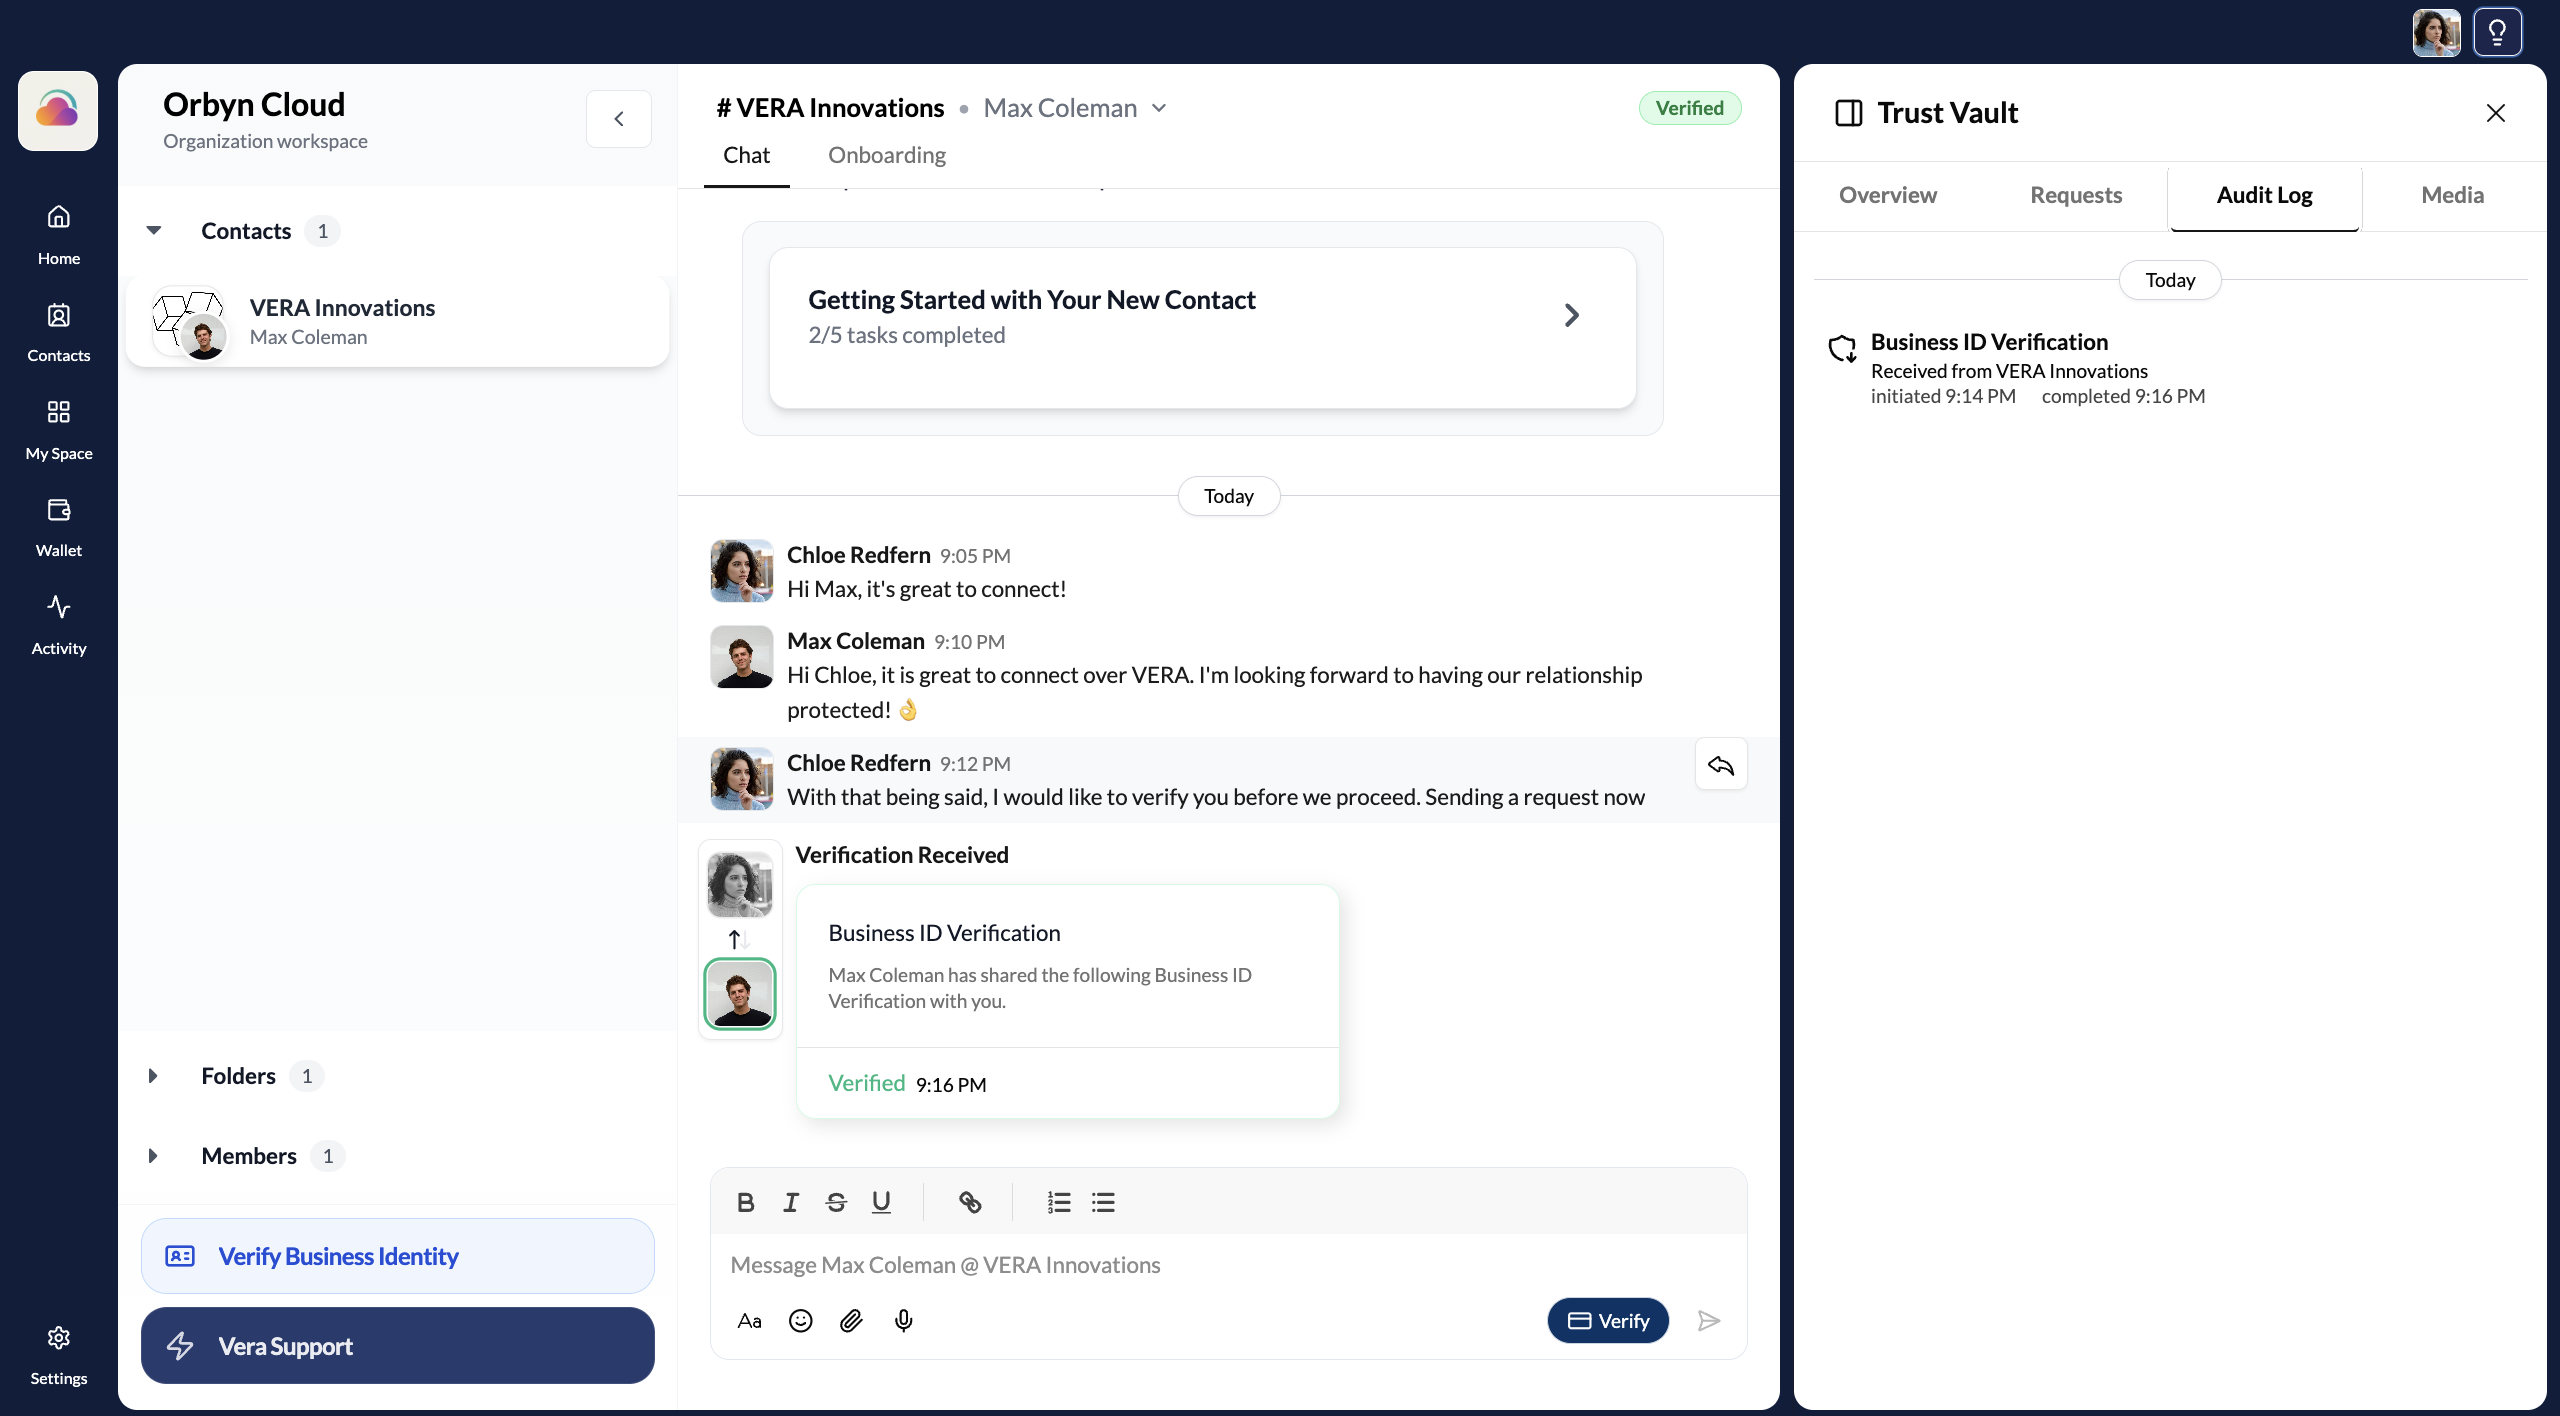
Overview shows the current verification status and shared credentials. Requests shows pending verification requests. Audit Log shows the complete history of verification events. Media shows shared files and documents.
Key things to know
You can be on either side. Sometimes you'll request credentials, sometimes you'll share them. The flow works the same in both directions using the Verify button's Send and Request options.
Verification is per-connection. Verifying with one contact doesn't automatically verify you with others. Each connection has its own Trust Vault and verification history — you control exactly who sees your verified information.
Credentials come from official sources. Business ID credentials are verified against CIPC (Companies and Intellectual Property Commission) records. Bank account credentials are verified against banking infrastructure. VERA doesn't create these credentials — it verifies them against authoritative sources and lets you share the proof.
You can verify multiple credential types. A single connection can have both a verified Business ID and verified Bank Account details. Each shows independently in the Trust Vault.
Everything is auditable. Every verification request, acceptance, and credential share is logged with timestamps and cryptographic proof. This creates a tamper-proof record of when trust was established between two parties.