Verify an invoice
Before you pay an invoice received over VERA, you can verify the sender's business identity and banking details against their shared credentials. Here's how.
Why invoice verification matters
Invoice fraud works because there's no easy way to confirm that the company name, registration number, and bank account on an invoice actually belong to the company that sent it. Fraudsters intercept or spoof invoices, swap the banking details, and the payment goes to the wrong account. By the time anyone notices, the money is gone.
VERA solves this by letting you compare the details on an invoice against verified, cryptographically signed credentials that your contact has shared with you directly. If the bank account number on the invoice matches the verified bank account credential in your Trust Vault, you know the payment details are legitimate.
What you need first
Before you can verify an invoice, you need to have received your contact's verified credentials through the Verify button in chat. Specifically, you need both:
Their identity credential. Either a Business ID Credential (for organisations) or a Person ID Credential (for individuals). This confirms the sender is who they claim to be.
Their bank account credential. Either a Business Bank Account Credential or a Person Bank Account Credential. This gives you their verified banking details to compare against the invoice.
If you haven't received these yet, request them using the Verify button in your chat with the contact. See Verify your connections for the full walkthrough of how to request and receive credentials.
An identity credential alone isn't enough — it confirms who sent the invoice but not whether the banking details are correct. A bank account credential alone confirms banking details but not who owns them. You need both to properly verify an invoice.
How to verify an invoice
Open the document
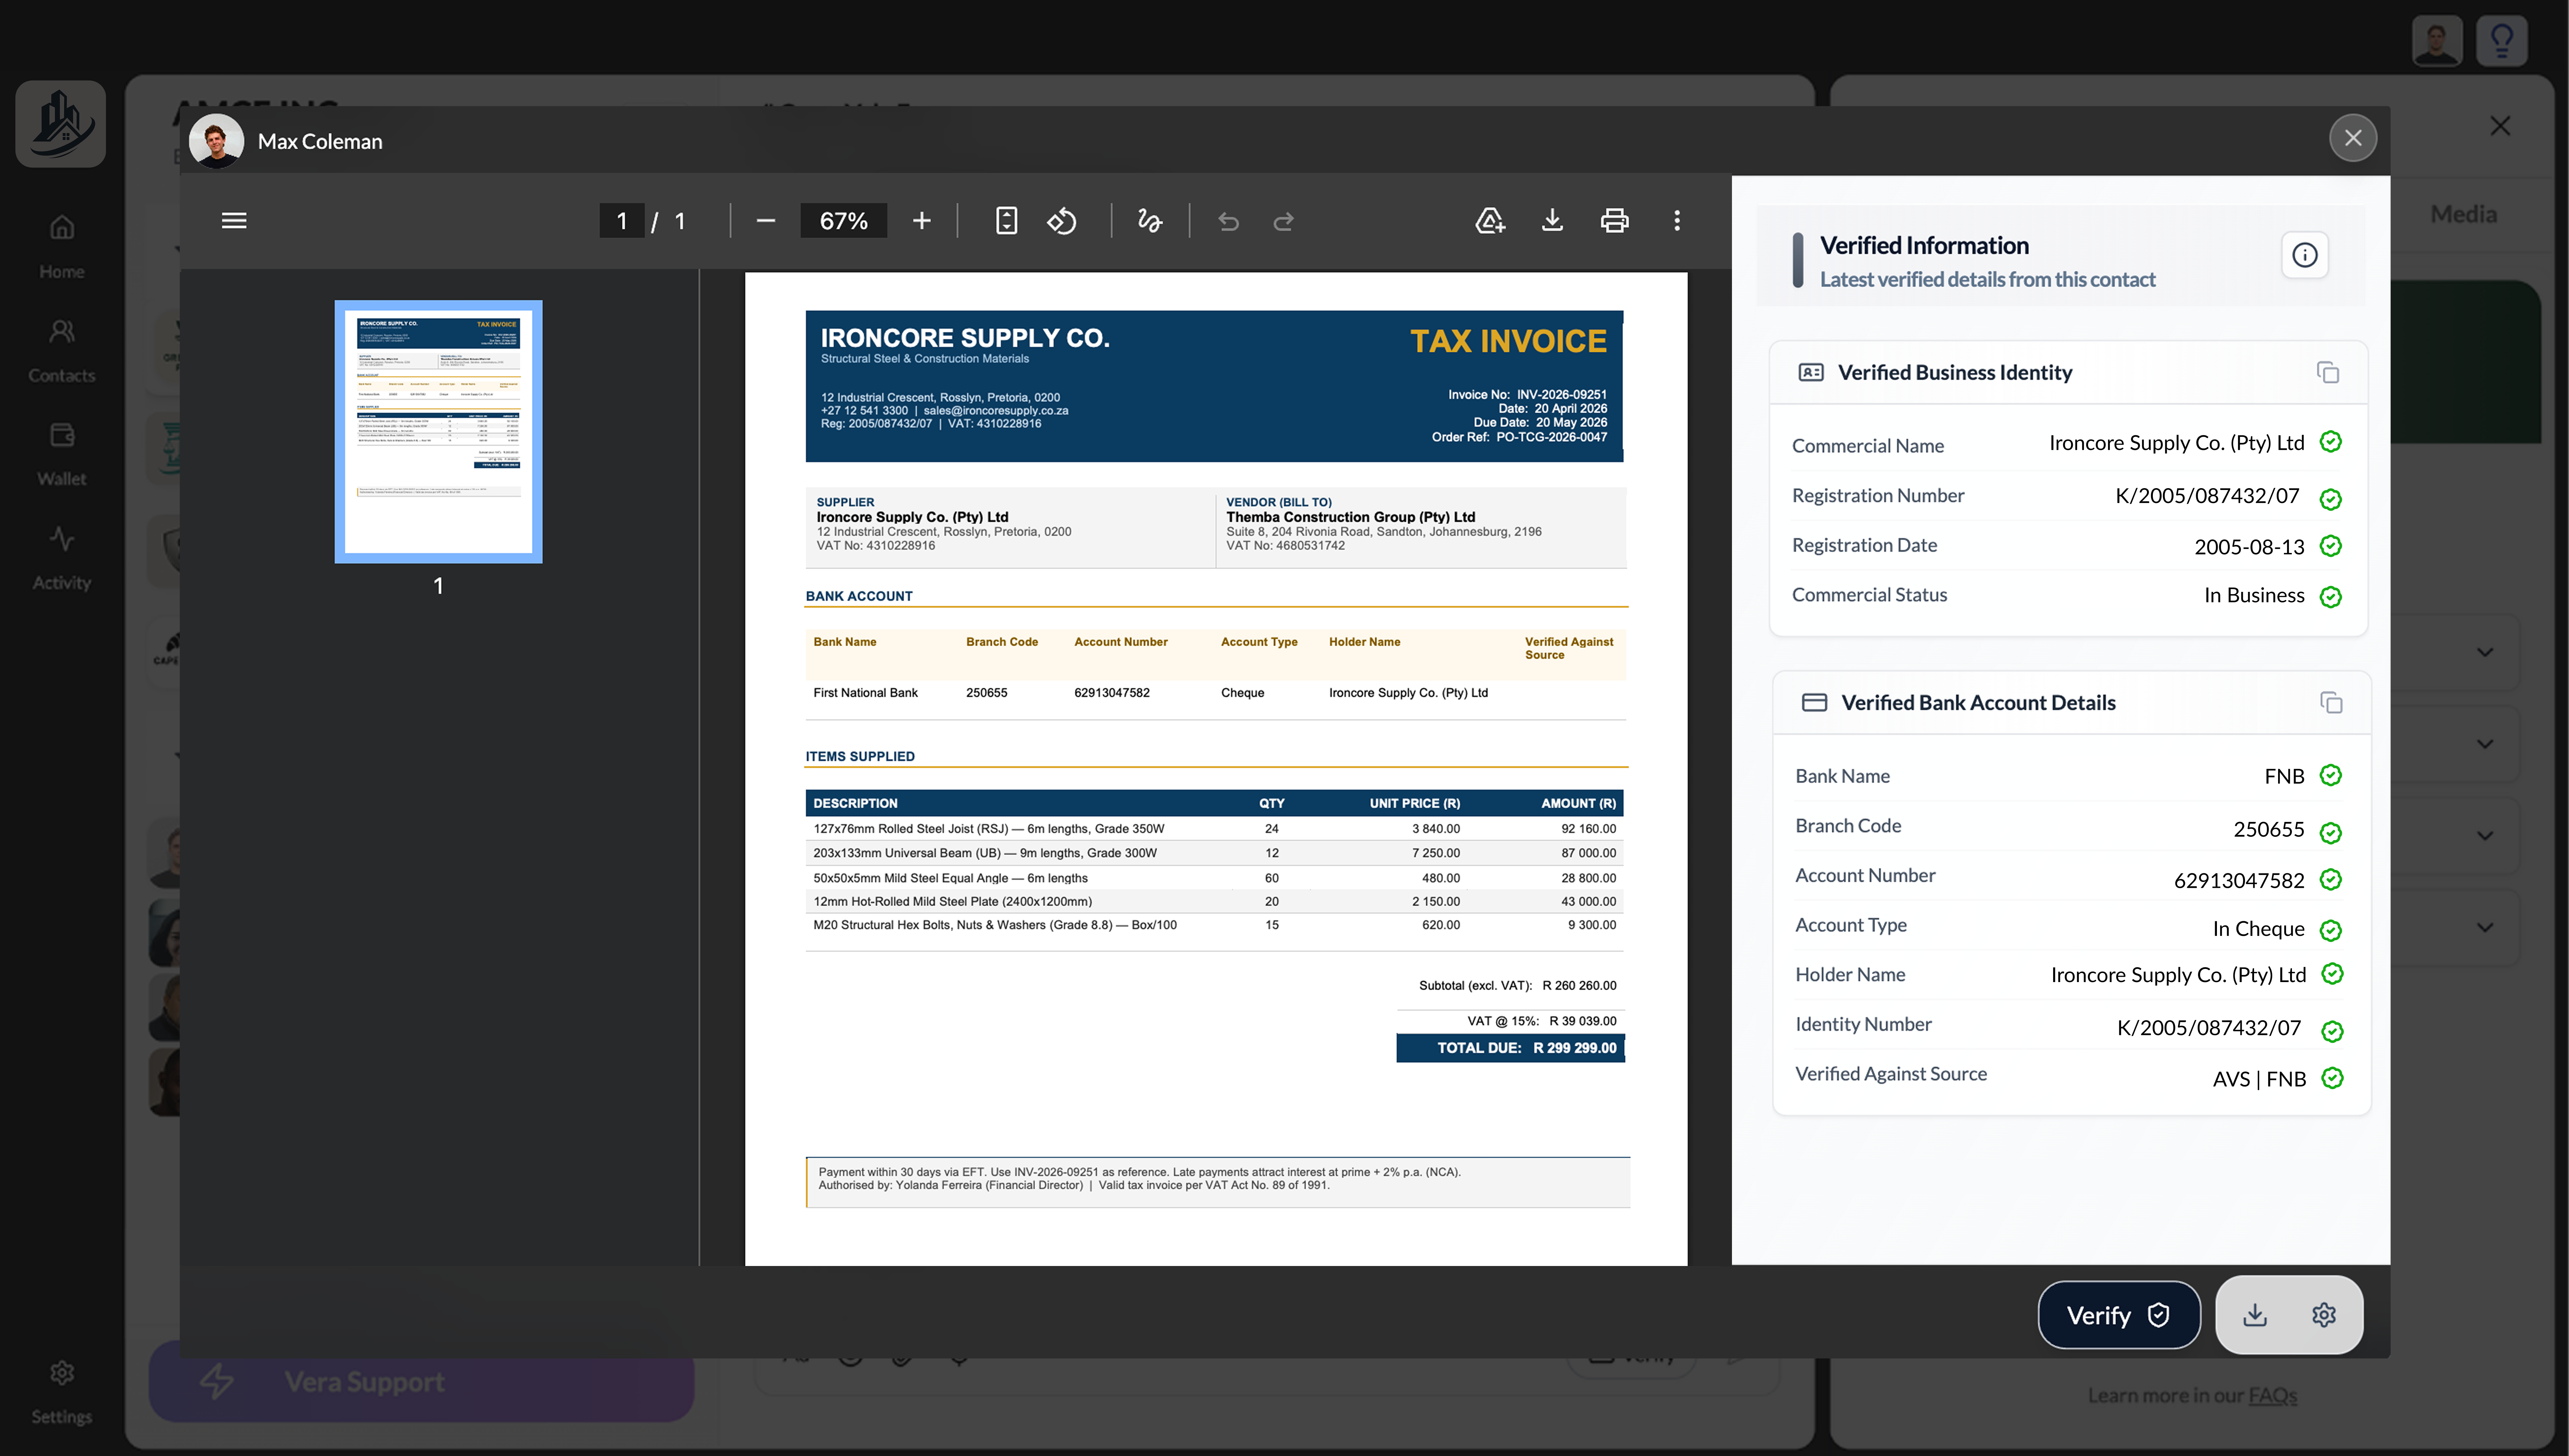
When your contact sends an invoice (PDF or image) through the VERA chat, click on the document to open it in the document viewer. The invoice opens in a full-screen viewer with zoom controls and a toolbar at the top.
Click the Verify button
In the bottom-right corner of the document viewer, click the Verify button (the button with a checkmark icon). This opens the Verified Information panel on the right side, showing the latest verified details you've received from this contact.
Compare the details
The Verified Information panel displays two sections:
Verified Business Identity (or Person ID) showing the contact's Commercial Name, Registration Number, Registration Date, and Commercial Status — each with a green checkmark confirming they've been verified.
Verified Bank Account Details showing the Bank Name, Branch Code, Account Number, Account Type, Holder Name, Identity Number, and Verified Against Source — again, each with a green checkmark.
Compare these verified details against what's printed on the invoice. Check that the company name, registration number, and VAT number match the identity credential. Then check that the bank name, branch code, and account number match the bank account credential.
Confirm or flag
If everything matches — the company details on the invoice align with the verified identity credential, and the banking details on the invoice match the verified bank account credential — the invoice is legitimate. Proceed with payment.
If anything doesn't match — a different bank account number, a different company name, or missing details — do not pay. Message your contact through the VERA channel to clarify. This mismatch could indicate an error, or it could indicate the invoice has been tampered with.
Invoice verification is currently a manual comparison — you review the verified credentials against the invoice details yourself. Automated invoice verification, where VERA flags mismatches automatically, is on the product roadmap.
Verifying other documents and media
The Verify button isn't limited to invoices. When you open any document, image, or media file shared through a VERA channel, the Verify button in the document viewer lets you pull up the sender's verified credentials for comparison. This is useful for confirming the origin of contracts, letters, statements, or any document where you need to confirm who sent it and whether their details check out.
Making your invoices verifiable
If you want your contacts to be able to verify invoices you send them, you need to share your credentials with them first. Use the Verify button in chat to send:
Your identity credential. Share your Business ID Credential (for your organisation) or Person ID Credential (for individual use).
Your bank account credential. Share your Business Bank Account Credential or Person Bank Account Credential.
Once your contact has received both, they can open any invoice you send through VERA and verify your details using the same process described above. The more contacts you share credentials with, the more people can verify that your invoices are genuine.
Don't wait for contacts to request your credentials. When you start a new business relationship on VERA, share your identity and bank account credentials early. This means every invoice, payment instruction, or financial document you send can be verified from day one.